When you first begin using FlightSpan™, FlightSpan Support will set up your initial aircraft configurations. However, if you acquire a new seat type, or a different aircraft of the same type with a slightly different configuration, you may need to set up seats and cargo compartments.
Add Seat Type
To add a new seat, from the Settings menu select Aircraft, then from the Aircraft Type List on the Aircraft menu, click on the model of the aircraft in which the seat will be used.
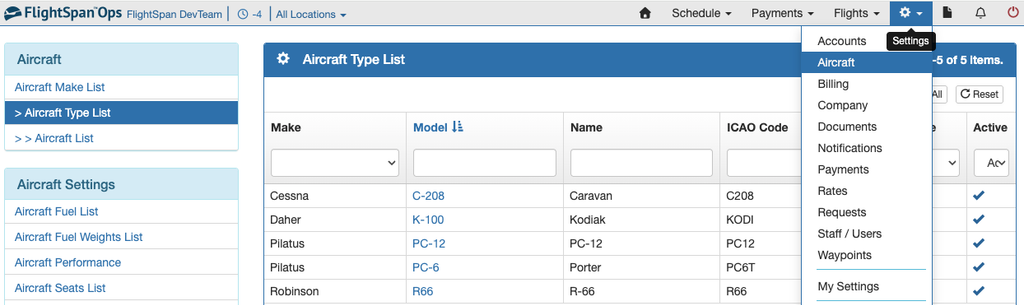
Then from the Seats tab of the Aircraft Type Detail, click the green Plus button.
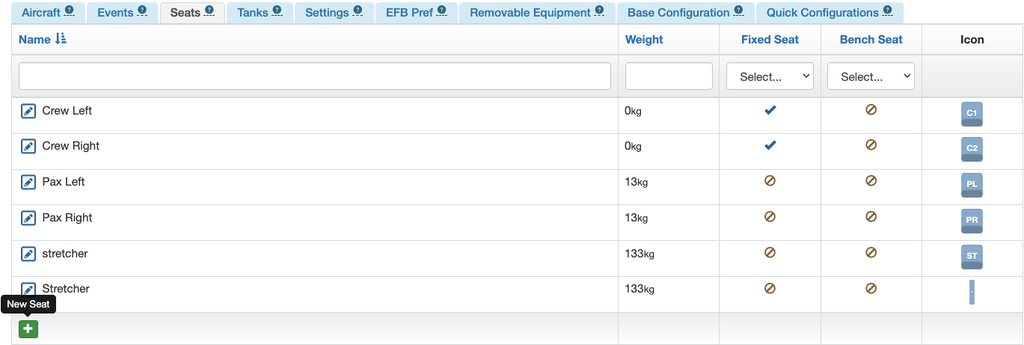
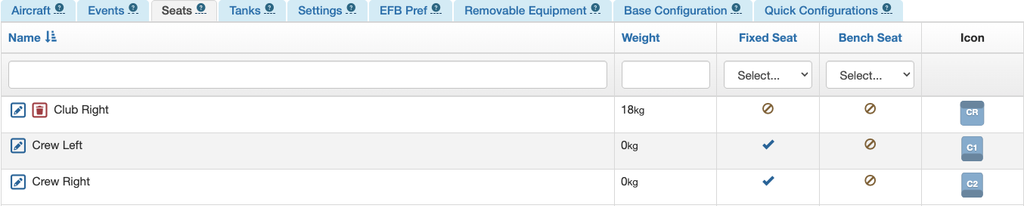
Name the seat, give it a two letter code, and enter the weight and the correct units.
Then toggle the switch if on the EFB you wish to be able to load cargo in the seat space when the seat is removed.
Add the dimensions of the seat in the aircraft units. Note that these numbers are only used for changing the graphical display of the seat in FlightSpan Ops and on the EFB.
Select the direction the passenger faces when seated.
Toggle Fixed Seat if the seat is not removable (for example, a crew seat), and select the purpose of the seat.
If there is a difference between the CG of the empty seat and the CG when a passenger is seated, enter the difference between the two. A positive number indicates the passenger CG is closer to the rear of the seat compared to the seat CG, and a negative number indicates the passenger CG is closer to the front of the seat, regardless of seat orientation (whether forward, side, or rear facing).
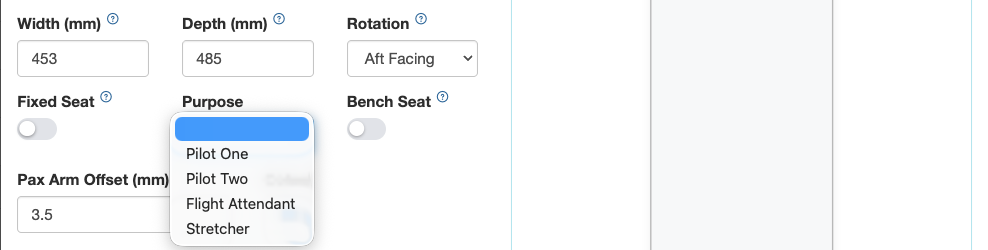
If you are adding a bench seat, toggle the Bench Seat switch and an additional Seating Count field will appear. Enter the number of seating positions on the bench.
Later, when you position the seat in the cabin, it will expand according to the seating count.

Select the color that will be used in the graphics in both FlightSpan Ops and on the EFB to define the seat back, to make it clear which direction the seat faces.
Next click the approximate location in the cabin where the seat will be placed. Longitudinal and Lateral arms will be automatically set based on where you clicked.
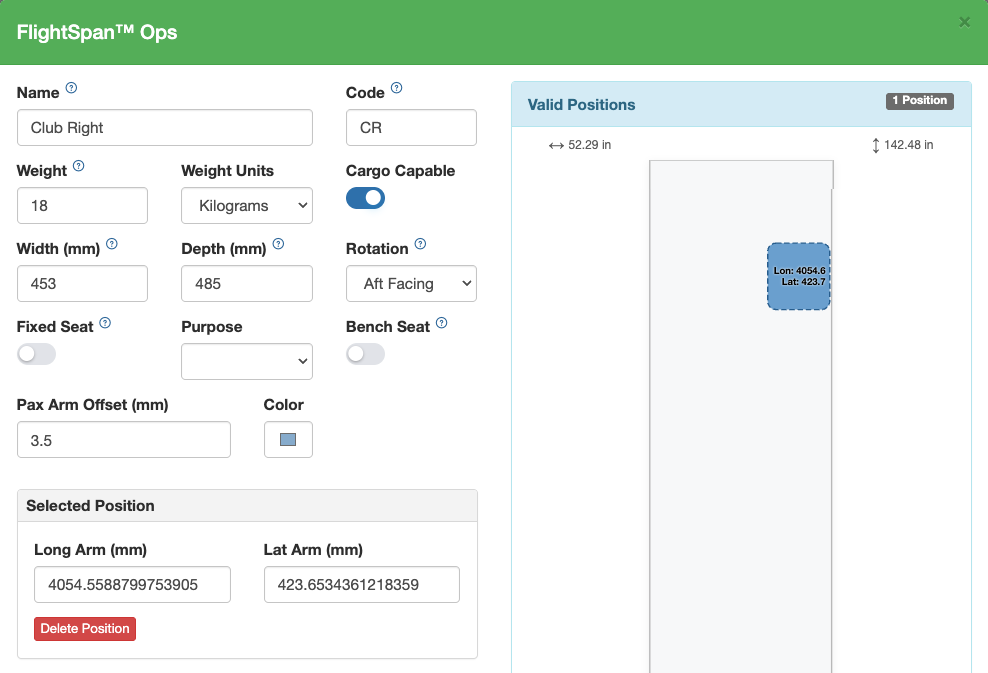
Next edit the Longitudinal Arm, entering the arm of the installed seat.
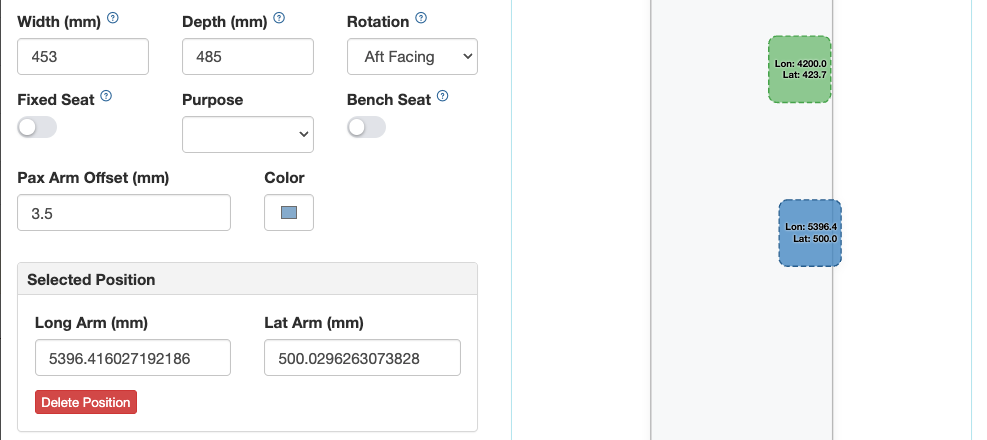
Then edit the Lateral Arm. For a rotorwing, Lateral Arm is the lateral CG of the installed seat, and is used for calculating lateral CG. For a fixed wing aircraft, lateral arm is only used to laterally position the seat on the graphics in both FlightSpan Ops and on the EFB, so it can be set to any number that represents the physical position of the seat.
If the seat can be installed in another location, repeat the process of defining any additional seat position(s).
To delete a seat position, click the seat position you wish to remove, and when it is highlighted blue, click Delete Position.
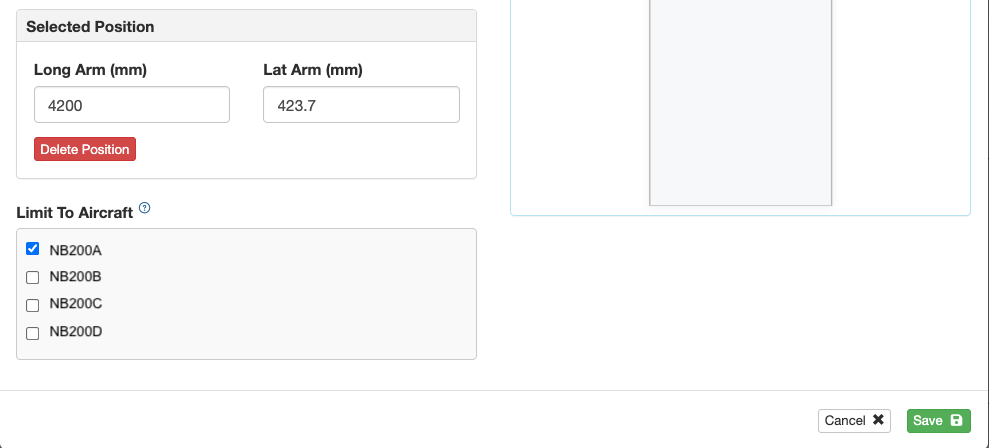
If you wish all aircraft of the same type to be able to use the aircraft, leave the checks blank.
If you wish to limit use of the seat to certain aircraft, check that aircraft or those aircraft, then click Save.
The seat will be added to the list. Edit the seat with the blue pencil icon; delete the seat with the red trash can icon.
Once a seat has been used on a manifest or a flight, it can no longer be deleted.
Base Configuration
From the Base Configuration tab of the Aircraft Type Detail, click the Edit button.

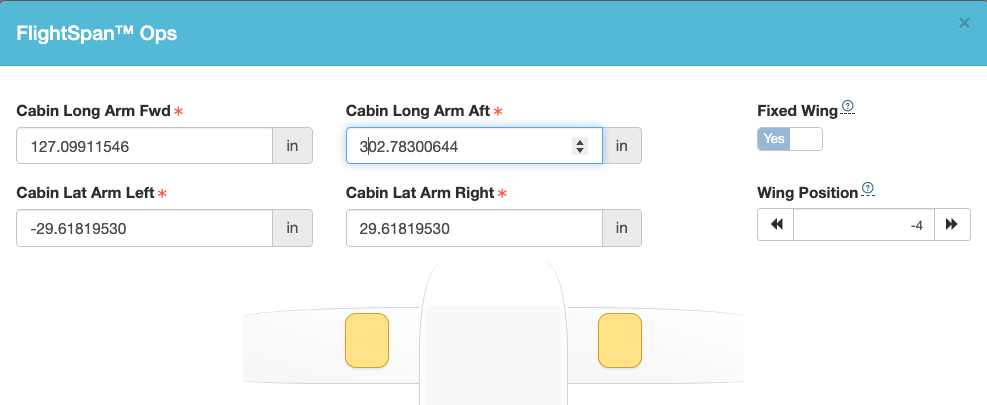
Enter the arms of the forward and aft bulkheads and the width of the cabin measured from the centerline of the aircraft to the cabin wall in aircraft units.
Fixed Wing Yes or No is set according to the type of aircraft you are editing.
Set the wing position in a representative location. Positive numbers are aft of the cabin center, negative numbers are forward.
The arms and wing position are only used for graphical representation of the aircraft cabin in FlightSpan Ops.
Certain cargo compartment settings are editable. You can:
- Change the name of a compartment. The label will be displayed on graphics in FlightSpan Ops, and on the calculator on the EFB.
- Change the longitudinal arm of the compartment. The arm that is set will be used for balance calculations on the EFB.
- Change the lateral arm of the compartment. The arm that is set will be used for lateral balance calculations on rotorcraft only.
- Change the weight capacity of the compartment. This should be set to the manufacturer’s limit, unless you wish to restrict it further.
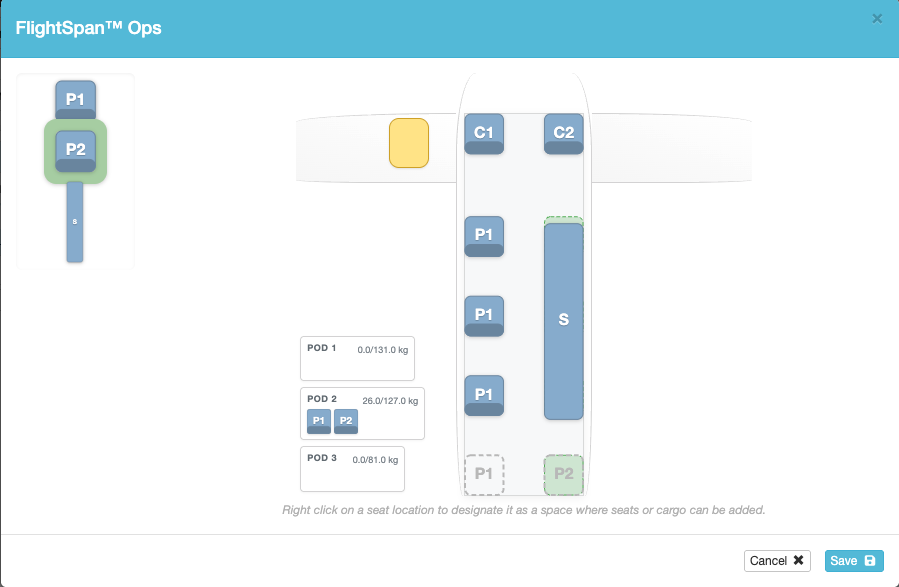
- Set the weight capacity for stowed seats. Seats capacity will limit the number of seats that can be stowed in that compartment.
- Change the location of where the compartment is displayed in the FlightSpan Ops graphical displays. The EFB will not be affected.
Other settings are only editable by FlightSpan Support.
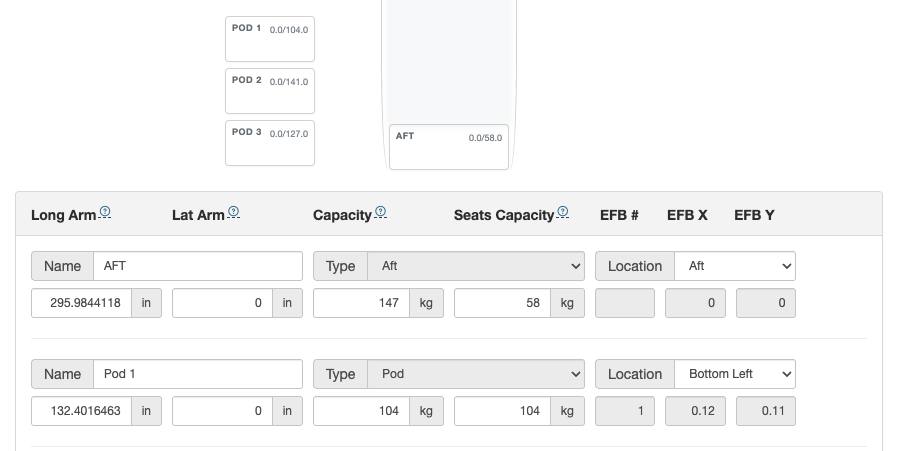
Note: Weight of seats stowed in the compartment together with the maximum seat capacity is displayed in each compartment.
Quick Configurations
Quick configurations are used by both FlightSpan Ops and the EFB for defining default and quickly selectable configurations.
Aircraft Type Configurations
From the Quick Configurations tab of the Aircraft Type Detail, create a new configuration for an aircraft type by clicking an Empty Configuration square.
You can define a maximum of six quick configurations.

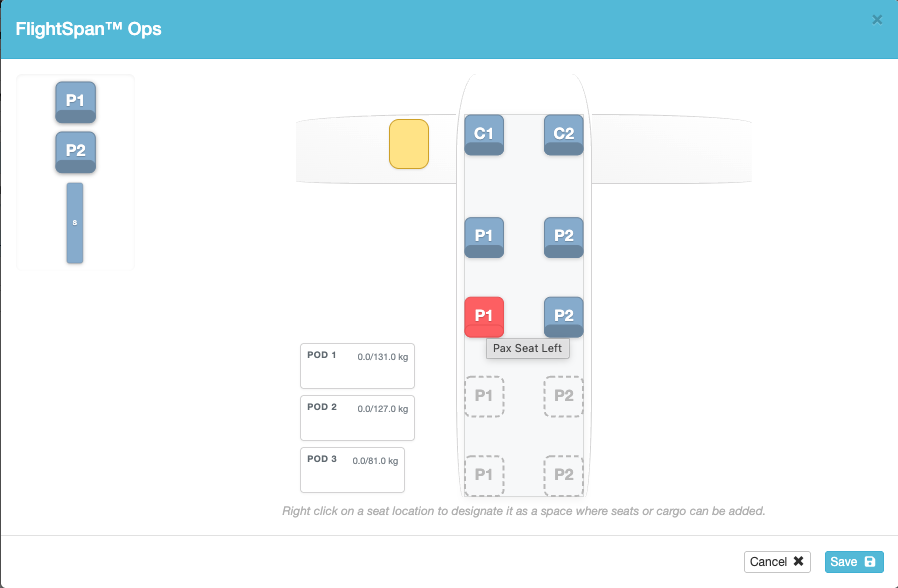
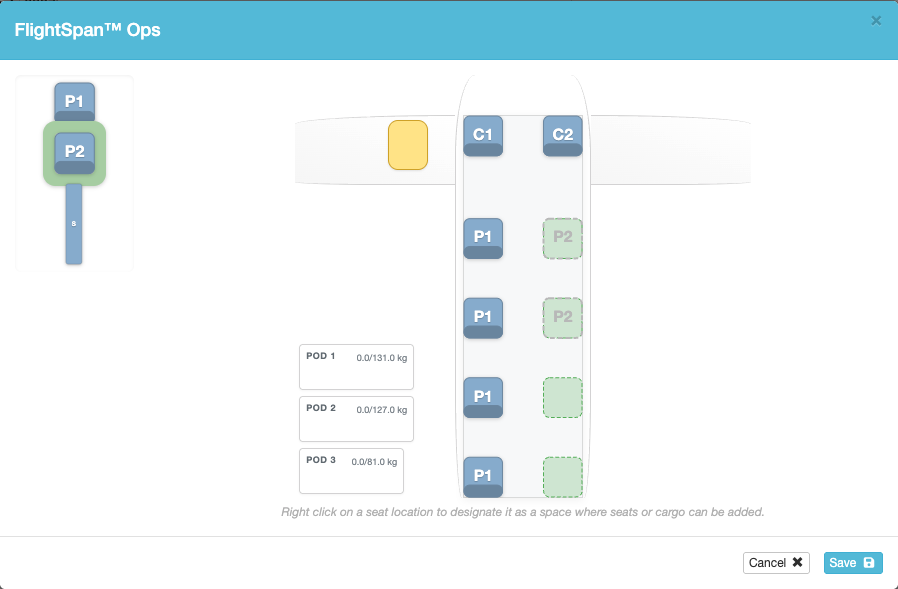
To add a seat, click the desired seat on the upper left, and the available positions that were defined when the seat type was created will be highlighted in green.
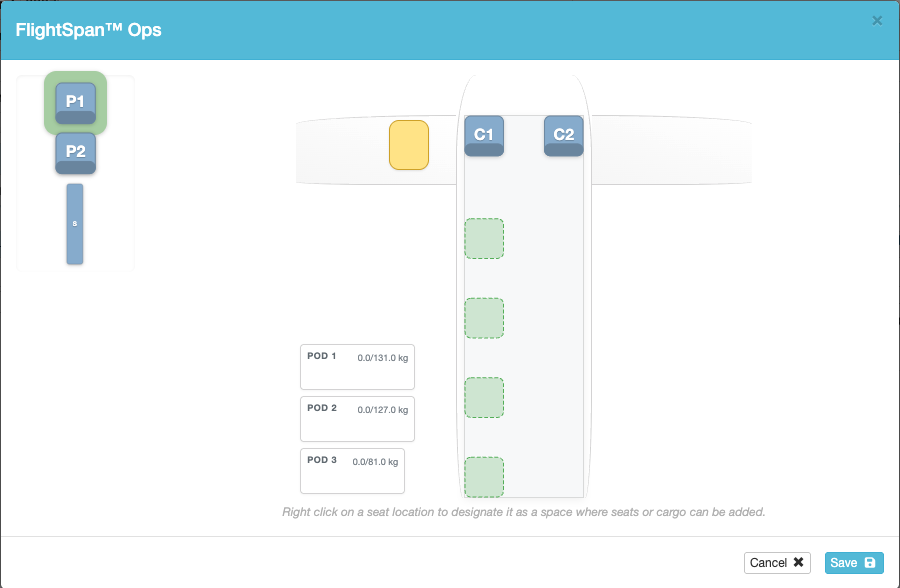
Click the desired seat position or positions to install a seat.
Click on an installed seat to remove it.
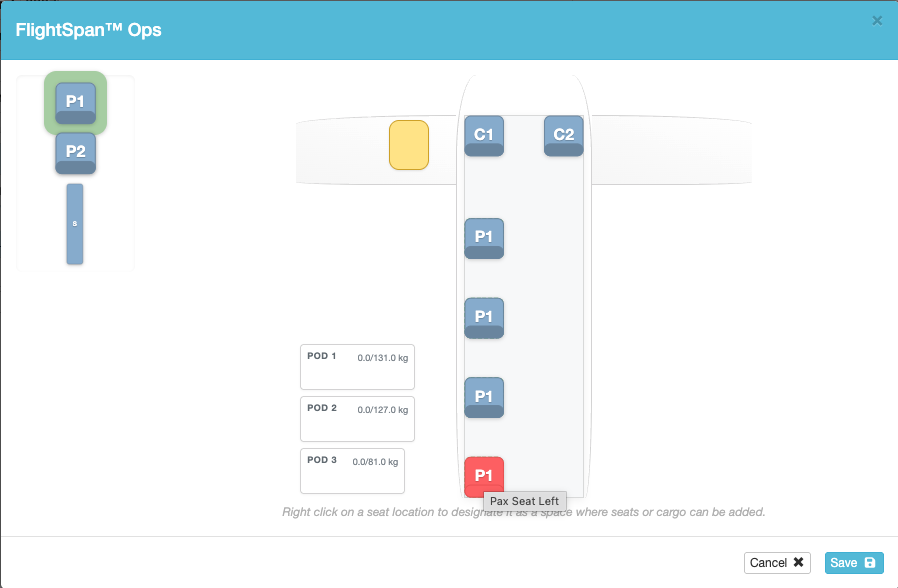
Right click on any seat to designate it as uninstalled, but a seat (or cargo) can be installed later from the EFB.
Uninstalled (but installable) seats will be highlighted green with the seat code added.
Seats without the seat code added cannot be added later from the EFB.
Seats can also be stowed by default in any cargo compartment designated for seats (defined when the Base Configuration was set).
When the configuration is complete, click Save.
Designate a configuration as the default that will be used on the EFB when a new flight is created by checking the box on the upper right of the configuration.
Delete a configuration with the red trash can icon at the bottom.
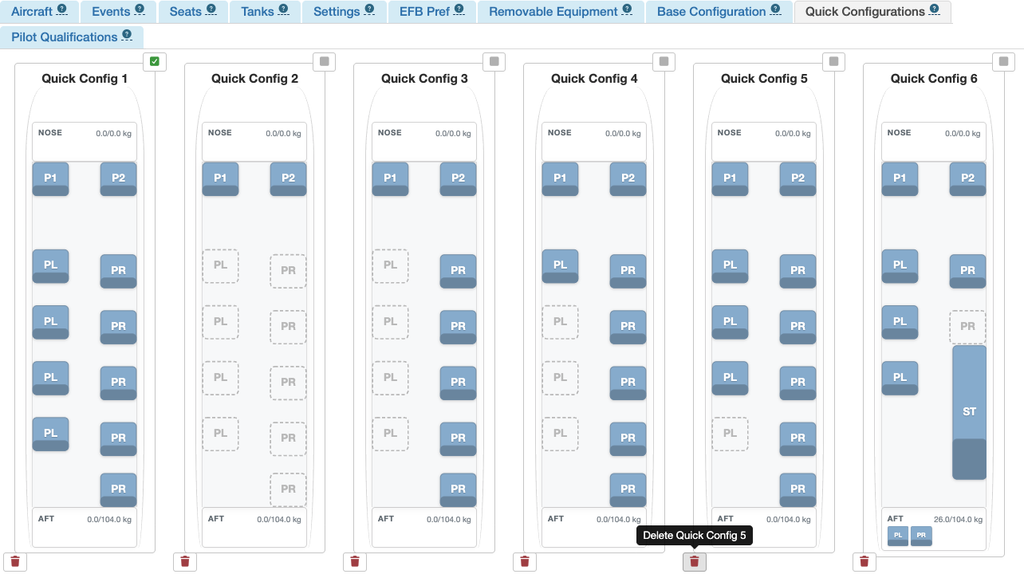
Note: If you change the Longitudinal or Lateral Arm of a seat, you must delete and rebuild all the configurations that use the seat before the change will take effect.
Aircraft Specific Configurations
Quick configurations can be established for individual aircraft within a type that will override the aircraft type quick configurations.
From the Aircraft List, click on the registration number of the desired aircraft.
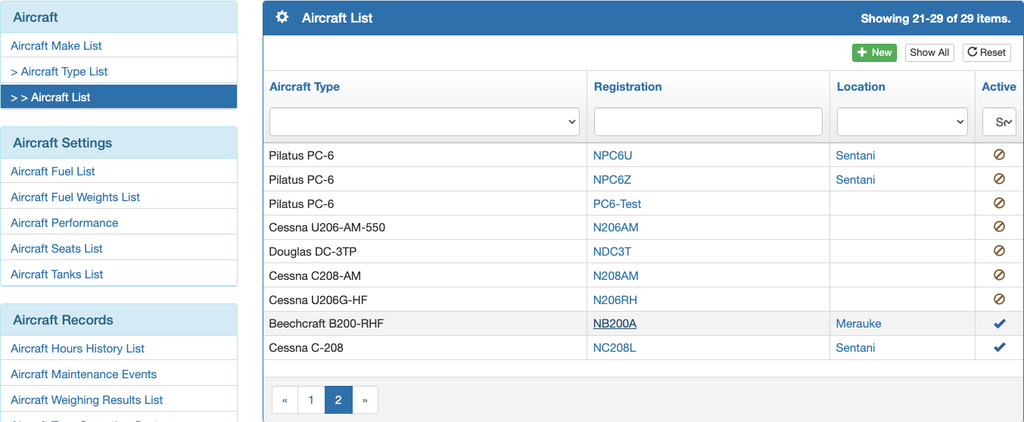
Then from the Quick Configurations tab of the Aircraft Detail, click the Create Aircraft Quick Configurations button.

Configurations defined for the aircraft type will be displayed. Click on a configuration to edit it.
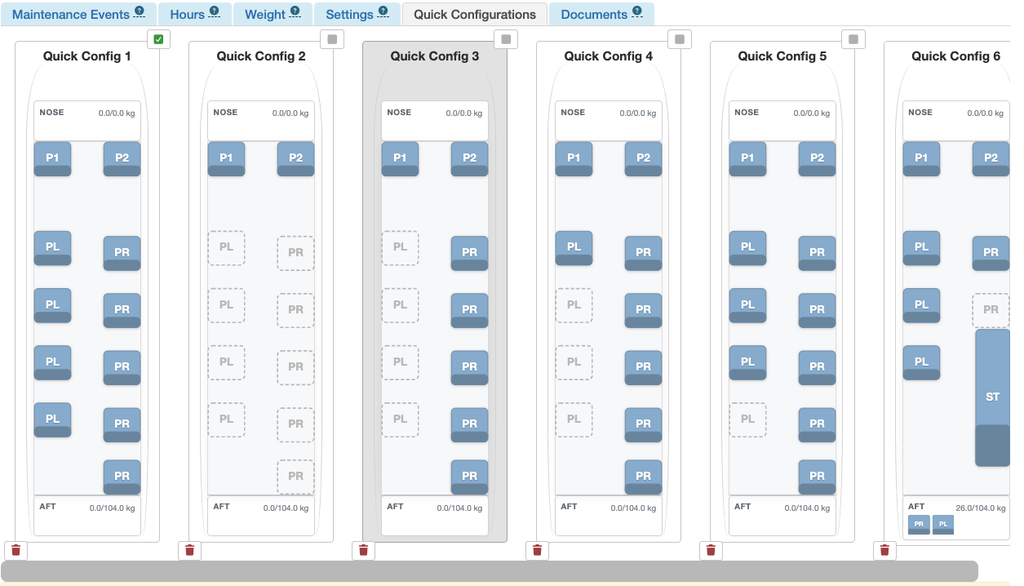
Edit the configuration as previously described, then Save.