
As a good business practice, at least once per day, each individual who has generated receipts should deposit their cash accompanied by the cash deposit form.
Electronic Receipts
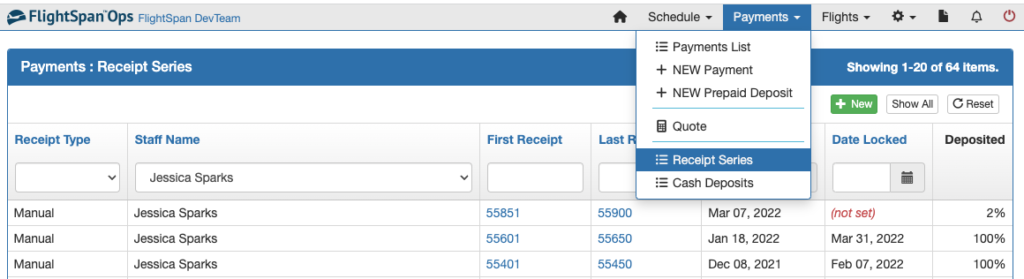
From the Cash Deposits page, click on the green New button, then select the date, the individual making the deposit, and the currency to be deposited, then save.

Electronic receipts generated by the staff member identified in the previous step will be pre-filled on the cash deposit form.
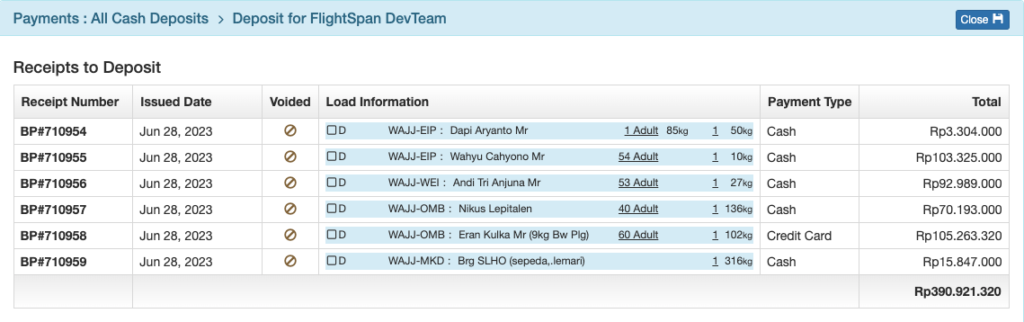
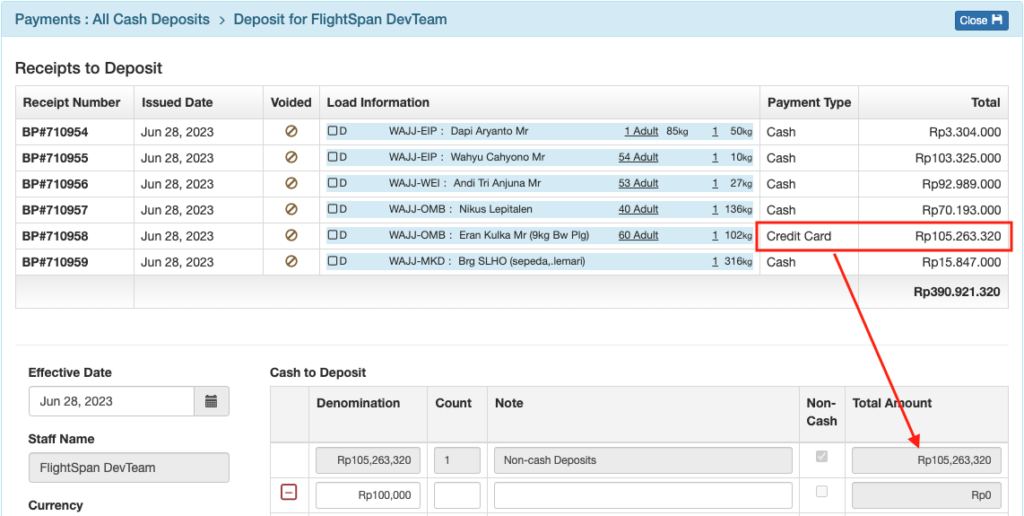
Non-cash deposits (bank transfers, credit card payments etc.) will be prefilled in the Cash to Deposit section.
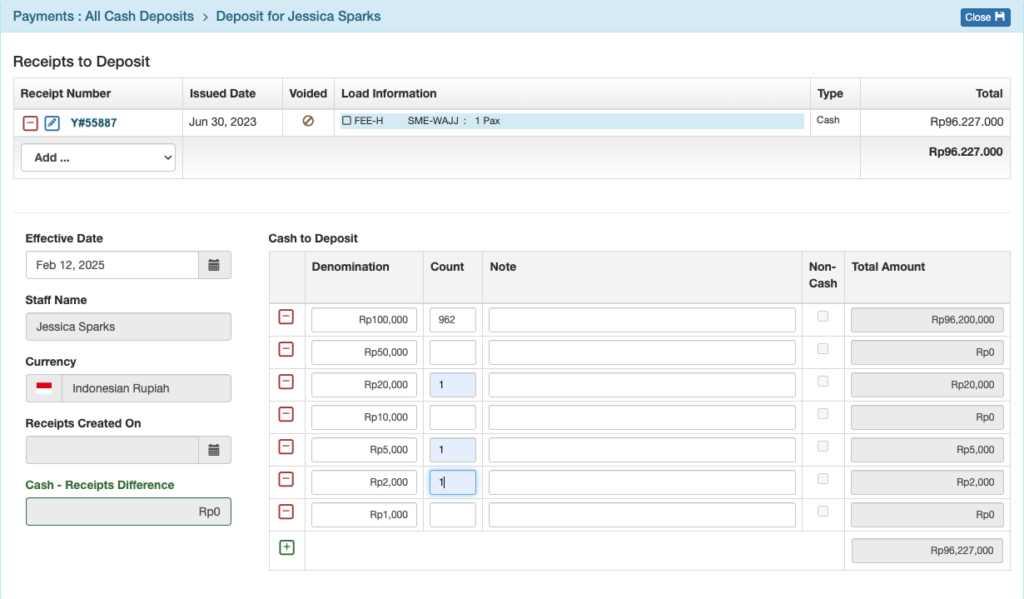
Count the cash, entering the number of bills of each denomination in the Count column.
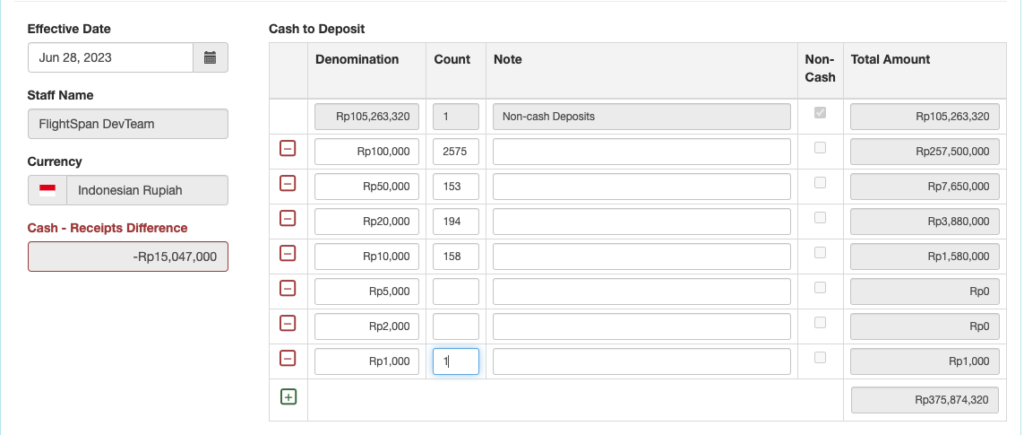
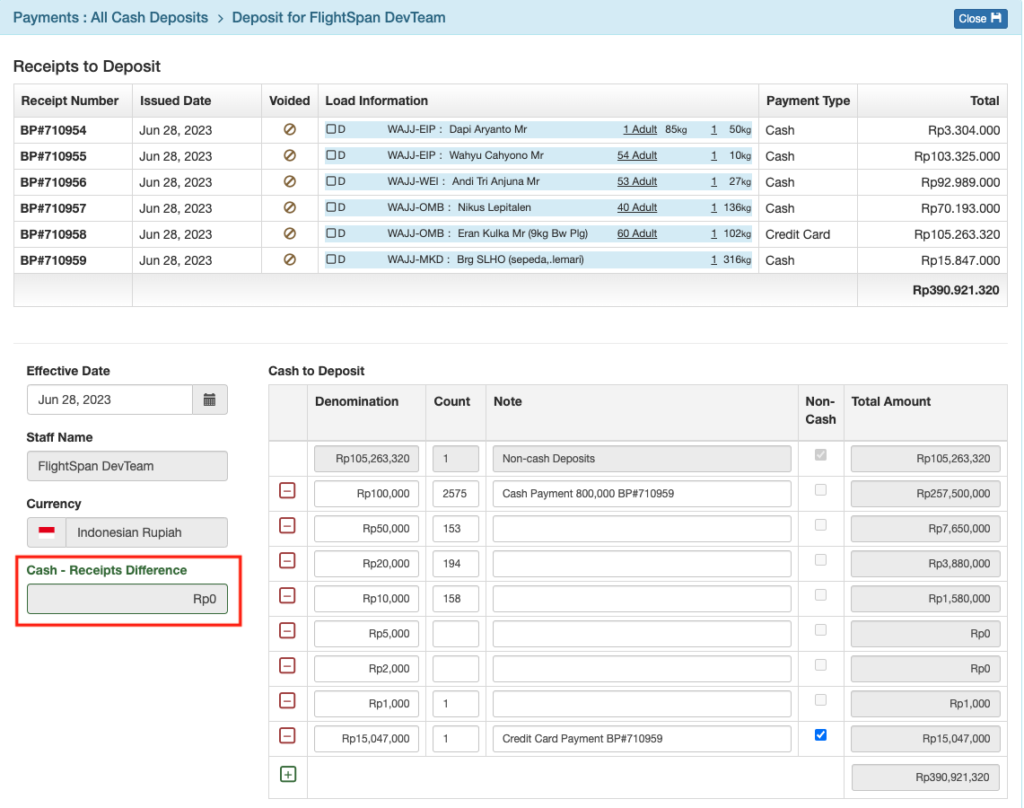
When the Cash-Receipts Difference amount reaches zero, your cash matches the total for the receipts on this deposit form; use the blue Close button to save your work.
Manual Receipts
From the Cash Deposits page, click on the green New button, then select the date, the individual making the deposit, and the currency to be deposited, then save.
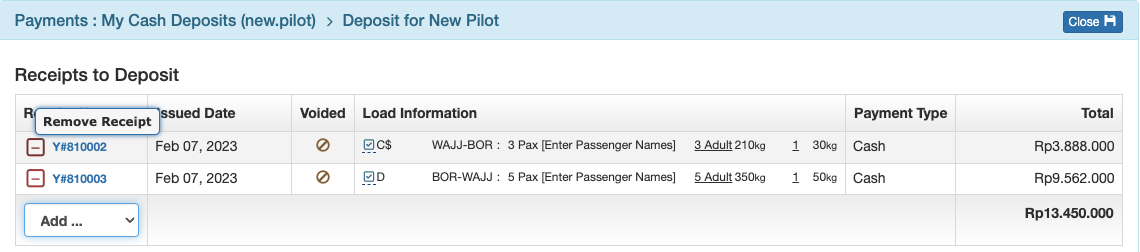
Manually generated receipts are not pre-populated on the Deposit page. Select the receipt(s) that you want to deposit from the drop down list on the left.

The correct amount for the rate, weights, and passengers is prefilled in the total. Click on the receipt number to confirm or edit the details, then save.
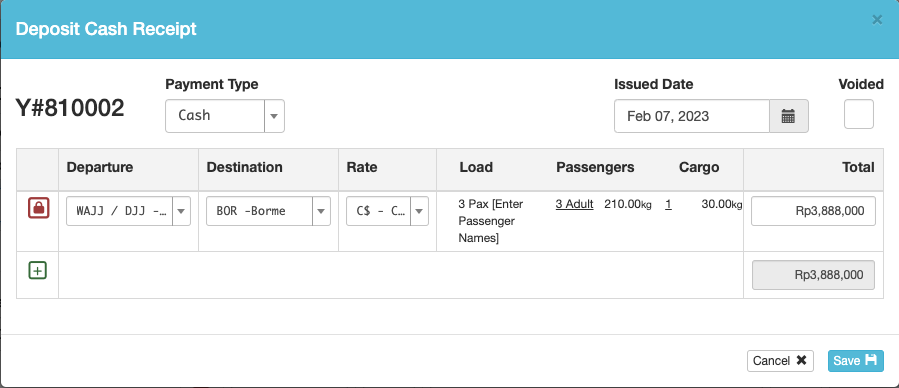
If you wish to remove a receipt from the deposit, click the red minus button to the left.
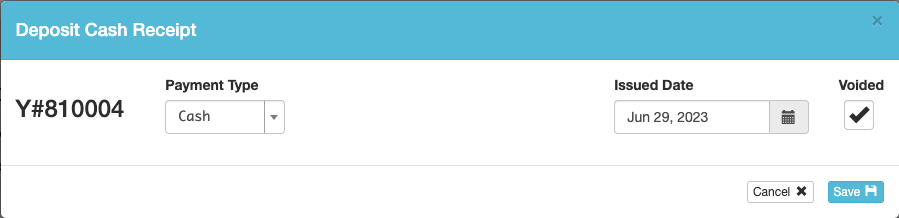
If you need to void a receipt, click on the receipt number, then click the Voided check box and Save.
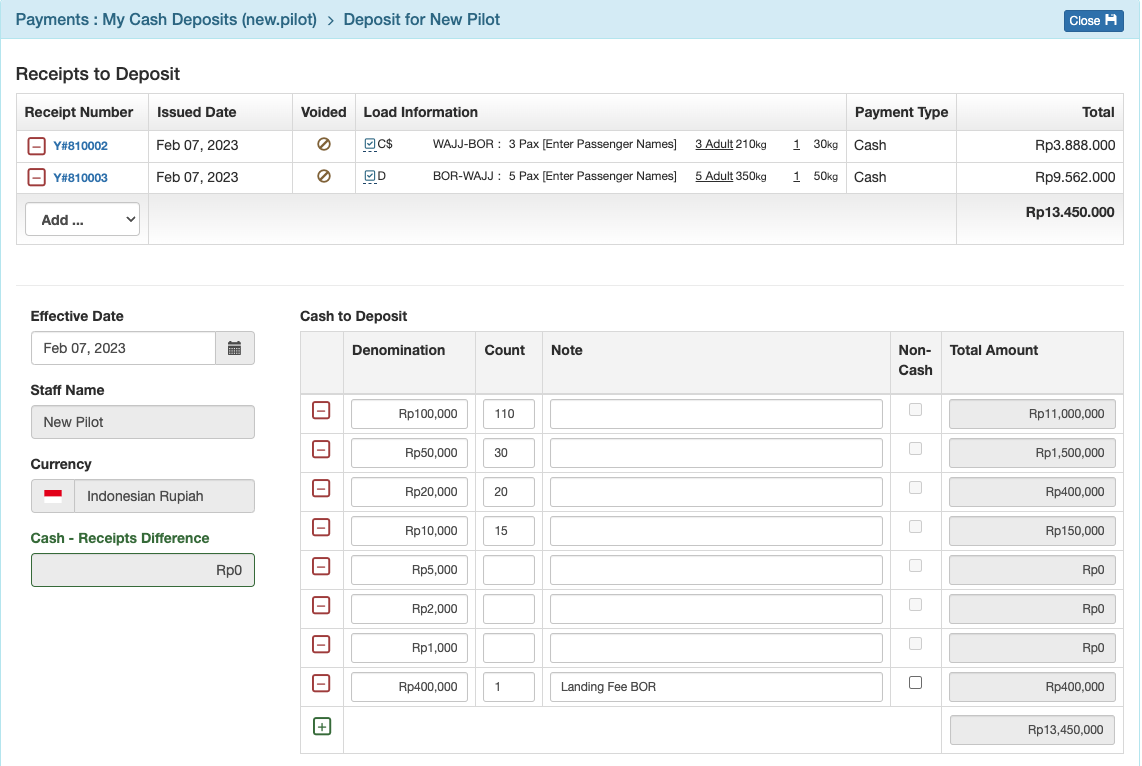
Count the cash, entering the number of bills of each denomination in the Count column. If you had a cash expense for the trip that you paid (or reimbursed yourself for) out of the cash received from writing receipts, use the green plus button to create a new row and enter the expense, along with an explanation in the note field. The expense receipt effectively reduces the amount of cash you are responsible to deposit.

Once the Cash-Receipts Difference reaches zero, use the Close button to save your work.
Deposit A Receipt Number That Did Not Upload With A DFR
If a pilot uploads a DFR with an invalid receipt number, the item will be listed under a “Data Entry Required” header.
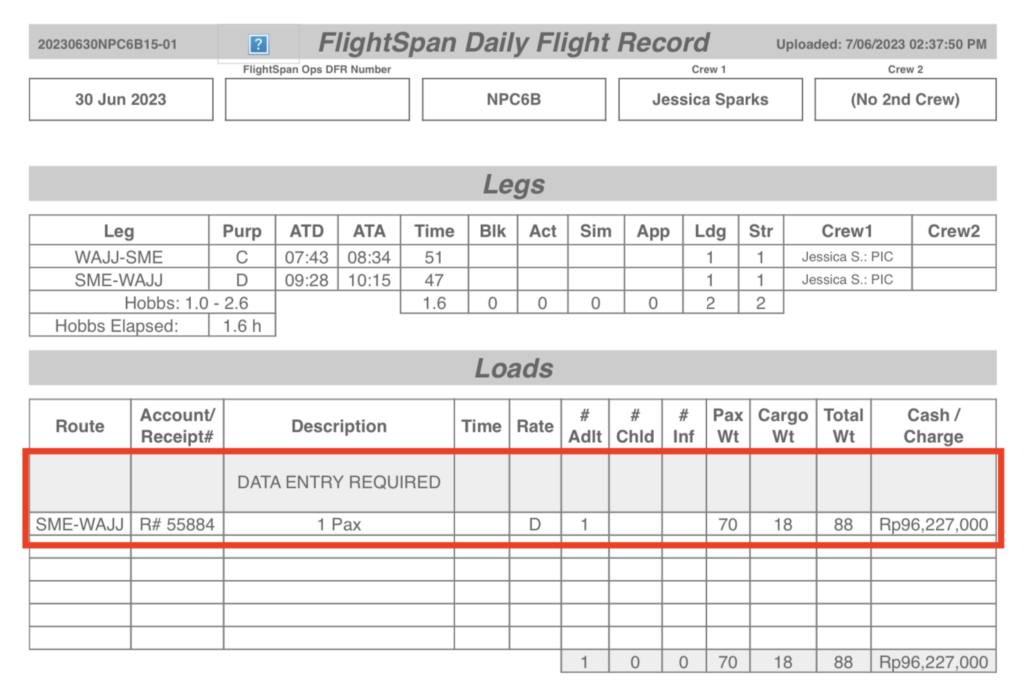
For this situation, and for times when the pilot may have omitted a receipt from their DFR, follow the manual deposit procedures, select the correct receipt number and enter the date the receipt was issued, the route, rate, and amount.
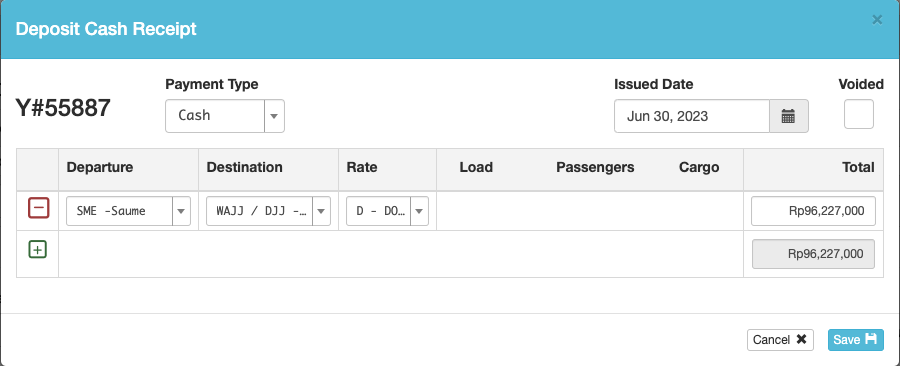
When you save, a Payment record will be created. Click on the Receipt number to open the Payment.

Enter the load description, then link the Payment to the Flight Record.

Complete and save the deposit form as previously described.
Completing a Deposit
Click the green printer icon, select the desired output and quantity, and select Print.

Attach all receipts to the printed document and turn them in to your cashier with the cash.

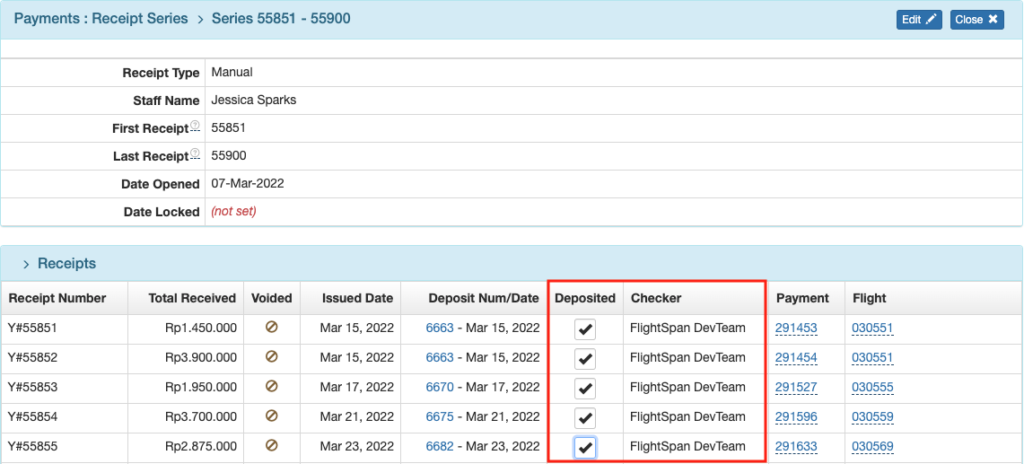
Recording Cash Receipts As Deposited
From the Receipt Series view, click on the receipt series of the person making the deposit.
To indicate that the cash and the cash deposit form were physically received by the cashier and the cash amounts were verified, the cashier receiving the cash deposit should mark each receipt as having been physically deposited by checking the Deposited checkbox.
When the Deposited checkbox is checked, the logged in user’s name will be filled in the Checker column.
Note: As a best practice, consider having the person receiving the cash recount the cash in the presence of the one turning it in.
Video Version