Staff members can be rostered (scheduled in advance) for duty time and overnights to proactively manage duty time and minimize the chances of exceeding duty time limitations.
There are six types of duty that can be rostered:
- Flight – the pilot is expected to fly
- Flight Attendant – the flight attendant is expected to fly
- Ground – the staff member is scheduled for non-flying duties
- Maintenance – the staff member is scheduled for maintenance
- Office – the staff member is scheduled to work in the office
- Standby – the pilot is on standby to fly

There are two Company Custom Settings for rostering, one for the default rostering crew type,

And the other to disable rostering completely if you do not wish to use this feature.

Roster List
Access the Roster List by selecting Staff / Users from the Settings menu, then Roster List from the Staff / Users menu on the left.

Filter and search from the boxes and dropdown lists at the top of each column, and sort by clicking on the blue column headers. Restore the defaults with the Reset button.

Create a new roster event with the green New button.

Complete the details and save.

The roster record will open, with the Staff Fatigue Status displayed. The fatigue status for that record is a snapshot in time at the end of the rostered period. Rostered events will be displayed in the Duty Time Limits and Rest Timeline sections. See the Staff Fatigue Status documentation for details on how to interpret the record.
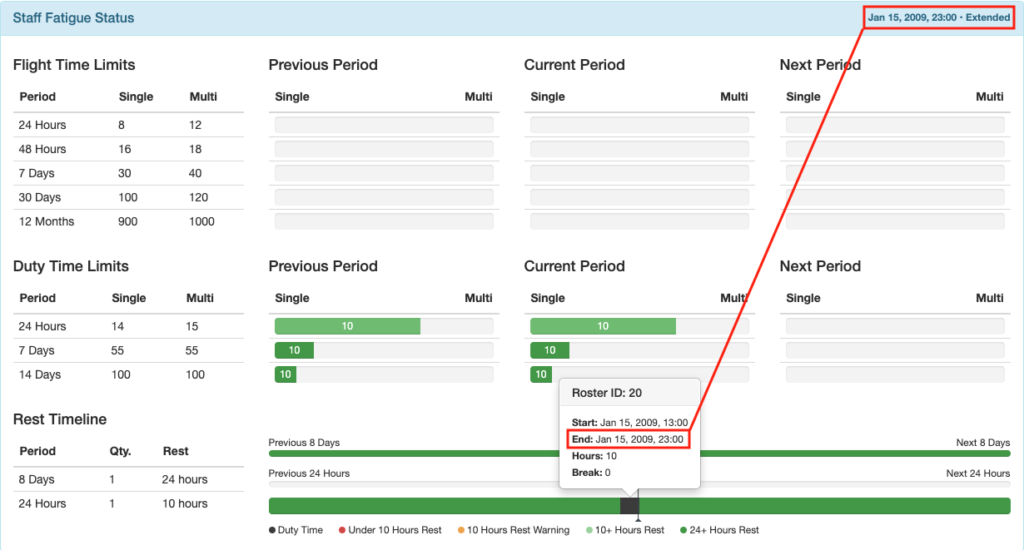
Open existing roster records by clicking on the staff name.

Use the arrow keys to view first, last, or adjacent records. Delete, Edit, or Close the record with the respective buttons.

Roster Calendar
Open the roster calendar by selecting Roster Calendar from the home page if you have added the shortcut, or from any page, select Roster Calendar from the Schedule menu.
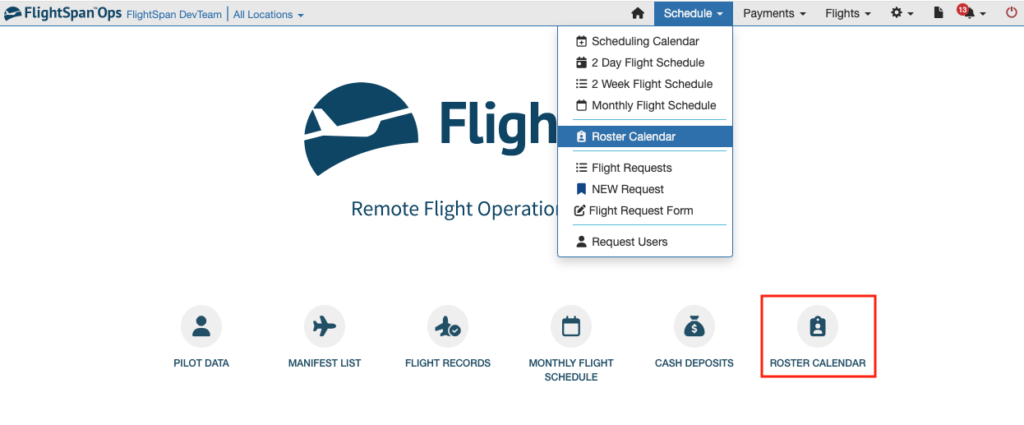
Or you can select Roster Calendar from the Staff / Users menu, or use the Calendar shortcut from the Roster List.

Hovering over a roster event icon will tell you the type of event, and clicking on the event will open the roster event detail.

Hovering over the calendar icon will display the schedule for the day, with each flight’s respective status color.
Clicking on the icon will open the Scheduling Calendar for that day.
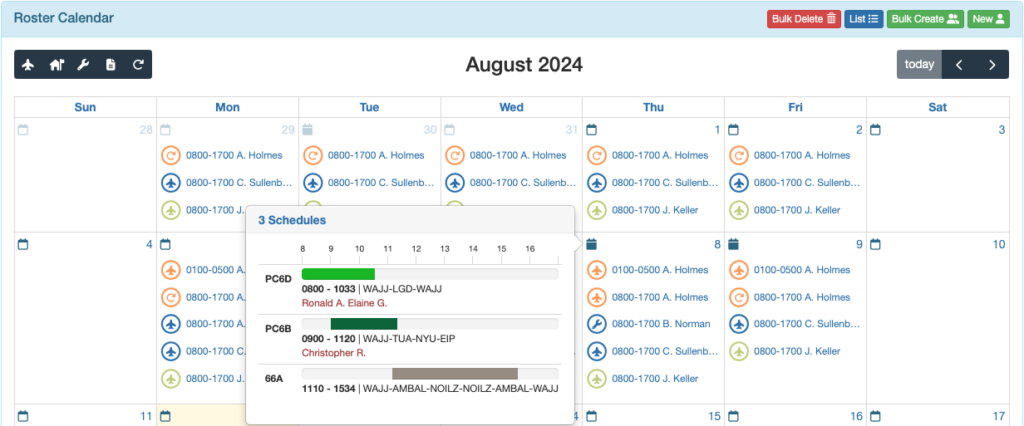
Use the filter buttons on the left to display or hide different types of roster events.

Use the arrow buttons to view adjacent months, and the Today button to jump to this month.

Select the List button to open the Roster List.

Bulk Create
Use the New button to create a single roster event, and the Bulk Create button to create multiple events for the month you are viewing.

When creating bulk events, first select one or more staff members.
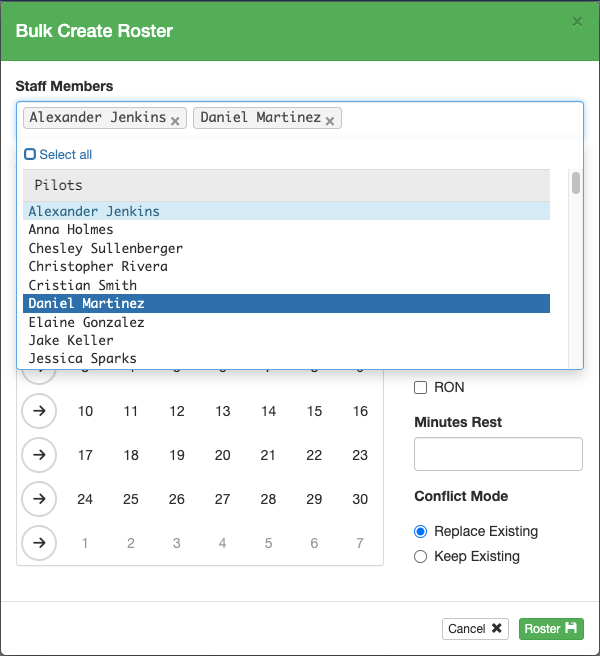
Then select the start and end times, type of event, and whether they will include an overnight away from their normal base of operations (RON).
The Conflict Mode choice (Replace Existing and Keep Existing) will only impact overlapping rostered events. If there is no conflict between existing and newly created events, then the newly created events will be added to the calendar without impacting already existing events.
When there is a conflict:
- Replace Existing – the new roster event will be created and the old event will be deleted.
- Keep Existing – the new roster event will not be added, and the existing event will be left intact.
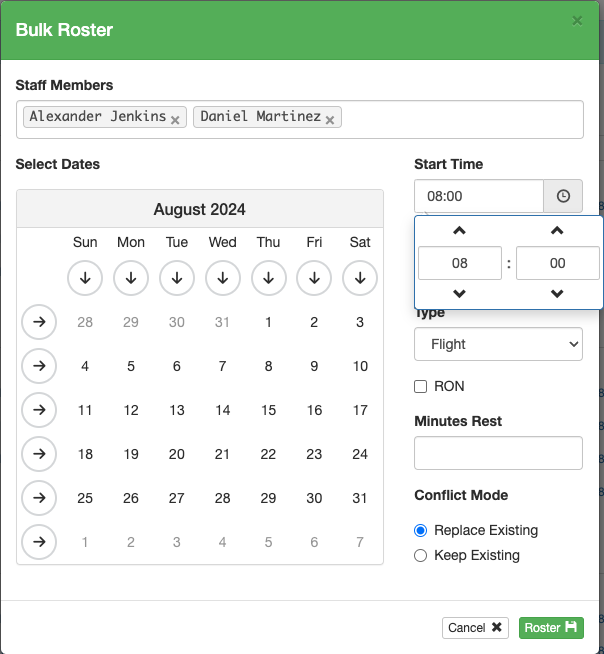
Toggle date columns or rows on or off by clicking on the arrows; toggle individual days on or off by clicking on the days, then click Roster to add the events to the calendar.
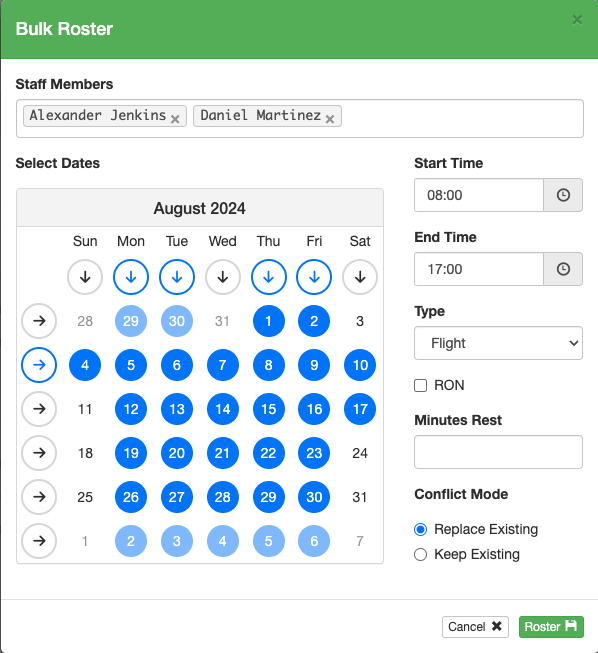
Bulk Delete
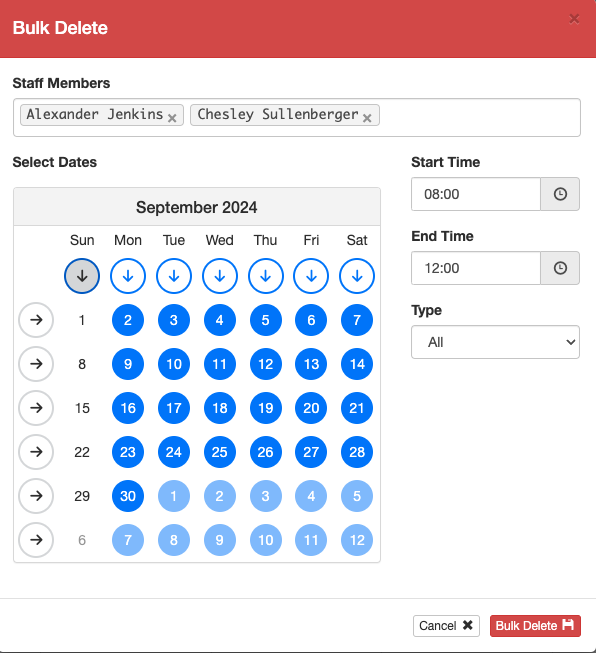
Select the Bulk Delete button to delete multiple records at once.

Select the staff members you wish to remove from the roster.
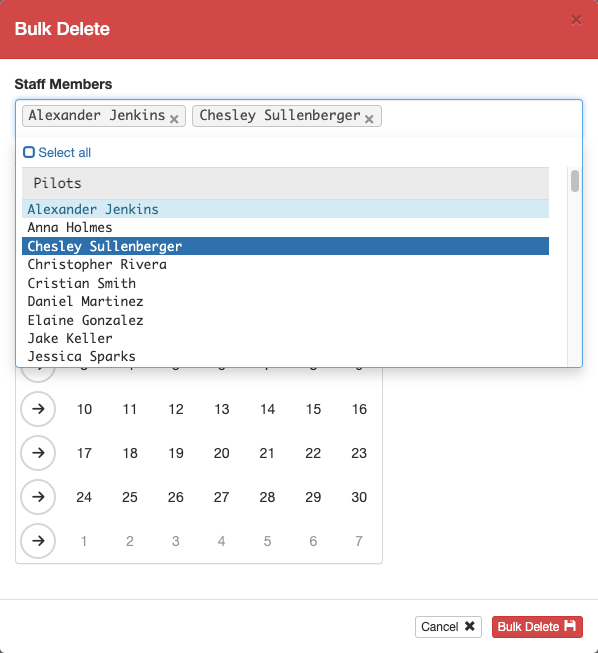
Select the time window within which you want to delete rostered duty. If there is any overlap between the selected time and the rostered event, the event will be deleted.
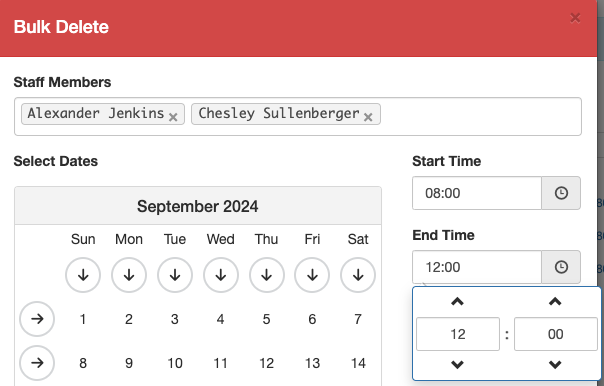
Toggle date columns or rows on or off by clicking on the arrows; toggle individual days on or off by clicking on the days, then click Bulk Delete to remove the rostered events from the calendar.
Video Version
