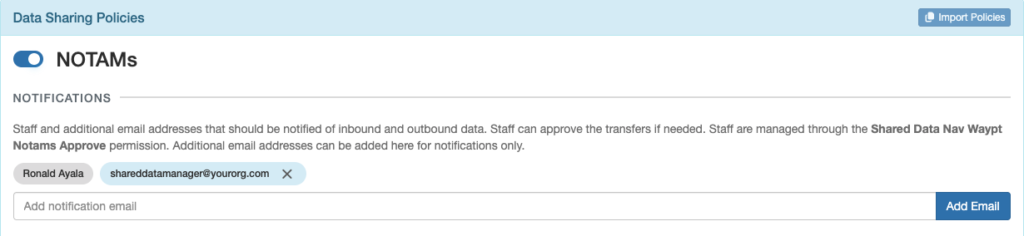
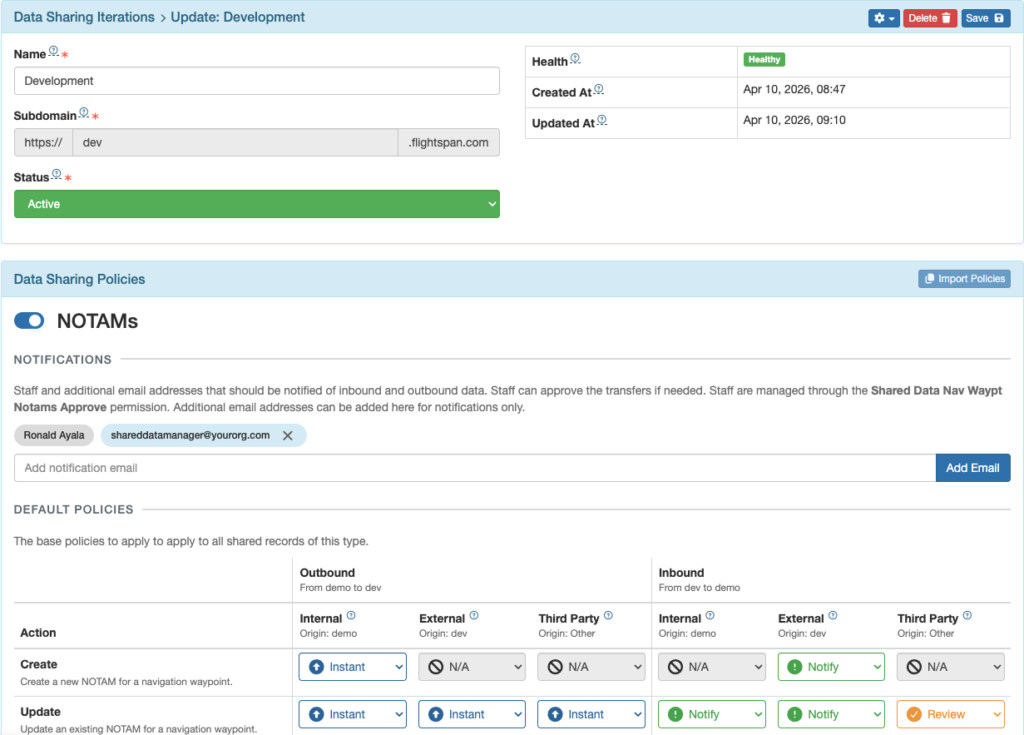
At least one user must have the Shared Data Approve permission for the type of data being shared in order to receive email notifications of incoming or outgoing shared data (depending on the settings you will select), and to review and approve or reject data sharing.
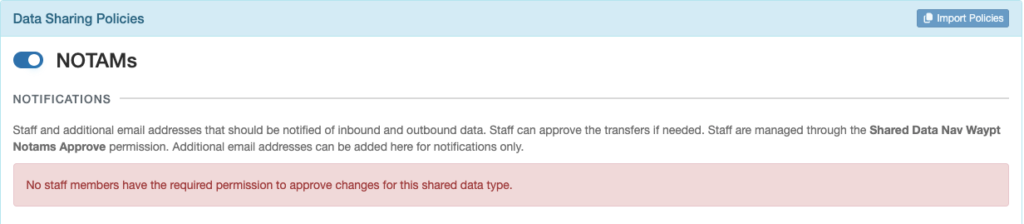
Once a user has the permission, their name will be added to the list. You can also add individual email addresses for anyone else you wish to receive email notifications.
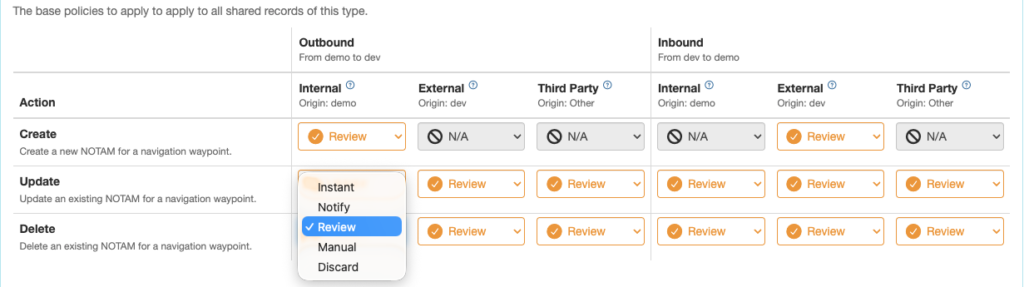
Default Policies
By default, all data is set to require a review. This means an email notification will be sent and the data manager will have to review and reject or approve the sharing action any time data is created, updated, or deleted, for both inbound and outbound data.
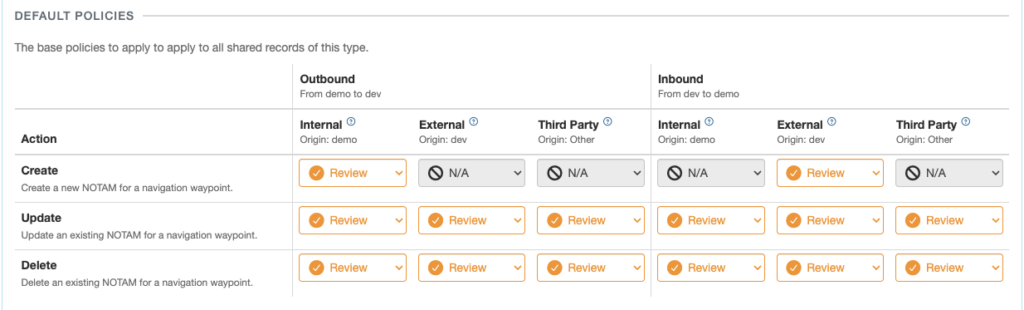
Any item can be changed to one of five policies.
Outbound data can originate from several sources:
- Internal – You created the original record
- External – The company you are sharing data with created the original record, but you have updated or deleted it
- Third Party – You are sharing data with two or more companies; company A created the original record, company B updated or deleted it, and now you have updated or deleted it.
Inbound data can also originate from several sources:
- Internal – You created the original record, but the company you are sharing data with updated or deleted it
- External – The company you are sharing with created the original record
- Third Party – – You are sharing data with two or more companies; company A created the original record and company B updated or deleted it
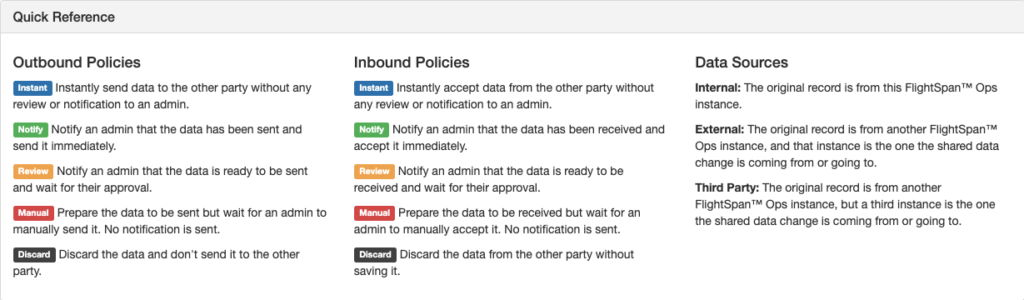
There is a quick reference list further down which defines the data sources and what will happen for any given policy.
Once you have created your policies, be sure to scroll back to the top and save.
Advanced Rules
Additional policies can be set to refine control of what happens to data within the Shared Data set.
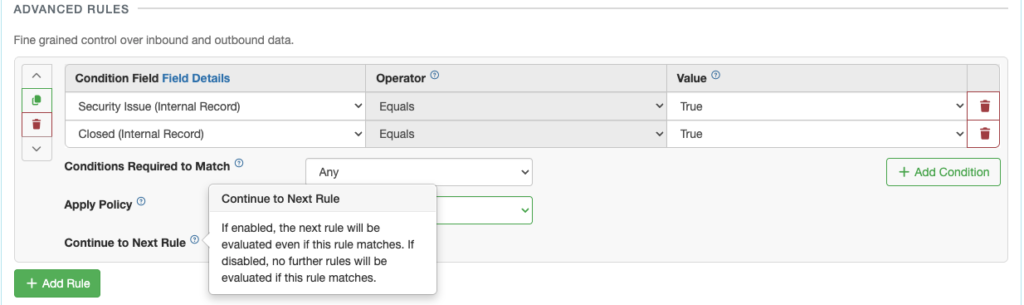
Under Advanced Rules, click the green Add Rule button.

The form for creating the rule will open.
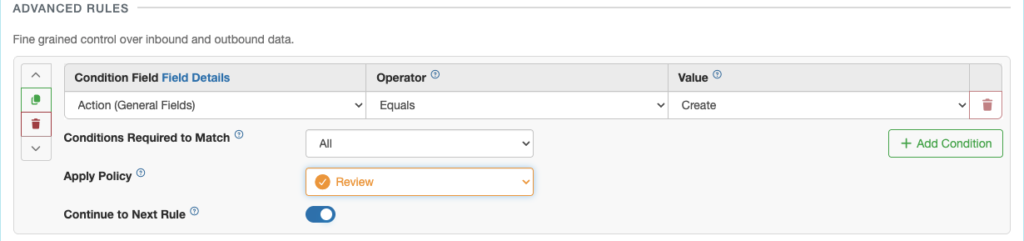
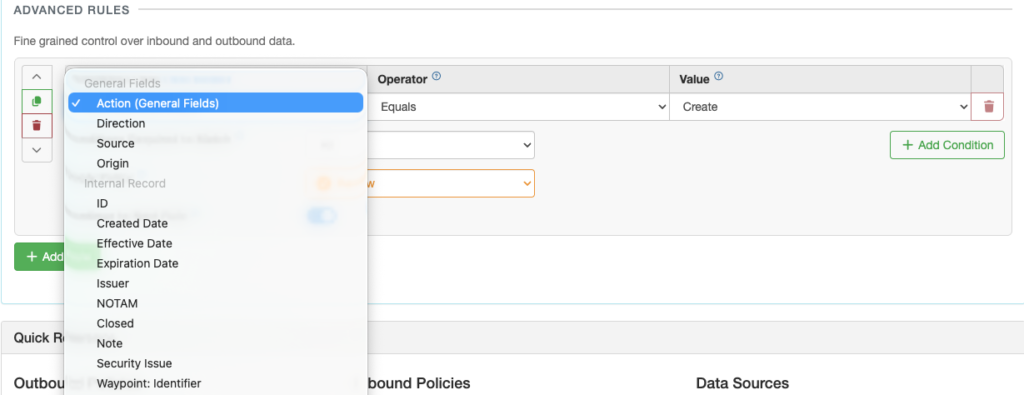
From the Condition Field, you can select any data field from General Fields, from Internal Records, or from Change Records within the shared data set.
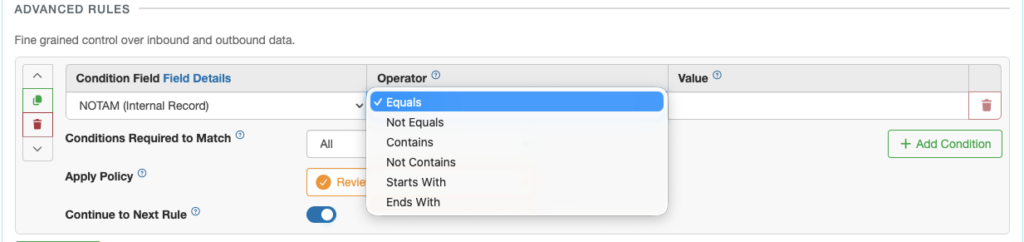
For most Condition Fields, you can select from six different Operators.
However, the following Condition Fields are automatically locked to Equals.
- Closed
- Security Issue
- Internal Only
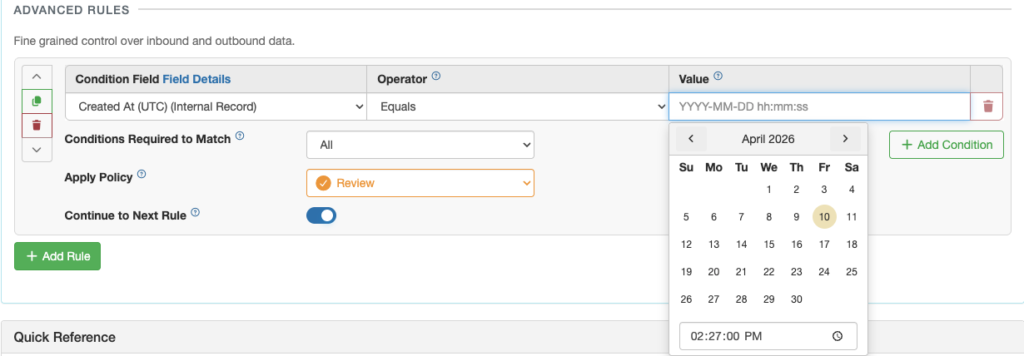
Depending on the Condition Field chosen, the Value field choices will be:
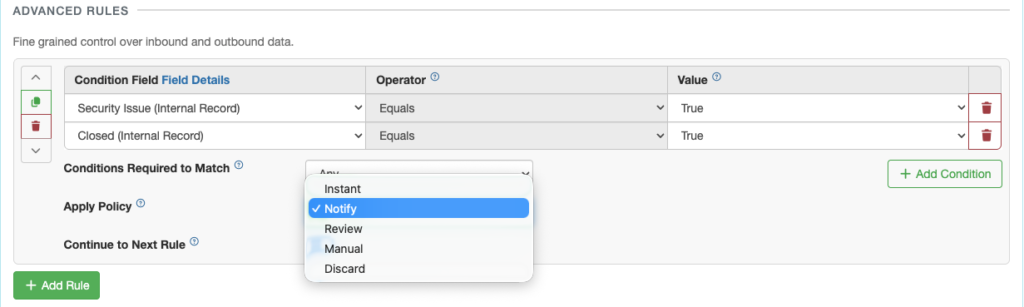
- Closed, Security Issue, or Internal Only – True or False
- Any date or date/time condition – a drop down calendar and the date/time format prefilled
- Waypoint: Waypoint Type – Land Airport, Landing Zone, or Water Landing Area
- Any other data type – enter any desired value
Multiple rules can be combined, and you can require the policy to be applied if any condition matches, or only if all conditions match.
If you wish to add multiple conditions, select the green Add Condition button.

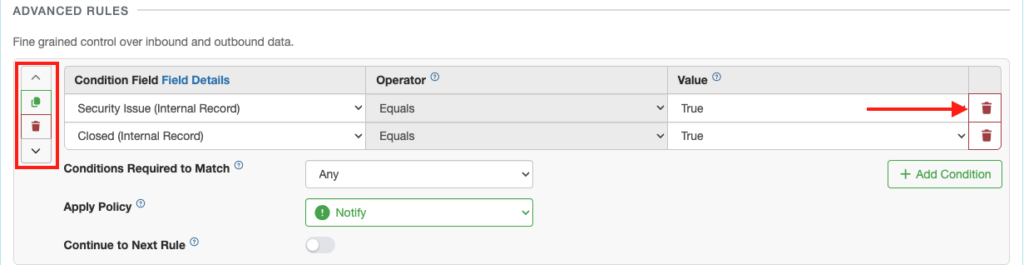
Next select which policy will be applied if the conditions match.
Then toggle the Continue to Next Rule switch Off if you wish to apply the action immediately, or On if you want the next rule to be evaluated first.
Continue to add separate or related rules as needed by clicking the green Add Rule button again.
Delete a Condition with one of the red trash can icons on the right.
Delete the entire rule with the red delete button on the left.
Duplicate a rule with the green duplicate button on the left.
Move the rule up or down in the hierarchy of rules using the up or down arrow on the left.
When all of your policies are complete, be sure to scroll to the top and save.

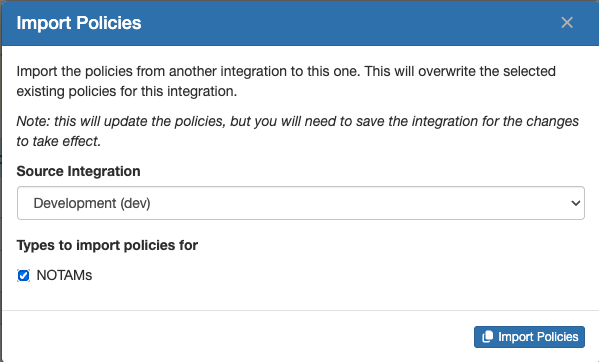
Import Policies
If you set up an additional integration with another company, you can import the policies from one integration to another.
From the new integration, select the Import Policies button.

Select the source (the first integration where you already set up the policies) and the type of data you want to copy the policy from, then select Import Policies.
Both the Default Policies and the Advanced Rules will be imported.
Be sure to Save.