Introduction
The Shared Data System is designed to facilitate the sharing of data across multiple instances of FlightSpan™, allowing separate and distinct flight operations to share data with each other. It is decentralized and allows for organizations to set up shared data integrations without the involvement or assistance of FlightSpan support.
If you wish, you can share data such as NOTAMs with any other organization that uses FlightSpan. You have full control over which data is shared, how it is shared, and how data shared with you is integrated into your system.
Because data can be shared between multiple FlightSpan instances, security is a primary concern. The Shared Data System implements multiple security measures to ensure that data is shared securely and that only authorized FlightSpan instances can access the data (see the full description here).
Note: At this time, only NOTAM sharing is available.
Sharing Integration Setup
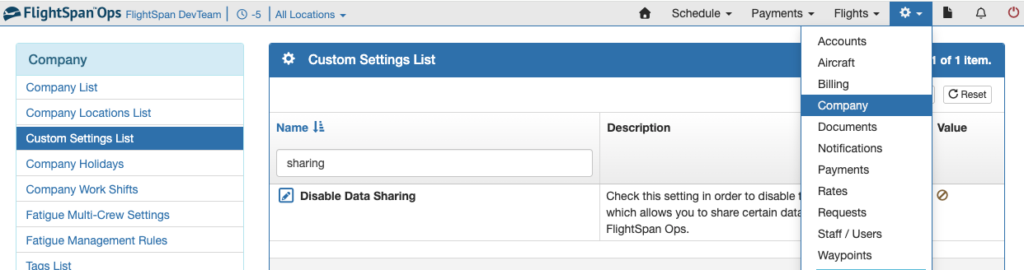
If you do not plan to share data and you wish to hide the Data Sharing menus, from the Company menu, select Custom Settings List, and search “sharing”. By default the Disable Data Sharing is disabled, and if you plan to share data, there should be no need to make a change. Check the box to disable sharing.
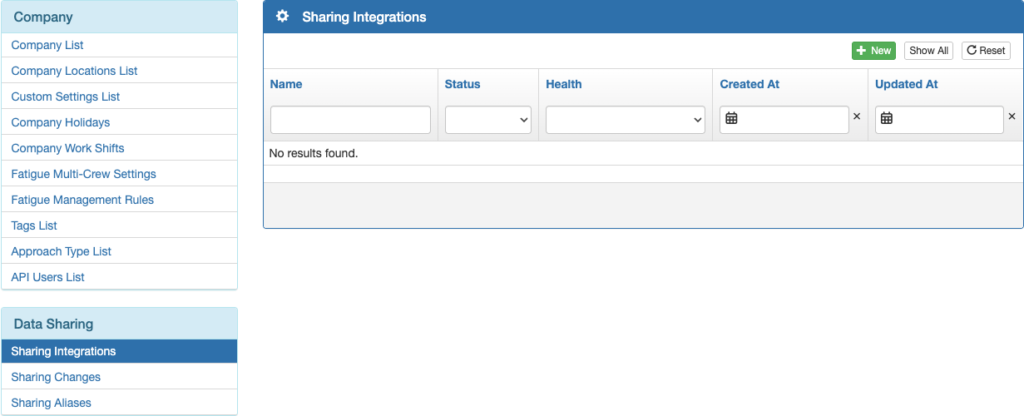
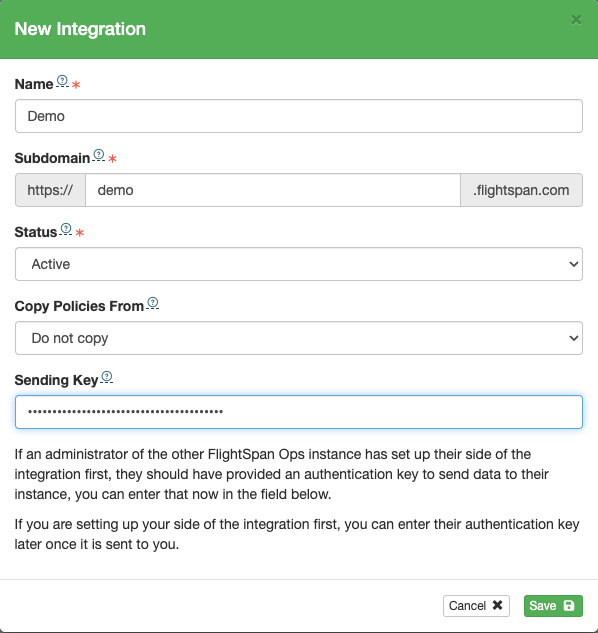
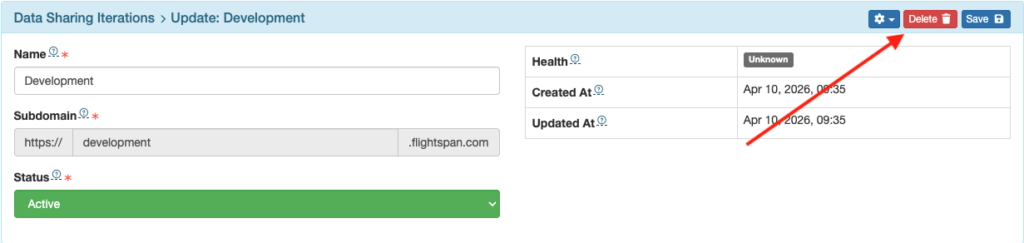
Next select the Sharing Integrations menu and click the green plus button.
Add the name of the integration (normally the name of the company with whom you will be sharing data) and add the subdomain name of their instance of FlightSpan. Make sure the Status is Active, then save.
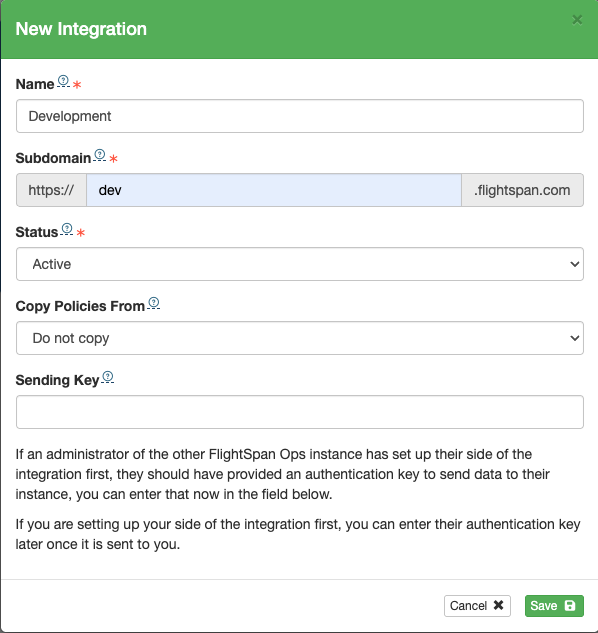
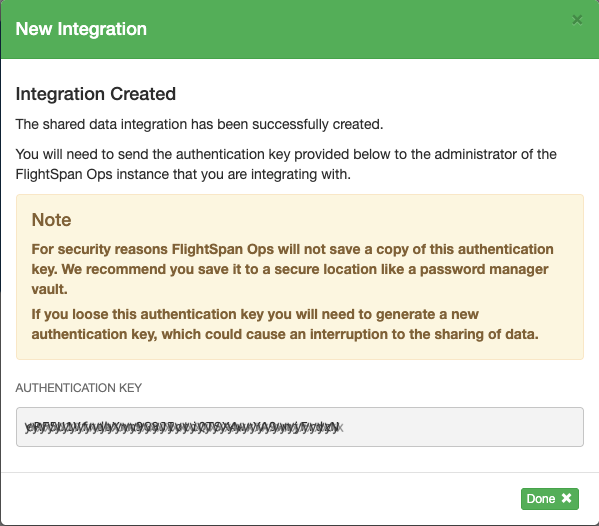
FlightSpan will generate an authentication key. Copy the key and share it with the company you will be sharing data with.
At the other company, they will follow the same steps, only they will paste the key they received from you into the Sharing Integration.
After they save the new integration, they must also be sure to save again.

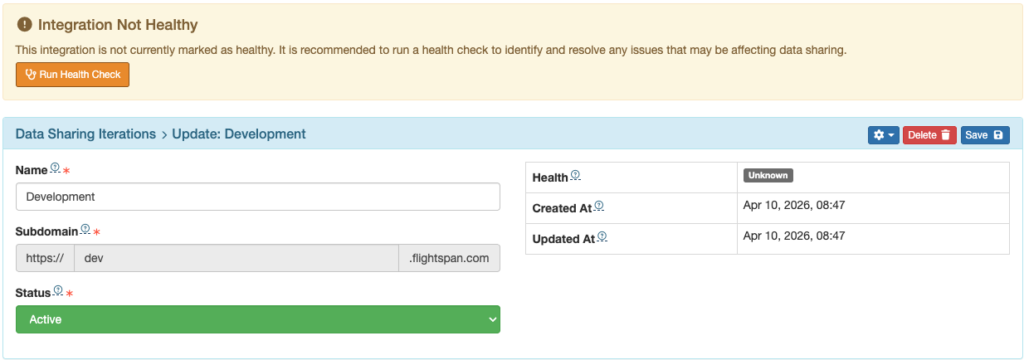
When they save, FlightSpan will automatically run a health check. The health check will fail if both parties have not completed all steps of the integration.
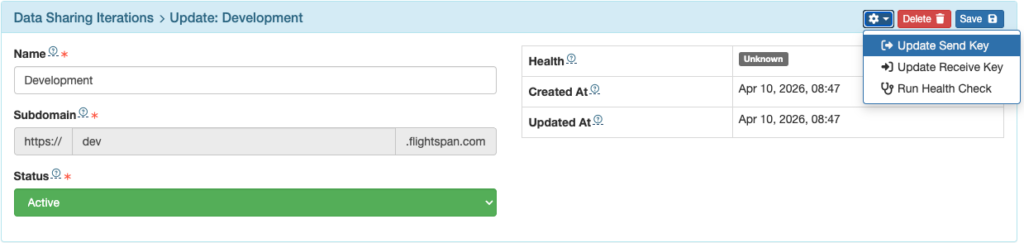
When you receive their key, open the integration by clicking on its name.
From the dropdown menu on the right, select “Update Send Key”.
Paste the key you received from them, and click Save Key.
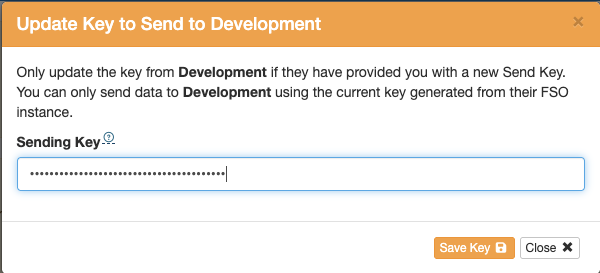
You should receive a confirmation that the key is valid.

Close the window, then be sure to save the integration.
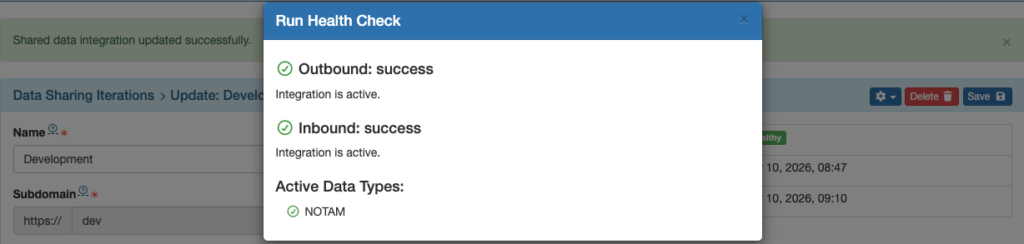
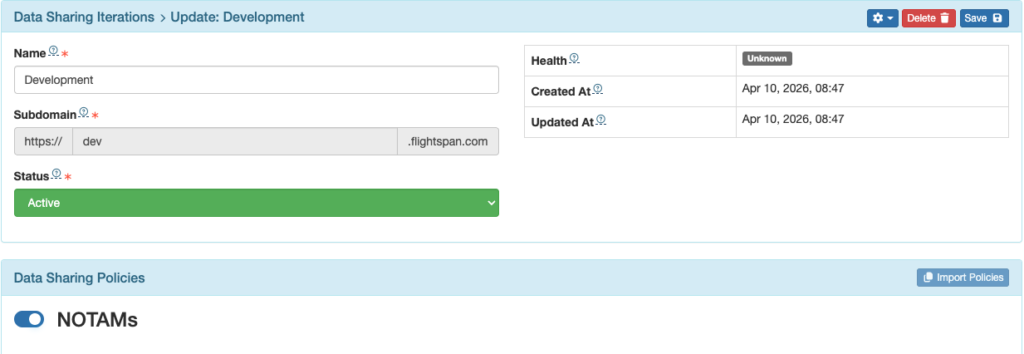
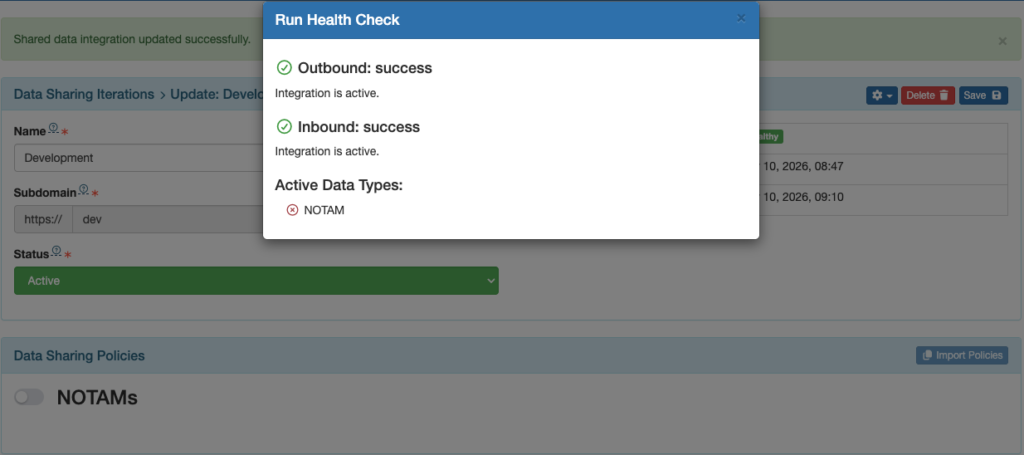
Next both parties should turn on the type of data they wish to share, in this case NOTAMs.
Then both parties should run a health check. When first setting up the integration, a health check is automatically run, but it will fail until both parties have completed all steps. Select Run Health Check.
If you have made an error entering the subdomain name, you will get a connection failure message.
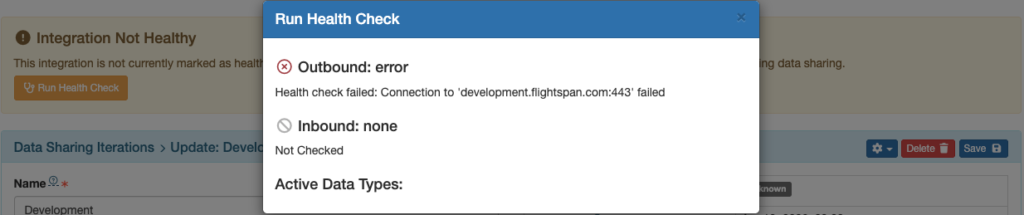
If you get the connection failure message, delete the integration and start over.
If either party has failed to Save or has made some other error, the health check will fail again.
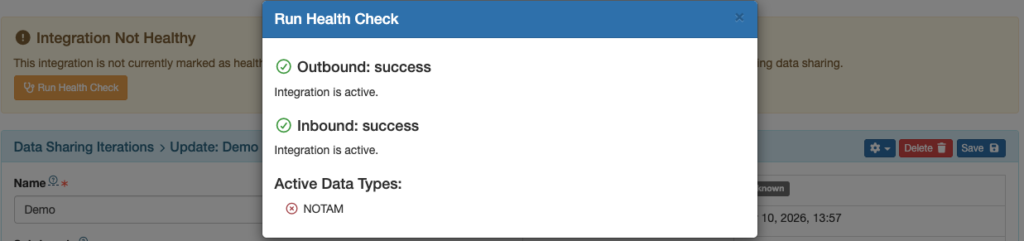
If the integration is healthy but you have failed to turn on an Active Data Type, you will be notified with a red X by the data type.
Turn on the data type, be sure to save, and run the health check again by selecting Run Health Check from the dropdown menu on the right.
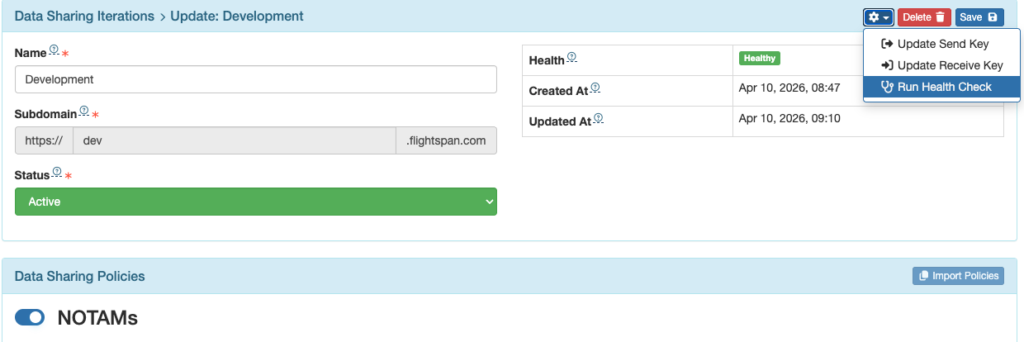
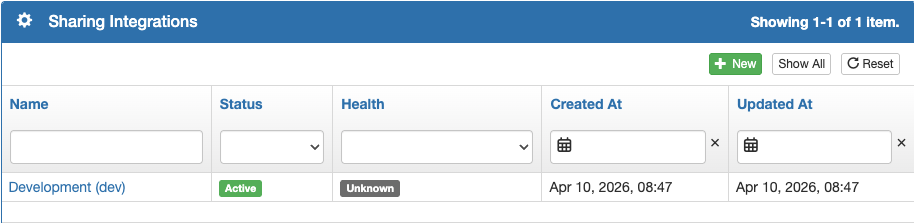
When both parties have successful health checks with all Active Data Types green, you can move on to setting up your sharing policies.