Unlink from Scheduled Flight
Unlink Payment from Non-Manifest Load
Removing a Non-Manifest Load from a scheduled flight must be done from the Schedule Details page.
Click on Load, then Unlink Payment From Flight.

You will be asked to confirm that you want to unlink the load from the flight.
Unlink Payment from Manifest Load
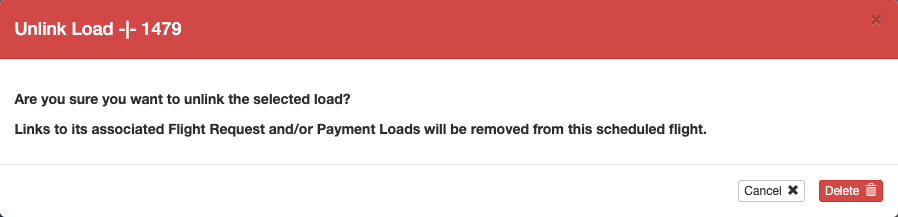
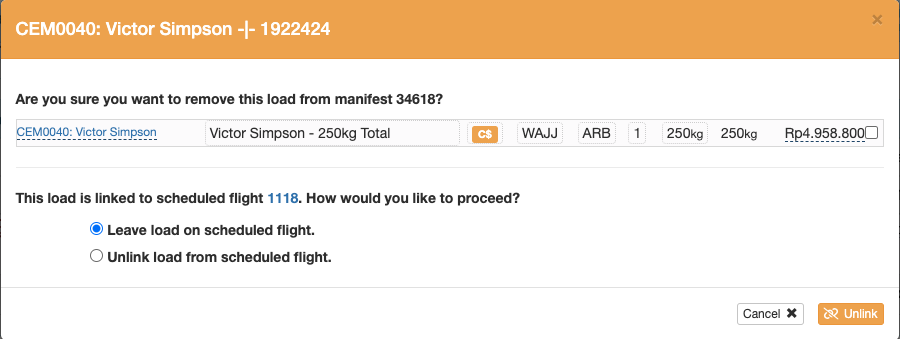
Payments can be unlinked from the manifest load of a scheduled flight from the manifest or the payment.
From the manifest, click the red unlink icon,

Or from the payment itself, click the red unlink icon,

Select whether you want to leave the load on the flight, or remove it from the flight. In either case, the Payment will not be deleted.
Unlink Non-Manifest Load from Completed Flight Record
From the Loads Flown section of the Flight Record, click on the red unlink icon,
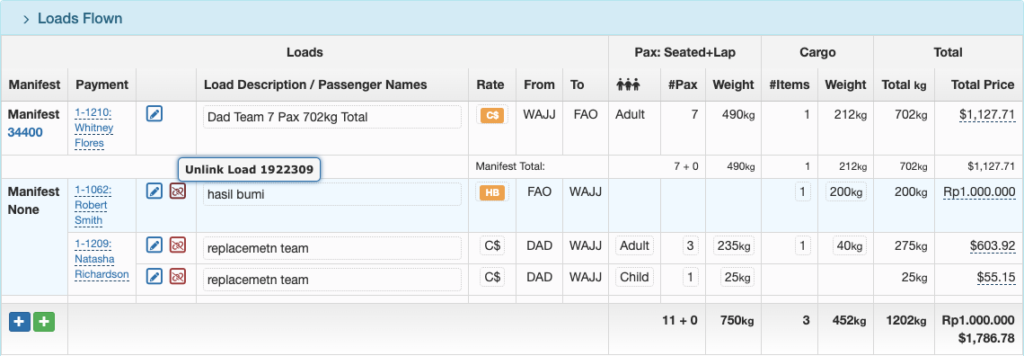
Or from the Payment Record, click on the red unlink icon,

Then confirm you want to unlink.

Once a Flight Record is locked, the payment cannot be unlinked from the Flight Record on either the payment record,

Or from the Flight Record itself without first reverting the flight to a non-Closed status.
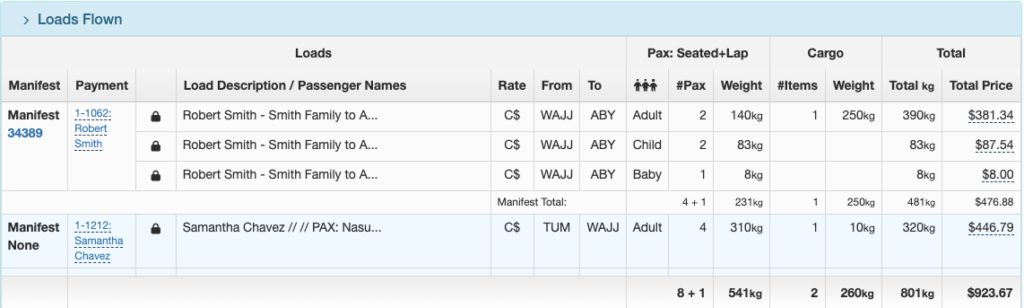
Note: Payment loads that are part of a manifest cannot be unlinked from a completed flight.
Delete Payment
Only payments associated with an account number can be deleted. Delete the payment and the load by clicking the red Archive Payment button and confirm.
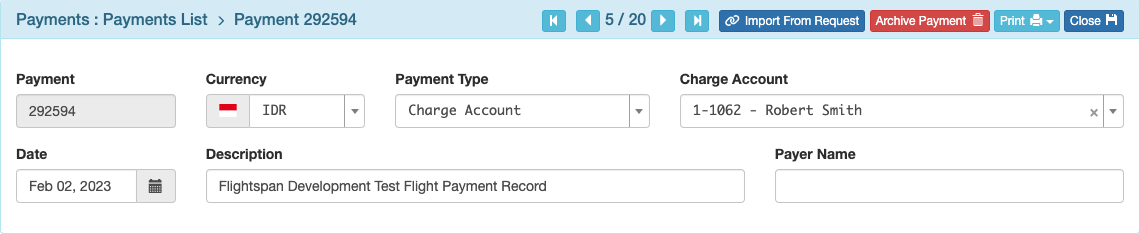
If the load is associated with a scheduled flight, you will be asked if you want to leave the load on the scheduled flight.
- If you choose “Leave load on scheduled flight” the non-manifest load will be left on the schedule, and the Payment will be archived. If the Payment is also associated with a Request, the link to the Request will remain on the schedule with the load.
- If you choose “Unlink load from scheduled flight,” the load will be deleted and the Payment will be archived. If the Payment is also associated with a Request, the load will be removed and the Request will be moved back to the “Unscheduled” queue.

Refund Payment
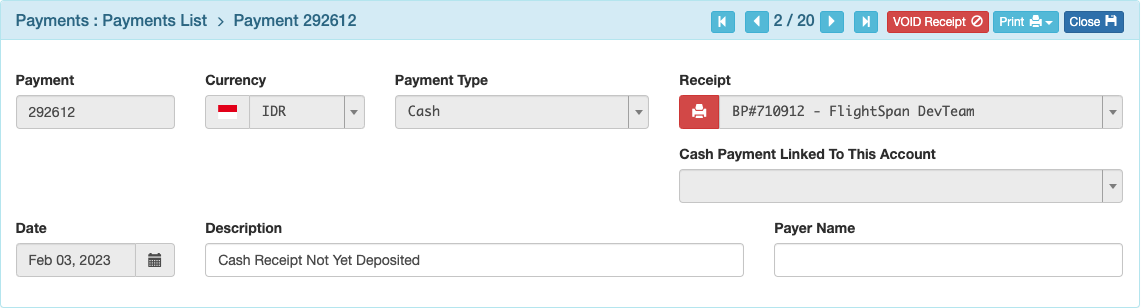
Cash and other non-Charge Account payments can’t be deleted, they must be refunded.
Cash Not Yet Deposited
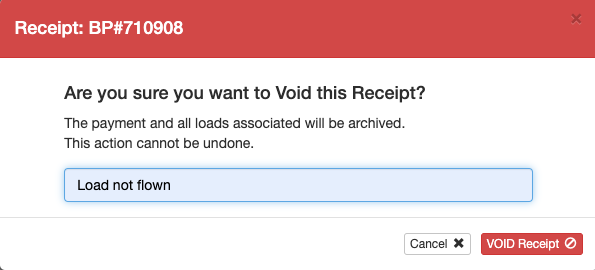
Have the author of the cash receipt void the receipt by clicking on the red VOID Receipt button.
Enter the reason and confirm, and return the cash to the payee. (Best practice would be to retain the customer’s original receipt for the finance department.)
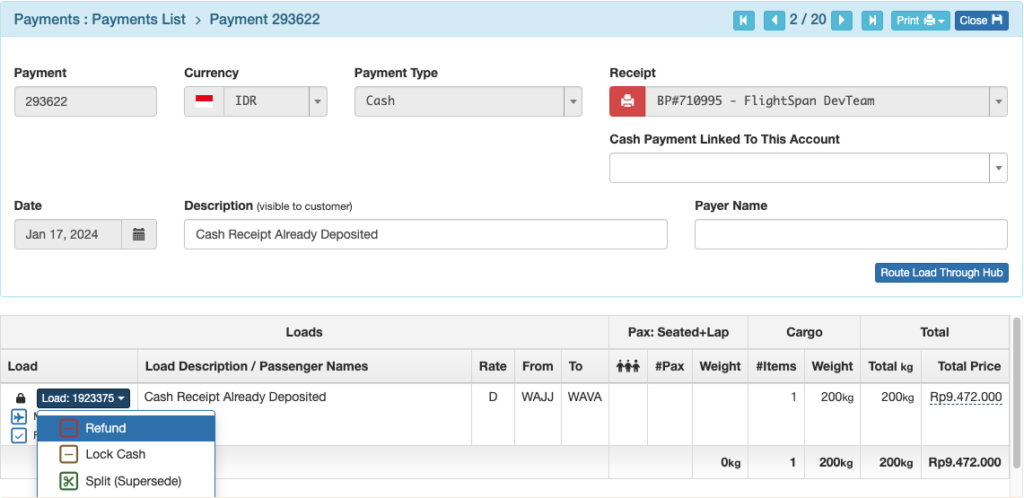
Cash Already Deposited
The VOID Receipt button is no longer available. Click on the load number and select Refund.
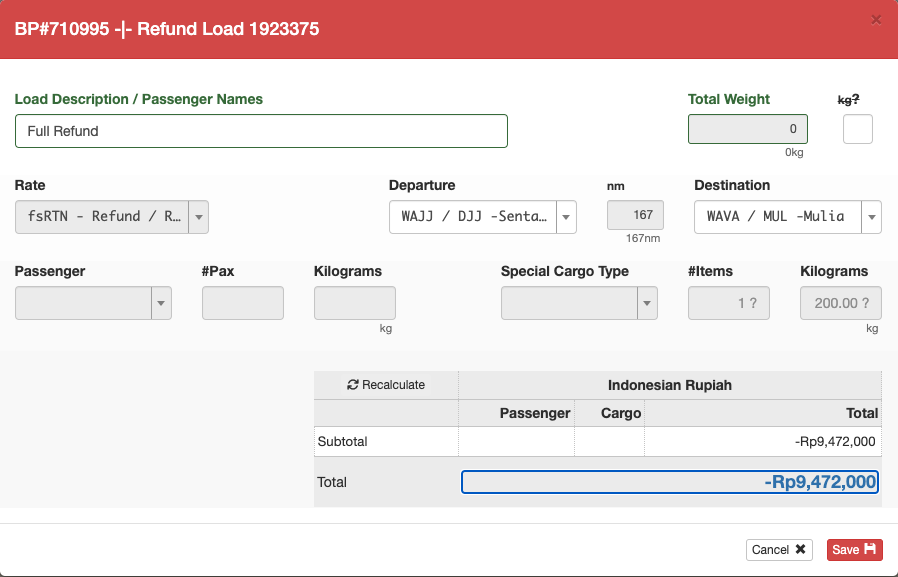
Enter the description and the refund amount in the blue Total field. Partial refunds can also be issued.
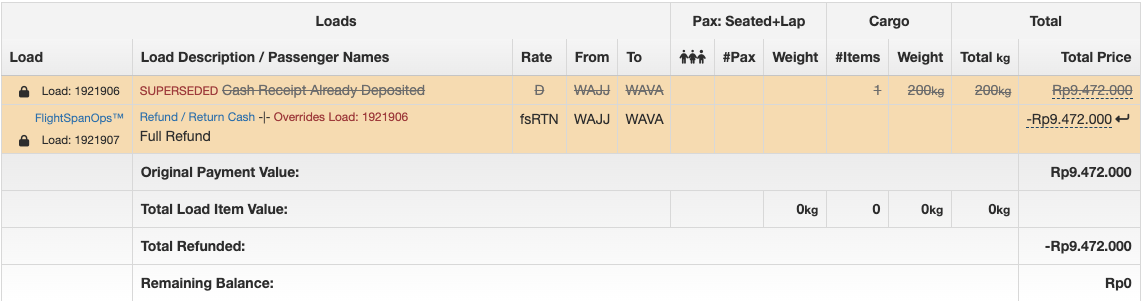
The remaining balance without an associated load will be displayed on the Payment record.
Note: Optionally, you may then print out the Transaction History, which shows the amount of the refund. The Cashier can then use this as the backup for issuing the cash refund.
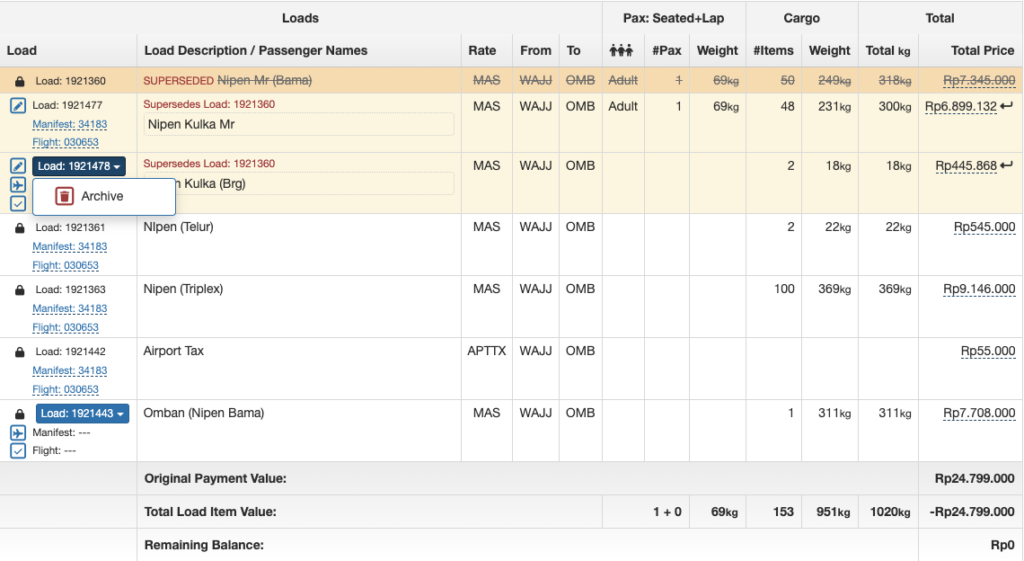
Load Partially Flown
If part of a Payment Load wasn’t flown, first delete the unflown load(s).
Confirm you want to Archive.
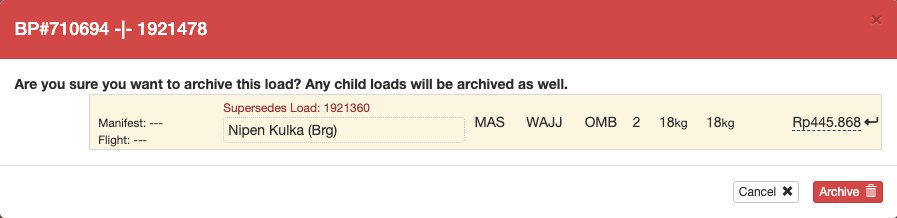
Then create the Refund as previously described.
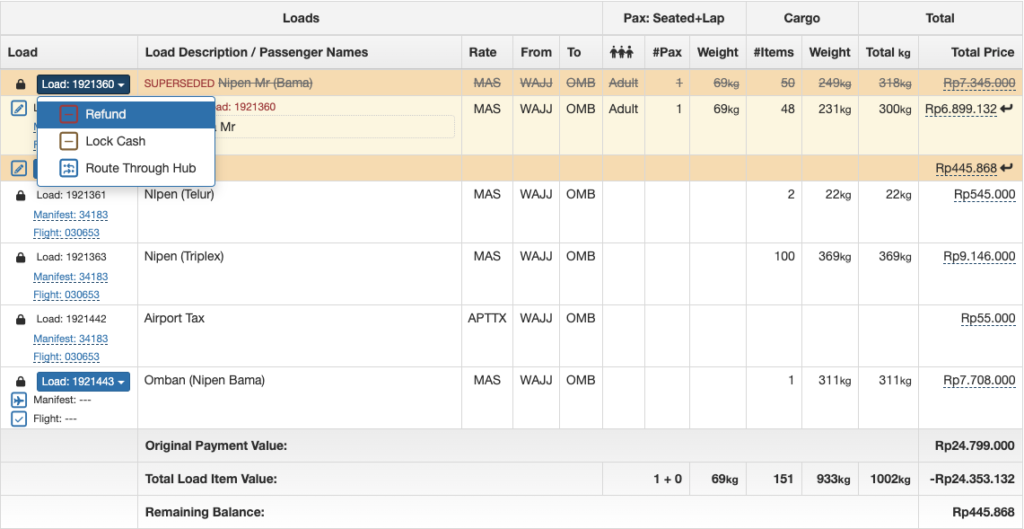
Note: Once a load has been split, the cash must be deposited or the Refund button will not be available.
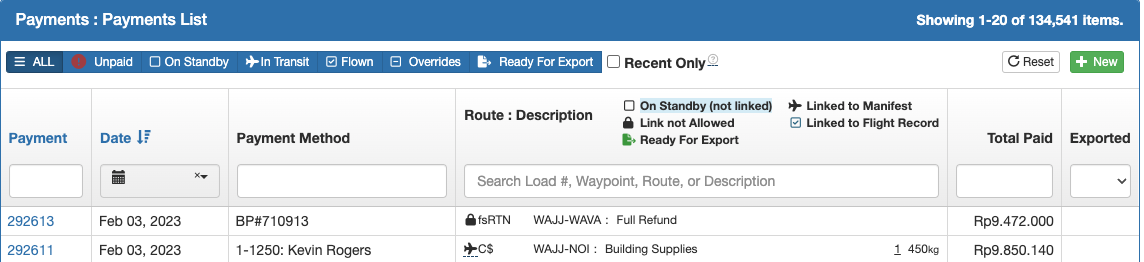
Refund Record
Voided receipts will be removed from the Payments List, and refunds will be marked with the description you entered.
A record is kept on the receipt series page. Voided receipts are identified by a blue checkmark in the Voided column.

Video Version