There are multiple ways to create payments.
Method One – Create New
Open Payment Form
There are multiple places where you can access the New Payment form.
If you have added the shortcut to the Home page, create a new Payment by clicking on the New Payment icon,

Or from any page, select New Payment from the Payments menu.

From the Payments List page click the green New icon,

Or from the Loads section of the manifest for a scheduled flight click the green plus button, and
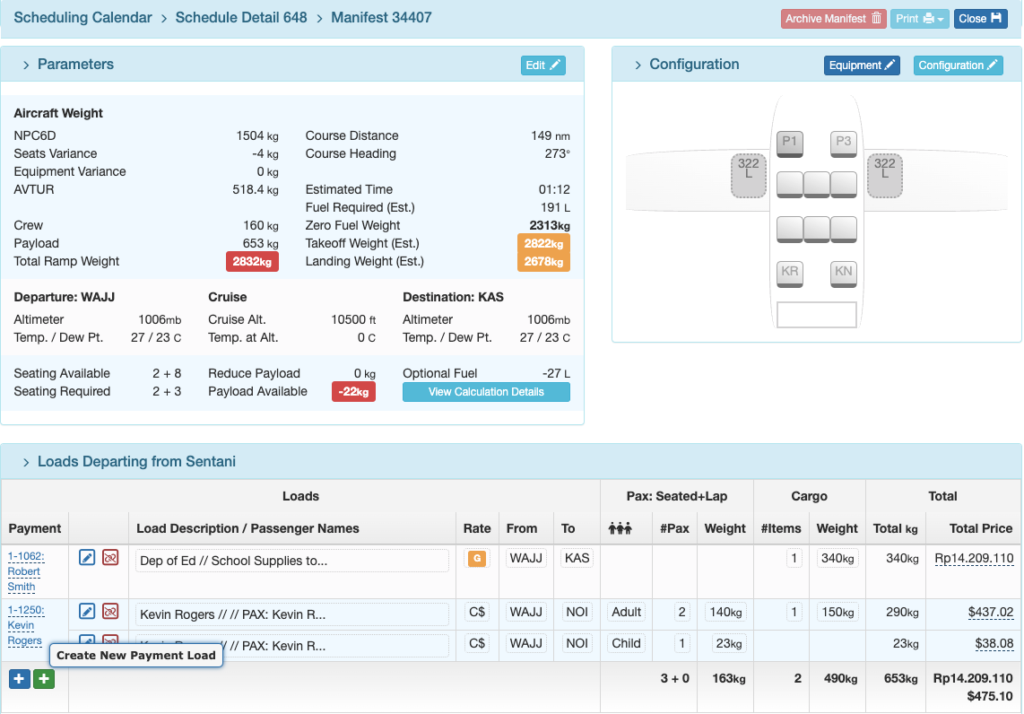
Finally, from the Loads Flown section of a completed flight, click on the green plus button to create a New Payment Load.

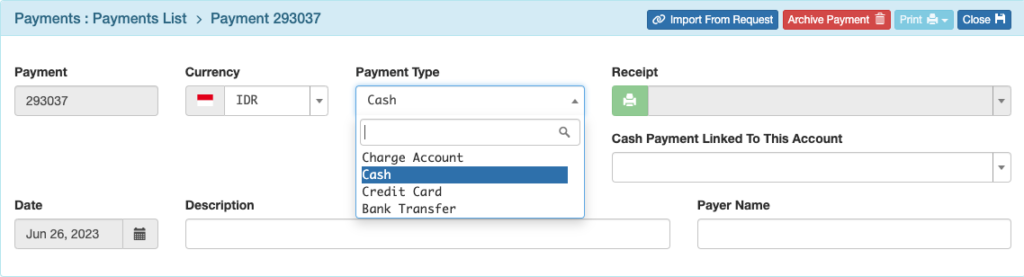
Complete Payment Details
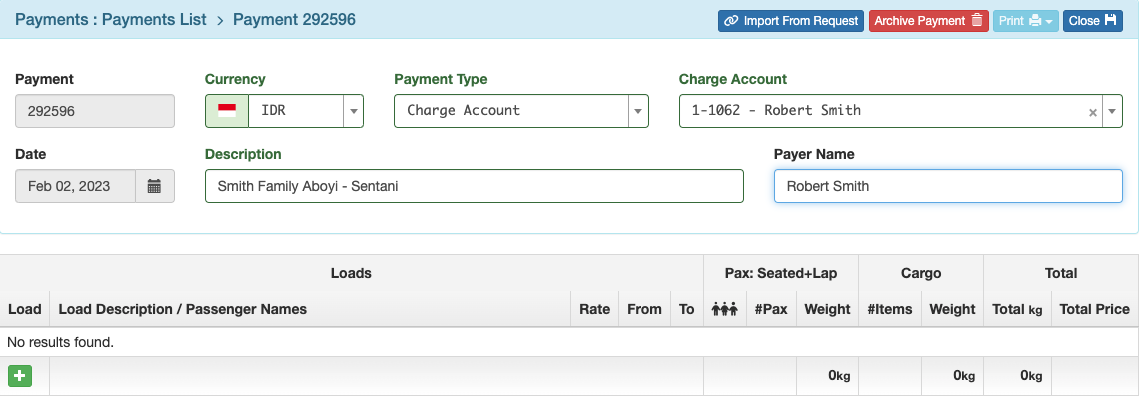
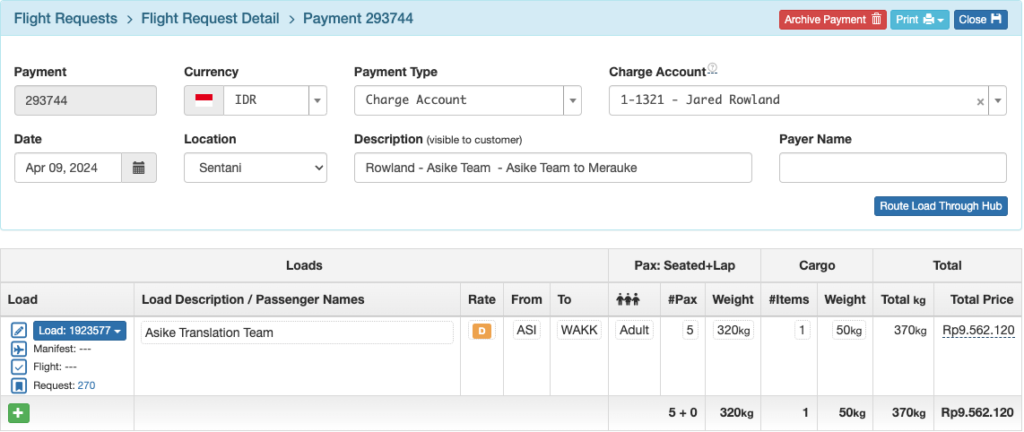
In each case, on the Payment Detail that opens, select from the company authorized forms of payment.
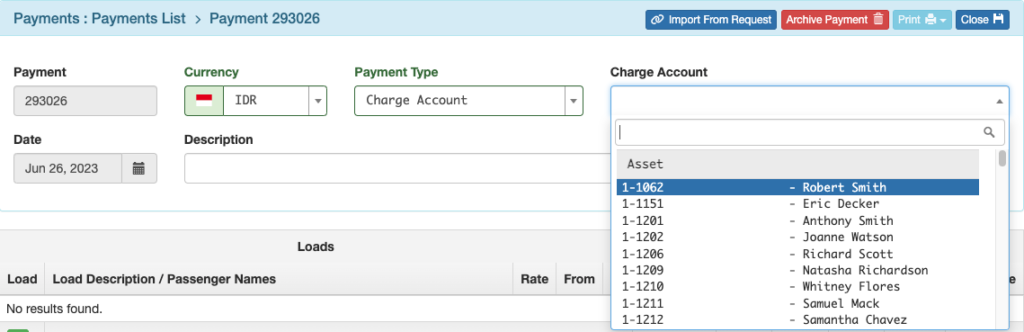
If you choose a Charge Account as the payment method, all accounts which you are authorized to select from will show up on the list. The account will not be charged until the load is flown.
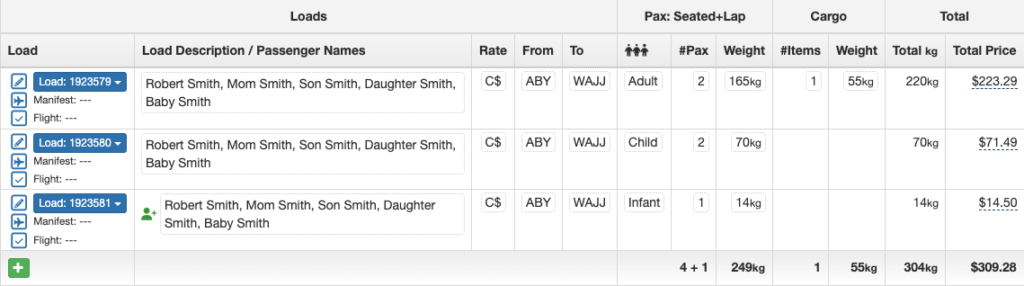
Enter payment details, then click the green plus icon to add the load.
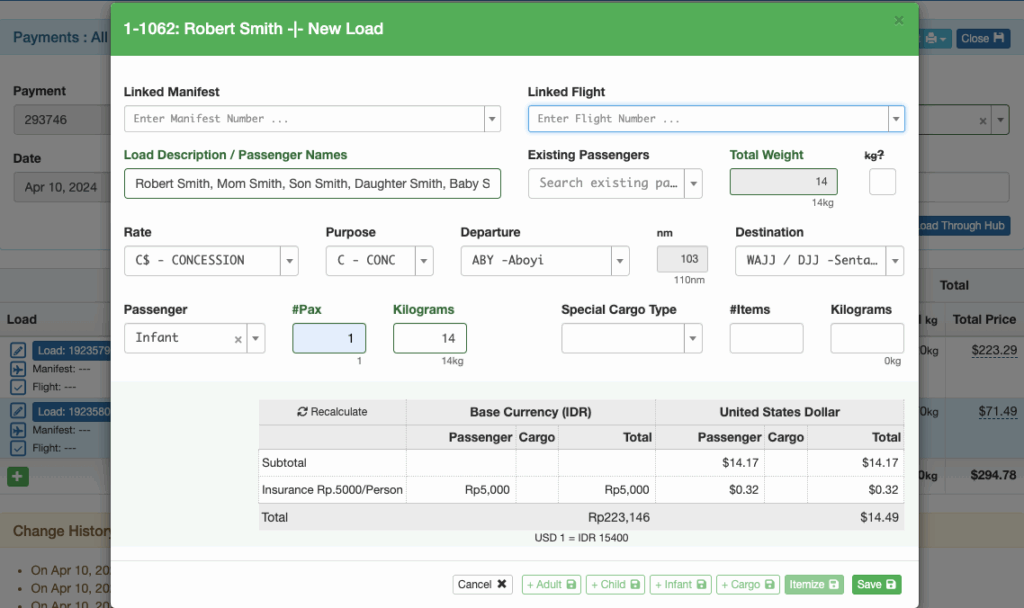
Add load details, then click Add Adult, Add Child, Add Infant, or Add Cargo as necessary.
When entering the Load Description, loads with a similar description that have flown in the last year will pop up.
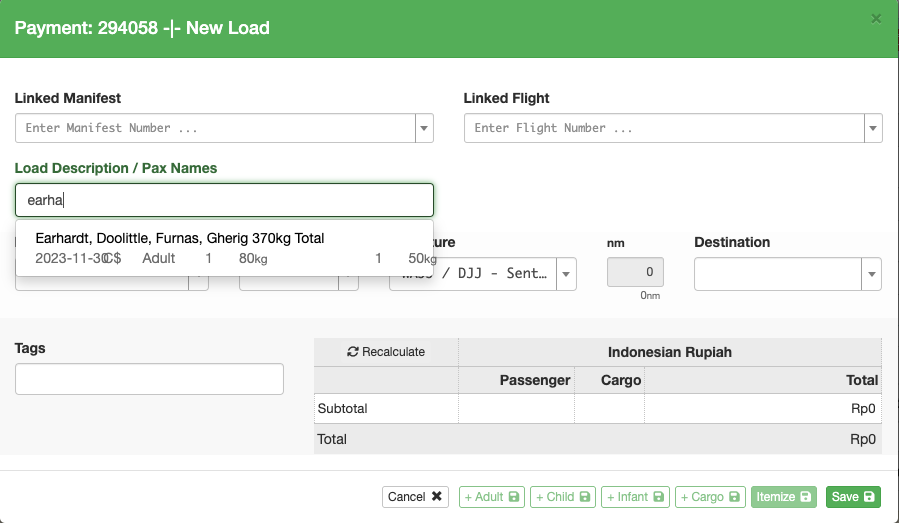
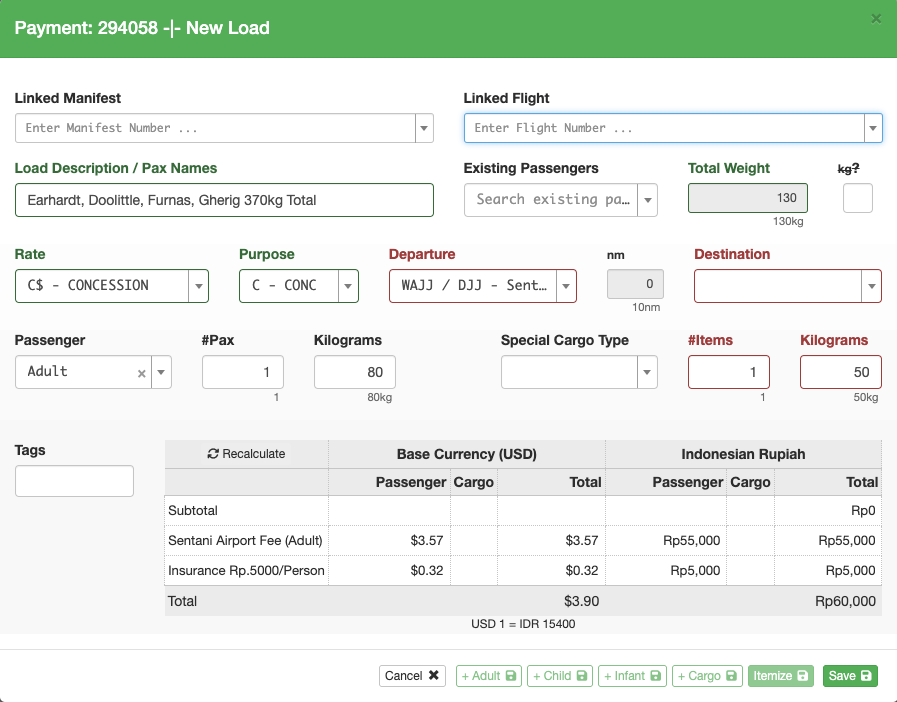
Use your keyboard’s arrow down key, and then your Enter key to fill in the saved details including the rate, purpose, and the previous loading. The original destination will not be included.
Adults, children, and infants will each appear on the load list as separate line items. (This distinction of passenger types is made to accommodate certain ICAO data reports.)
Method Two – Create from Quote
From the Quote tool, click Create New Payment. A Payment will be created with all the information that was included in the quote.

Method Three – Create from Request
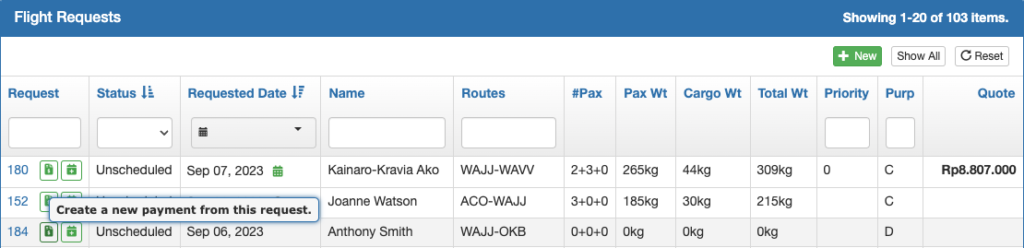
From the Flight Requests page click the green Payment icon next to the flight request.
Or from the Flight Request Detail, click on the Create Payment button.

If there is a passenger count or weight mismatch, a window will open offering two alternatives.
If you select Create From Totals, the Payment will use the total passenger weights and numbers that were manually entered. If you choose Create From Itemized, the Payment will be created using the itemized passenger weights and numbers.
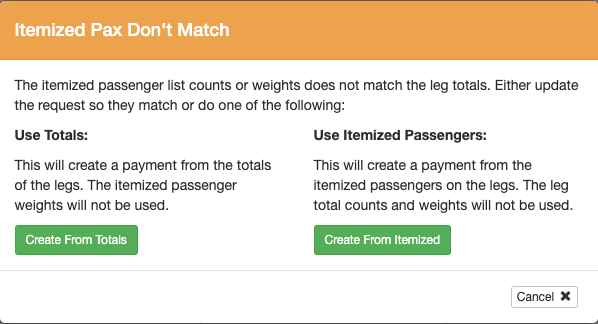
In both cases a new Payment will be created with all the information that was included in the request.
Method Four – Import from Request
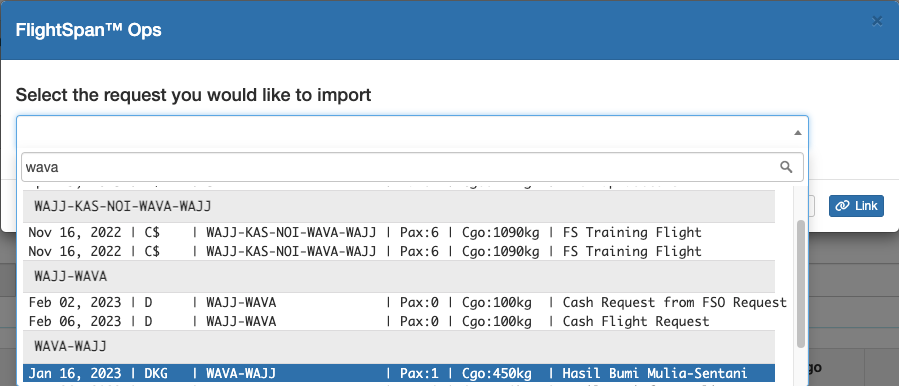
Open the New Payment page (as previously described) and click on the blue Import From Request button

Search using any of the available criteria – date, rate, destination, description, etc., select the desired flight request and click Link
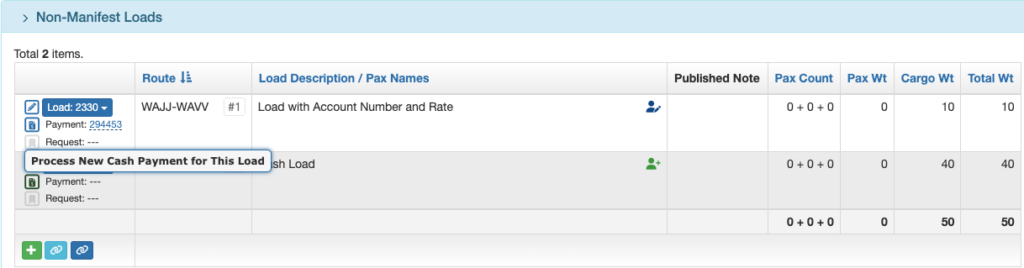
Method Five – From Non-Manifest Loads
From the non-manifest loads section of a Schedule Detail, click on the Payment icon. Loads with an account number and rate will immediately create the Payment and link it to the flight.
Loads without account and rate information will open the Payment Detail, and will automatically link to the flight once the cash receipt is printed.
Method Six – From Scheduling Calendar
This method happens automatically when the Flight Coordinator drags a flight request onto the schedule and adds it to a manifest if there is an account associated with the request. When asked if you want to create a manifest, select Yes.
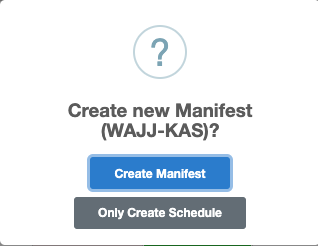
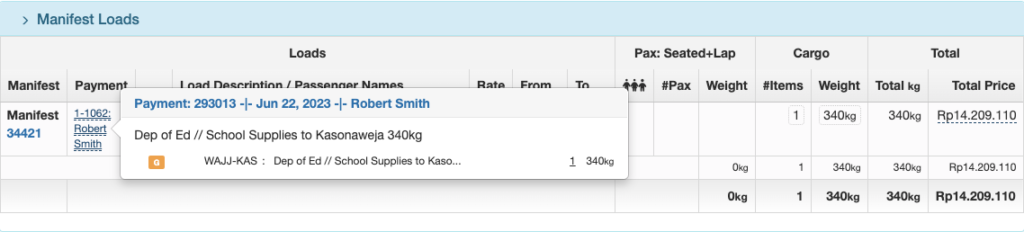
The Payment for the load will be created and the Payment number will be added to the manifest.
Note: Since a Manifest is a collection of loads departing from bases where manifests are used (perhaps to multiple destinations) this method should only be used when scheduling outbound flights. Click here for a complete description of Flight Manifests.
Method Seven – From DFR Upload
When a pilot has created loads on their DFR that have a valid account or cash receipt number, a Payment is automatically created for these loads when the pilot uploads that DFR from the EFB to FlightSpan™ Ops.

Method Eight – From Cash Deposit
If a DFR is uploaded with an invalid receipt number or other required information, it will appear below the Data Entry Required section on the printed DFR. Deposit the cash, entering the data from the DFR, and the Payment record will automatically be created.

Video Version