There are three required components for every flight – the flight itself, loads, and a payment record for each load. (Some loads may not have a payment record until the flight is completed and uploaded. At that point the record will be created automatically.) Each of these has its own unique record number. Depending on how the flight is requested or created, the process varies slightly for associating all three components. In this lesson we’ll look at creating just the flight. Creating loads and payment records will be covered in separate lessons.
Scheduling Payments and Requested Flights
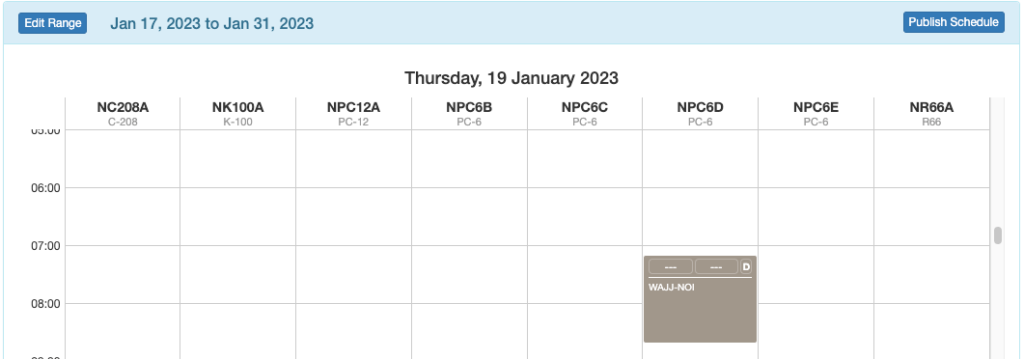
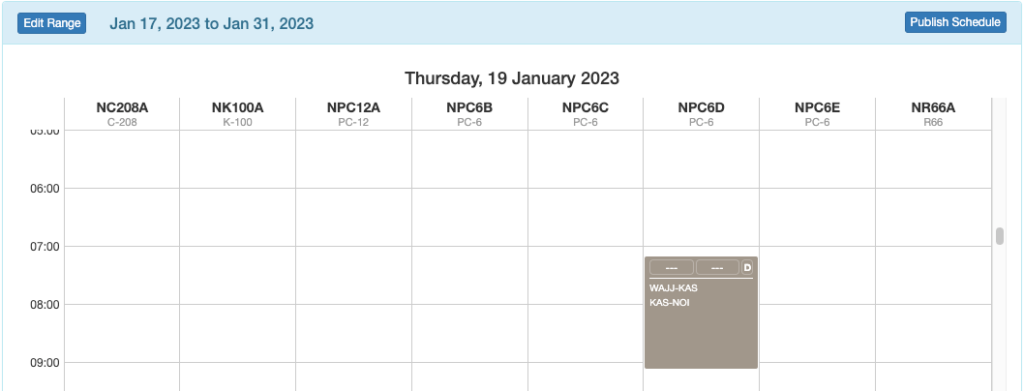
You can drag and drop a payment or a flight request from the request column to any date and any aircraft at 10 minute time increments on the calendar. The flight length on the calendar corresponds to the length of the flight plus the aircraft’s standard ground time between stops. The flight will be gray with a small D in the upper right corner to indicate the flight’s status is ‘Draft’.
Note: It is easiest to drop the request or payment into the correct column if you click on the center (left/right) of the request or payment.
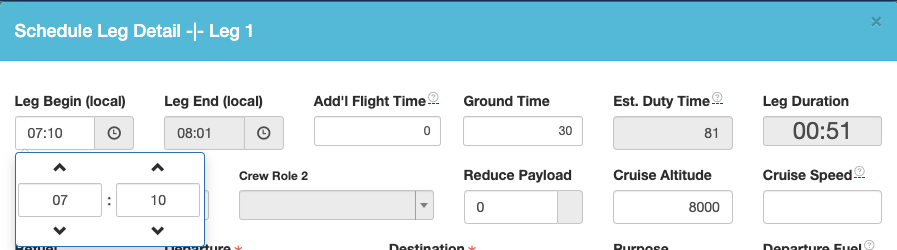
When in Week View, moving the cursor up or down in the day changes the hour in the pop-up.
After you drop the request or payment, you can adjust the time in ten minute increments by typing the time (e.g. 0910) or by using the up/down arrows on your keyboard. Select Create Schedule when the flight is at the desired time.

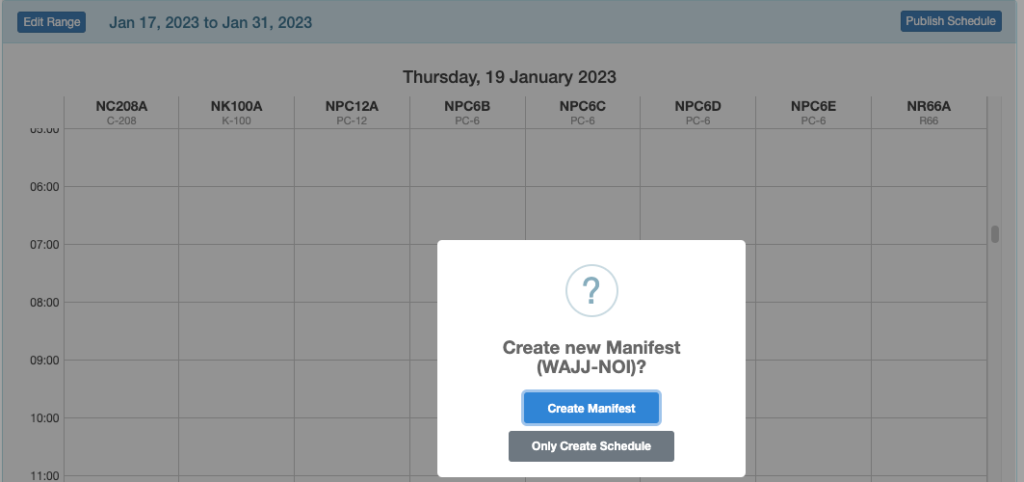
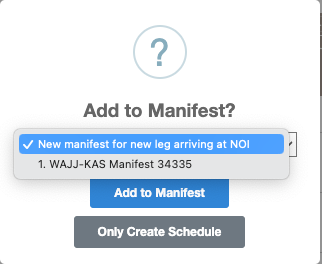
For payments or flight requests with an associated account number or payment record, when you drop the flight, FlightSpan™ Ops will ask whether or not you want to create a manifest. Manifests are explained in more detail here.
If you wish to combine more than one payment or flight request into one flight, drag and drop the additional payment(s) or flight request(s) on top of the first already scheduled flight. FlightSpan Ops will ask if you want to add the load to the manifest. You can add the new load to an existing manifest, create a new one, or add the load without a manifest.
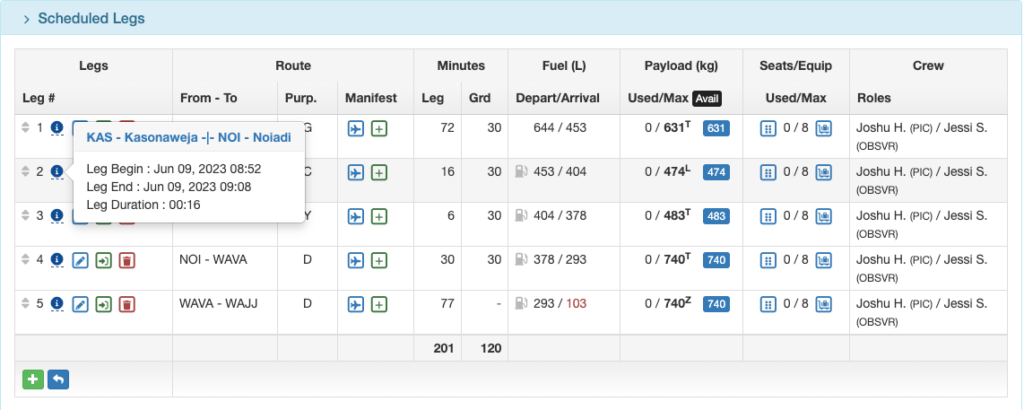
FlightSpan Ops will combine the flights in the most efficient manner possible. The flight will expand on the calendar to include estimated flight and ground times. In the example below, a flight request from WAJJ-NOI was dragged onto a flight from WAJJ-KAS.
You can override the routing created by FlightSpan Ops by clicking on one of the gray arrow icons and dragging the leg up or down.
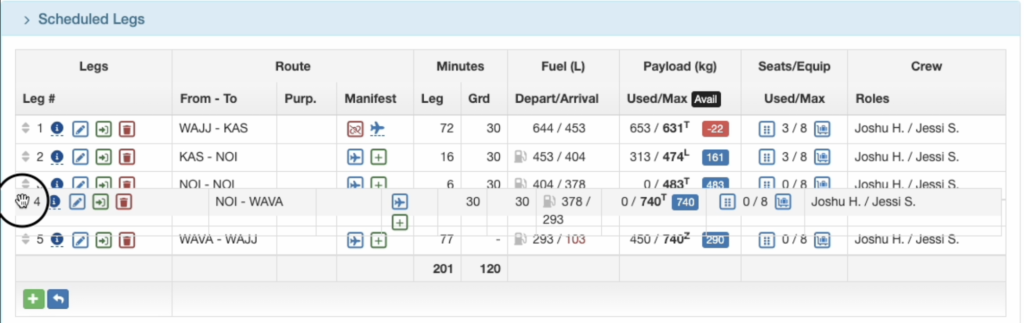
Note: You are dragging the destination airport to the new position, not the entire route.
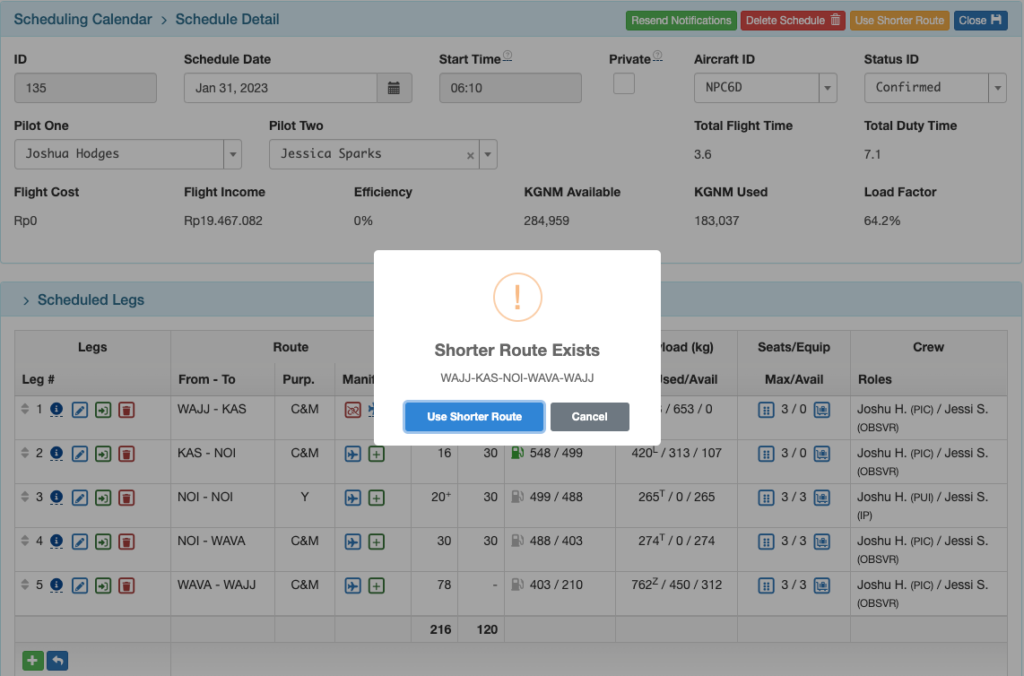
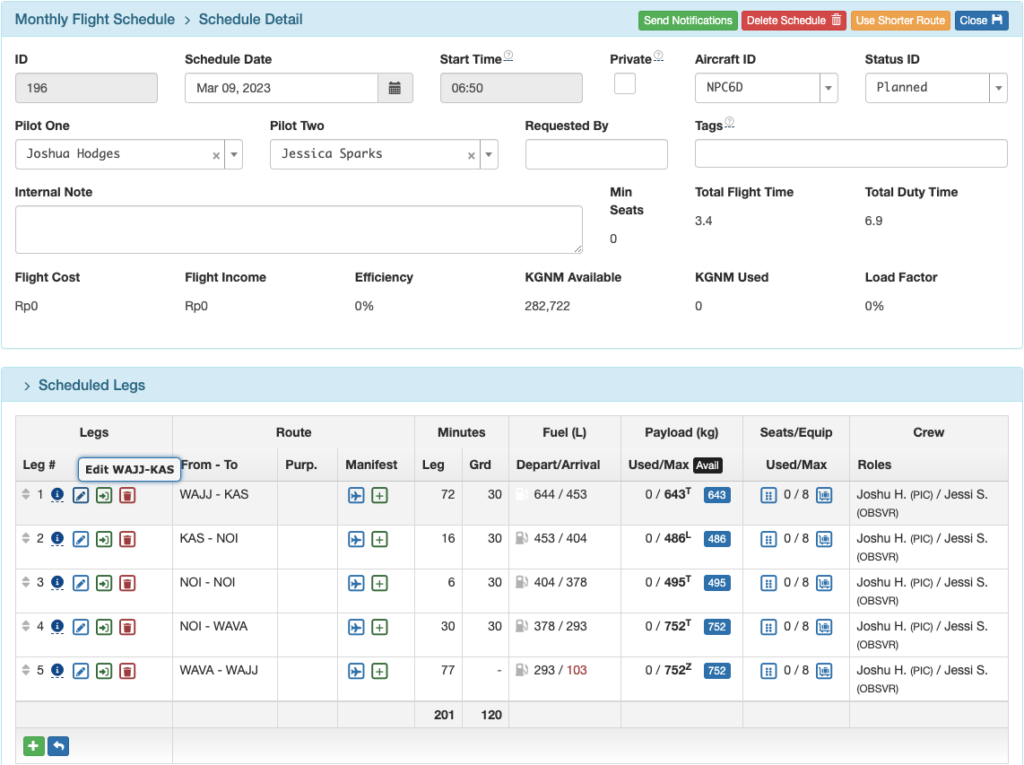
If a shorter route exists, a yellow Use Shorter Route button appears on the Schedule Detail page.

In this case, the shorter route would eliminate the training leg from NOI-NOI.
Change the departure time by dragging on the calendar, or from the Schedule Details by editing the departure time on the first leg of the flight.


Hover over the blue information buttons to get basic information about a leg.
Scheduling a Flight from Scratch
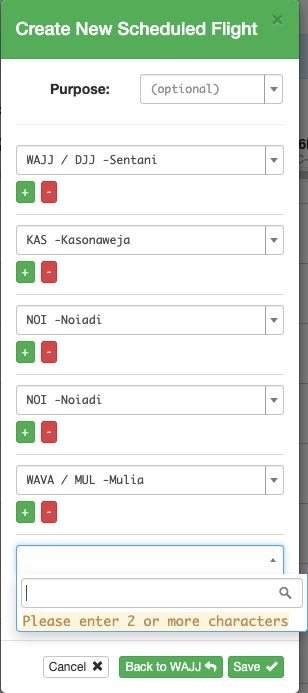
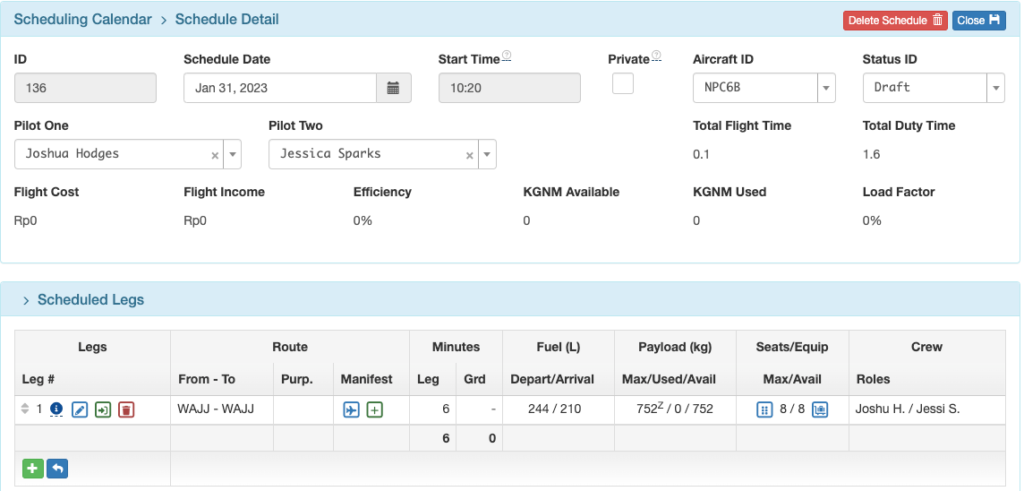
Double click on the Scheduling Calendar, and begin adding legs. The default route is home base to home base. Clicking on the Save or Back to home base buttons will open the Schedule Detail page with the date, time, and aircraft where you clicked pre-filled.
Add crew, and click on the pencil icon in the Scheduled Legs section to add crew roles. Click here for more details on crew assignment.
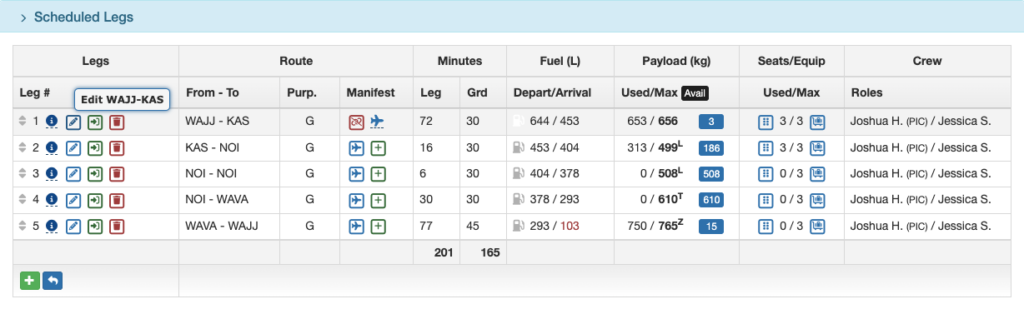
Add/Delete Legs
You can add more legs with the green plus button. The new leg will copy the purpose code, crew, etc. from the previous leg.
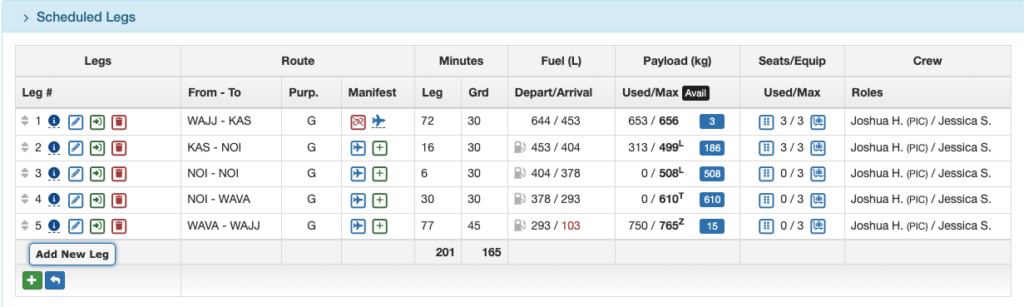
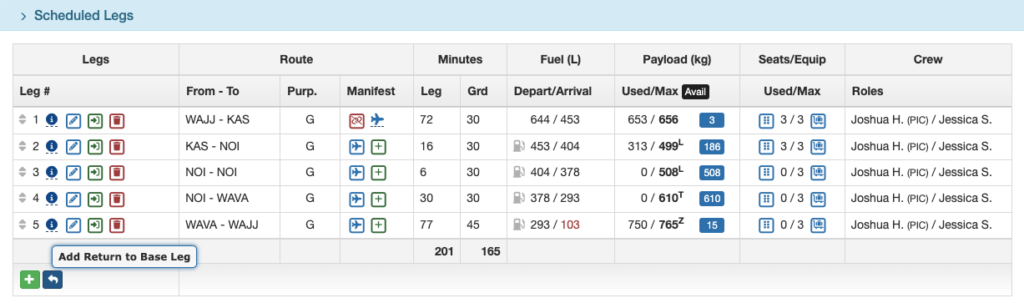
Clicking the blue back arrow will add a leg back to home base.
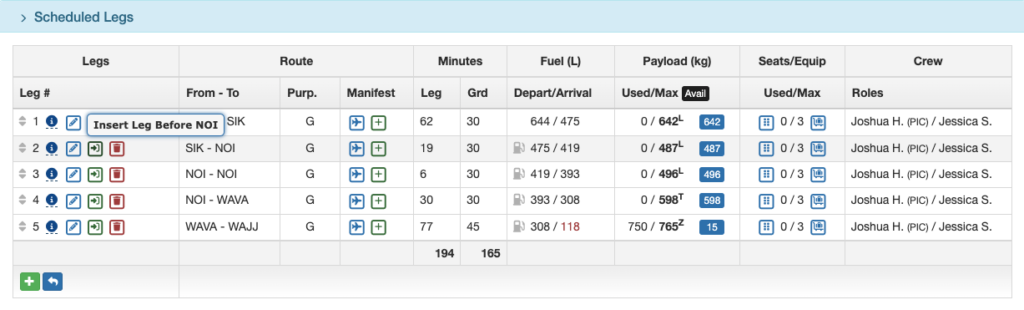
Insert a destination between the leg’s departure point and destination on legs 2 and following by clicking the green Insert button.
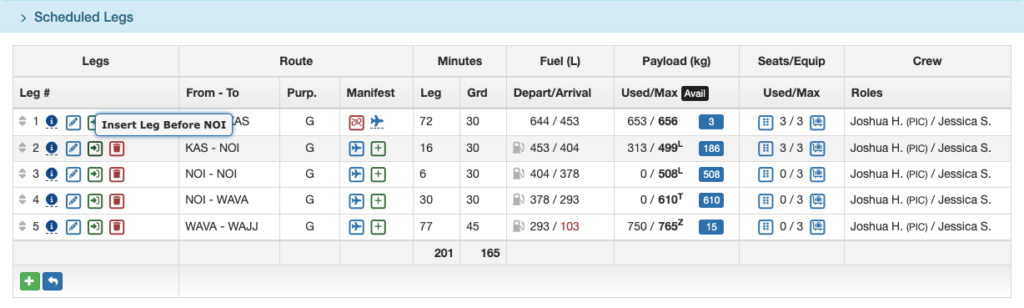
The insert button functions differently on Leg 1, allowing you to insert a new departure point prior to your original departure point.
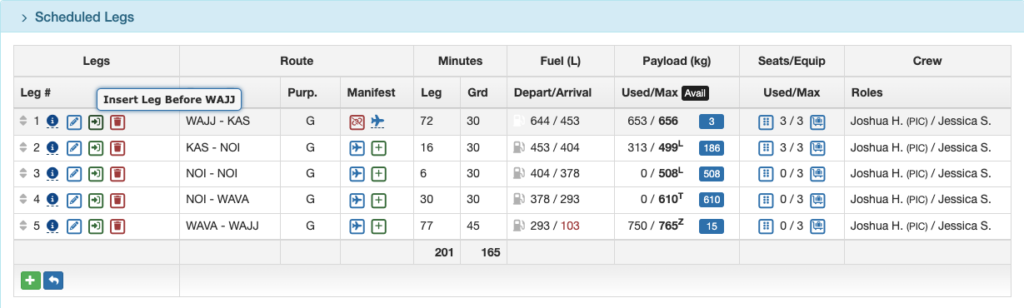
To insert a destination between the departure point and the original destination, first edit Leg 1 using the blue pencil icon.
Change the original destination to the new destination

Then use the green Insert button on Leg 2 to reinsert the original destination into the route.
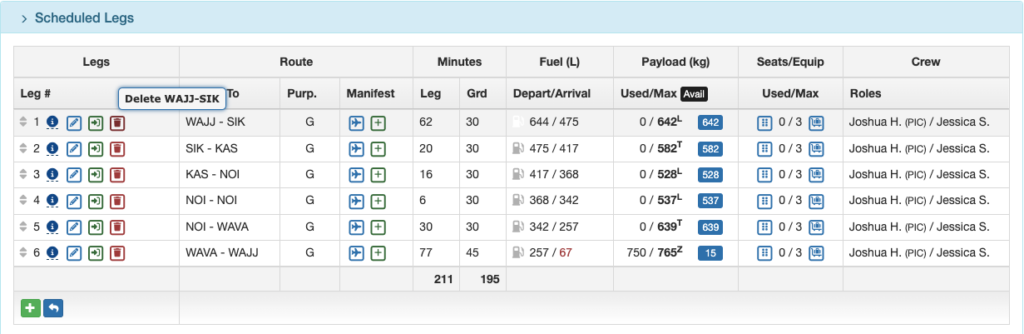
Delete the destination on a leg with the red trash can icon. In this case, SIK will be deleted from the route.
If local training is required, create a flight or add a leg from the departure point back to the same departure point.
Video Version