Customer accounts in FlightSpan™ may be charge/post-paid accounts (the default) or prepaid. Prepaid account customers can put funds on deposit on their account to maintain a credit balance with your company against which any flight charges they incur will be charged.
When creating a new prepaid account, change the Prepaid toggle to Yes.

Receiving Credits to Prepaid Accounts
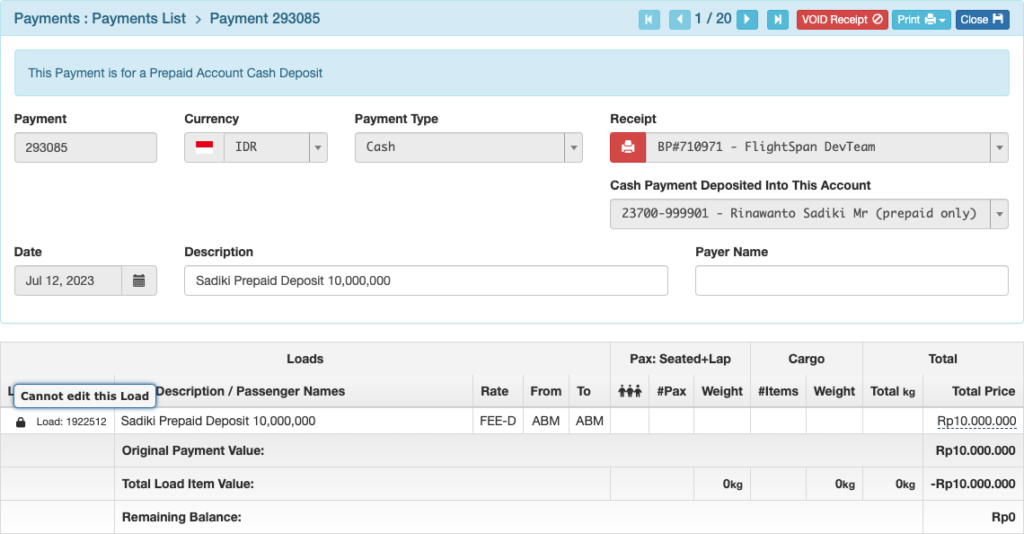
From the Payments menu, select New Prepaid Deposit.

Entering a rate for a prepaid deposit is a technical requirement for FlightSpan™ Ops to manage prepaid accounts properly. As a best practice select the Open Total rate that corresponds to the default rate for the account holder. In other words, if the account holder’s default rate is DOC, select the FEE-D rate. The Rate is associated with taxes and fees, and is later associated with different payment reports to determine for what purpose the funds were deposited. Only Open Total (manually entered) rates are available to choose from because that allows you to specify any amount (which is what you need to make a deposit of any amount).

Select the currency of the payment, the payment method, and the payment amount. Enter the transaction details appropriate for the payment method, and select the account that should be credited. Enter the date and a description of the purpose for the prepayment. Payer name is optional.

After saving, if needed click the blue pencil icon to edit the load.
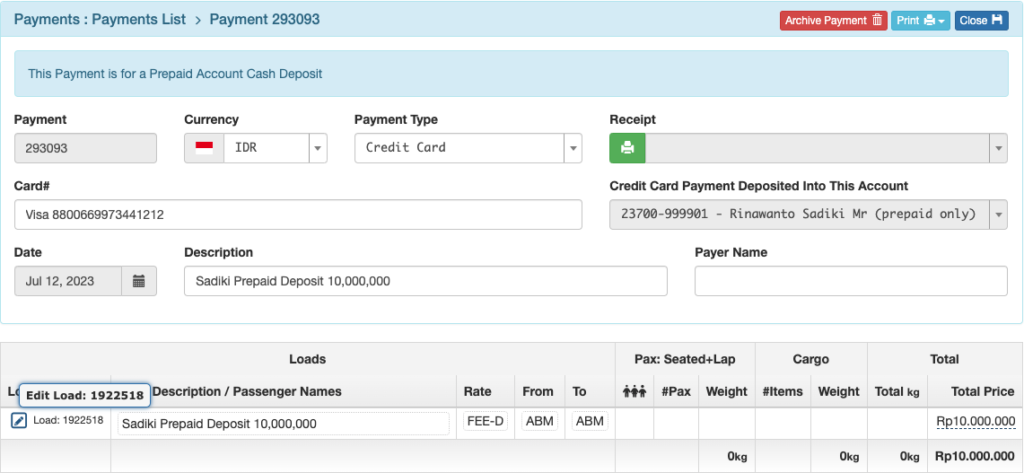
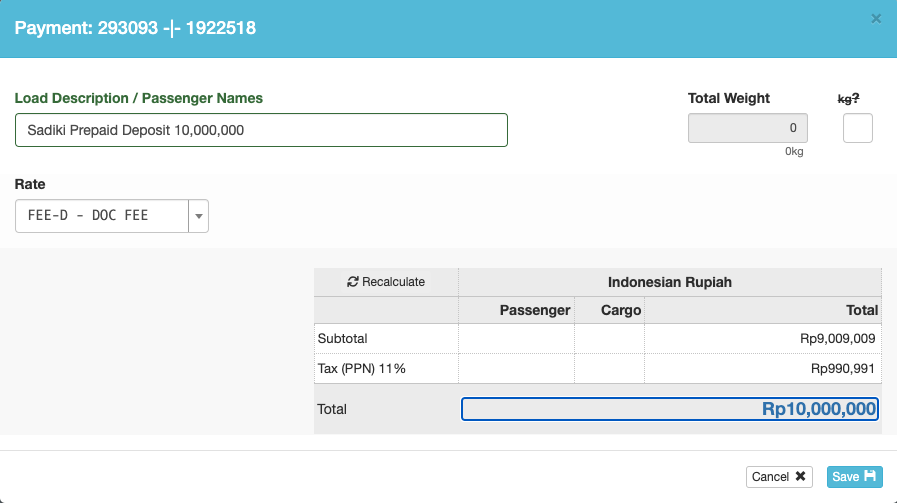
Edit description, rate, or amount.
Print the receipt using either the green print button or select Cash Receipt under the Print menu.
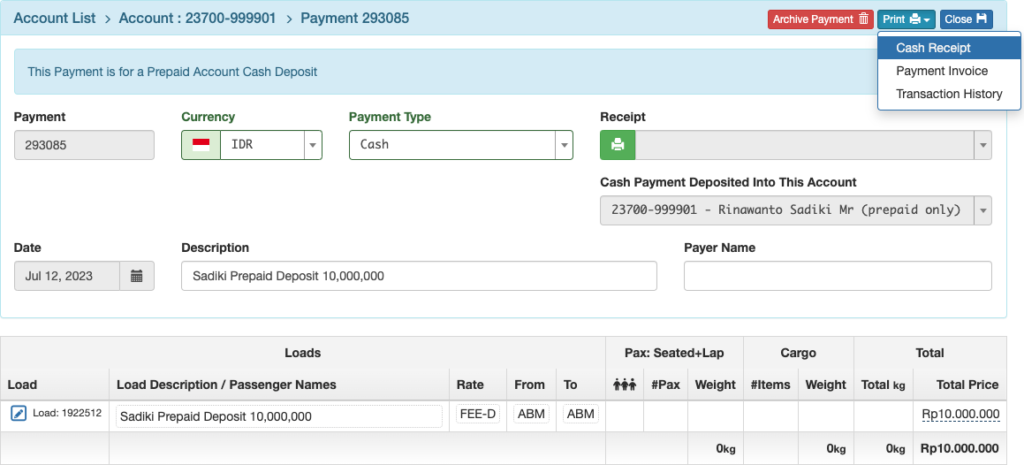
Once the receipt is printed, the load can no longer be edited.
Balance Adjustments
With the appropriate role permission, it’s possible to adjust a customer’s prepaid balance from their account page. For example, when your company is first transitioning to FlightSpan™ Ops and a customer has an existing prepaid balance, you may need to create an opening balance adjustment. As a best practice, the role permission to create a balance adjustment should be limited to a few high-level administrators.

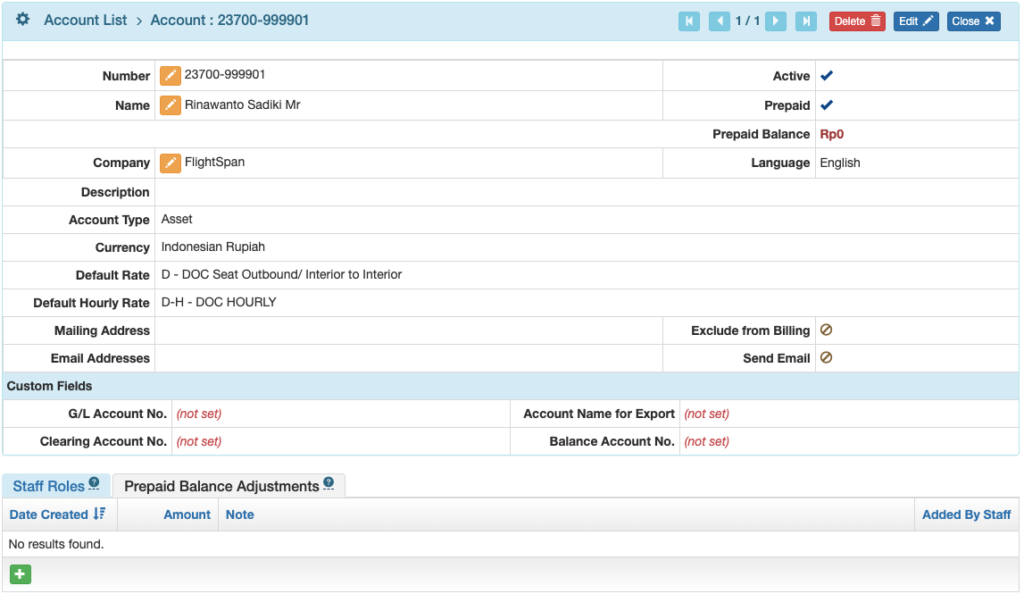
From the Account List, search for and open the desired account by clicking on the account number.

Select the Prepaid Balance Adjustments tab and click the green plus button.
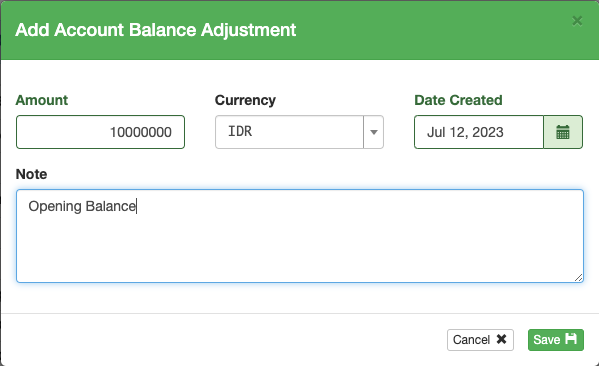
Select the currency, the amount of the adjustment, date, and description, then save.
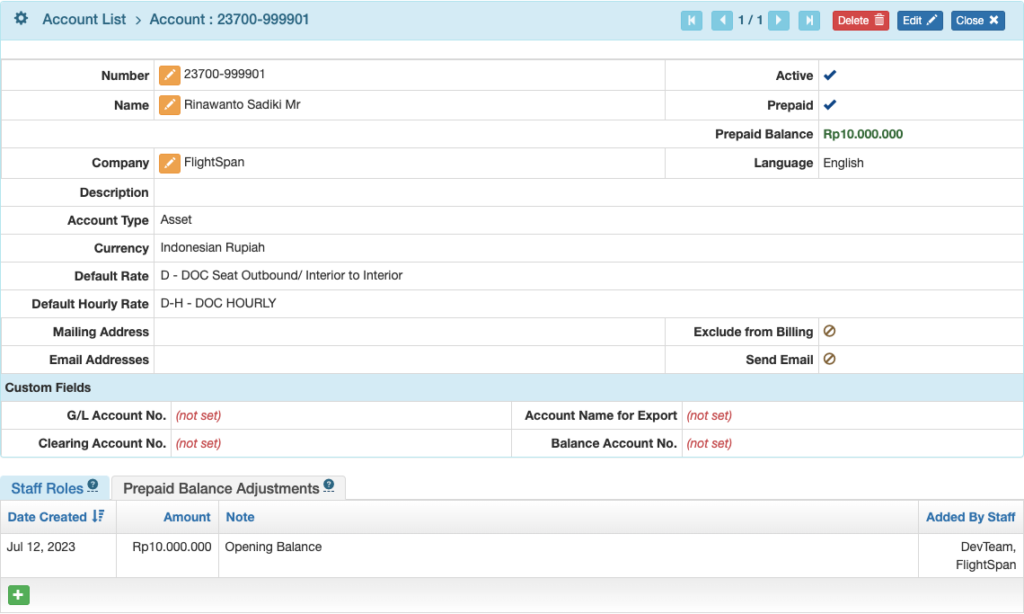
Once an account adjustment is entered, a permanent change history is maintained under the Prepaid Balance Adjustment tab.
Note: Since funds are held outside of FlightSpan™ Ops, if you are refunding money the refund receipt and any other documentation will need to be done through your accounting system.
Charging Prepaid Accounts
Create a Payment Load using any of the methods described in Creating Payments.
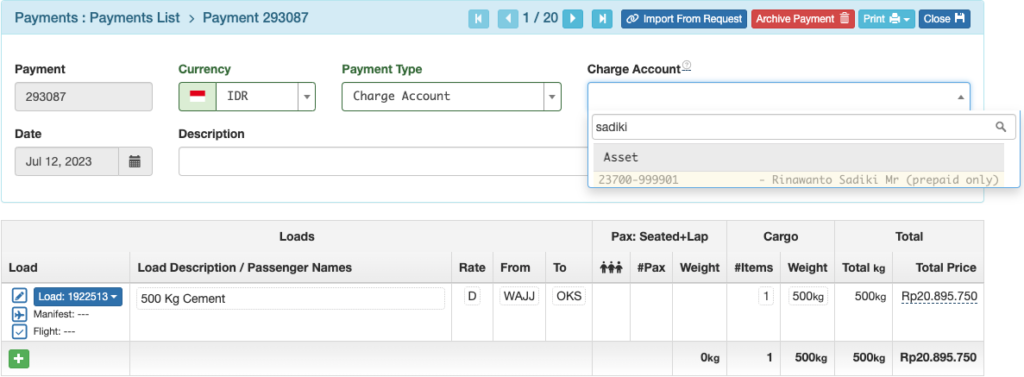
If you are creating a new payment, select Charge Account as the payment method, and choose the appropriate prepaid account. The account balance is displayed above the account field.

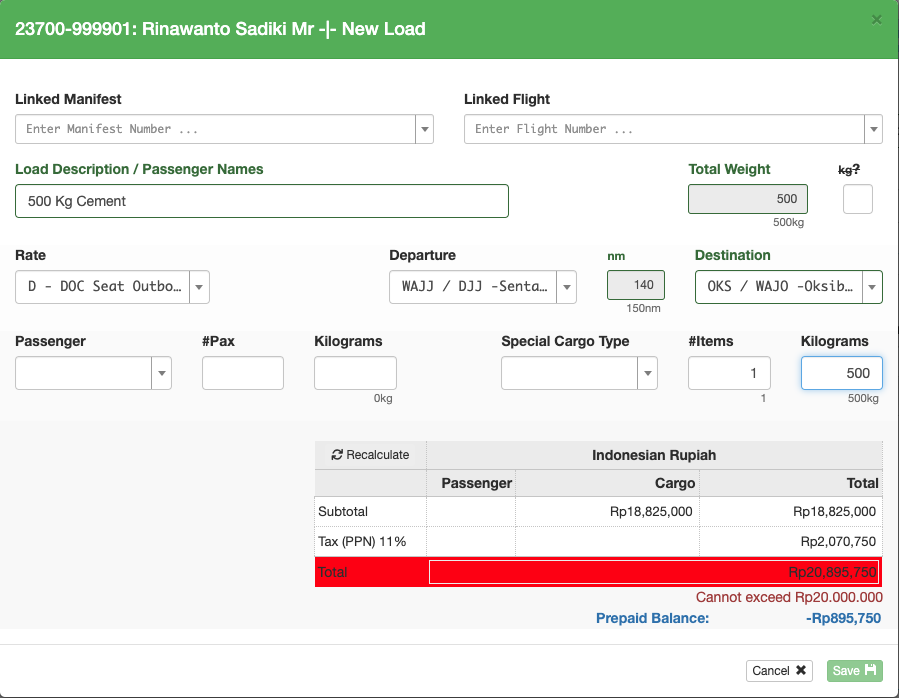
It will only be possible to create the Payment if there are sufficient funds in the prepaid account for the load. If you attempt to create a payment load that exceeds the prepaid amount, the total will be red, and it won’t be possible to save the payment.
If you create a load using a cash-type payment, then attempt to switch to a prepaid account and there are insufficient funds, the prepaid account can’t be selected.
Video Version
