Flight Requests
A customer flight request is normally where the Planning a Flight phase of flight coordinating begins.
Flight Requests Page
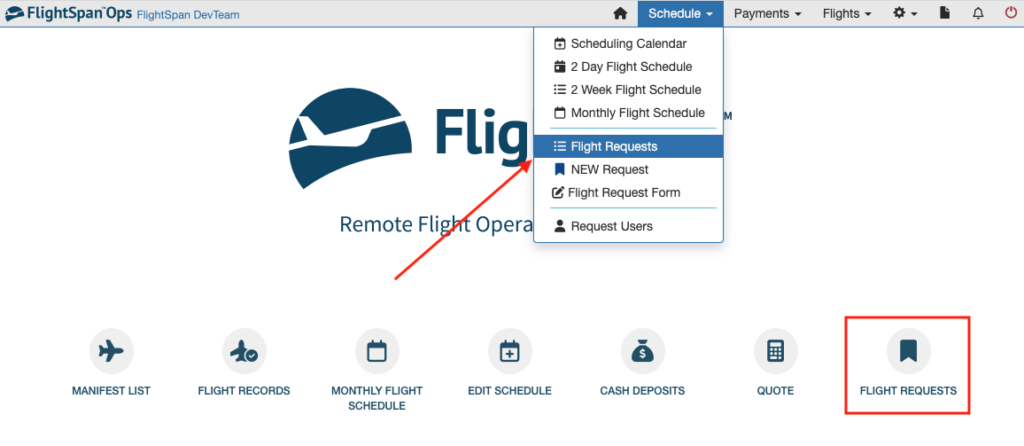
First we’ll look at how FlightSpan™ Ops organizes all the flight requests that come in. Access the Flight Requests page from the Home page if you have added the shortcut, or from any page select Flight Requests from the Schedule menu at the top.
By default unscheduled flight requests with the earliest requested flight date are listed first, followed by partially scheduled requests, then by requests that have been put on a manifest, by scheduled requests, and finally by flown requests, all with the earliest requested flight date first.
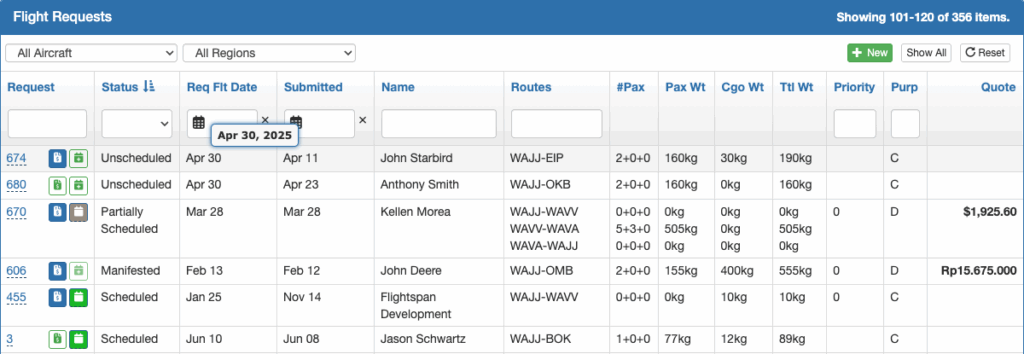
Requests can be filtered by aircraft type or region from the dropdown lists at the top of the header.

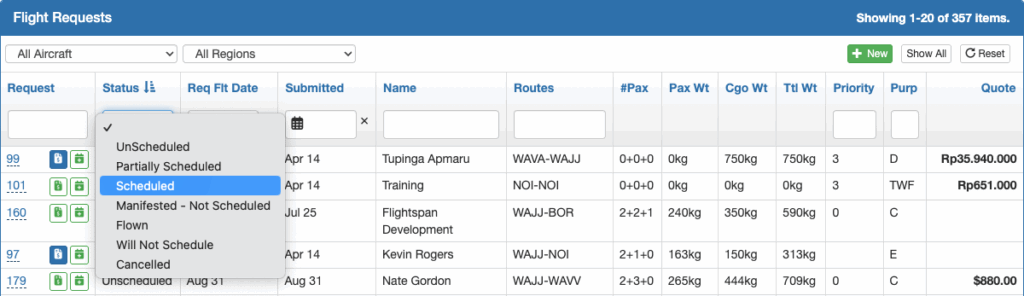
Requests can also be filtered by Status, a range of requested flight dates, or a range of dates the requests were submitted, can be searched using the search boxes at the top of each column, and sorted by clicking on any of the blue column headers. Use the Reset button to restore the defaults.
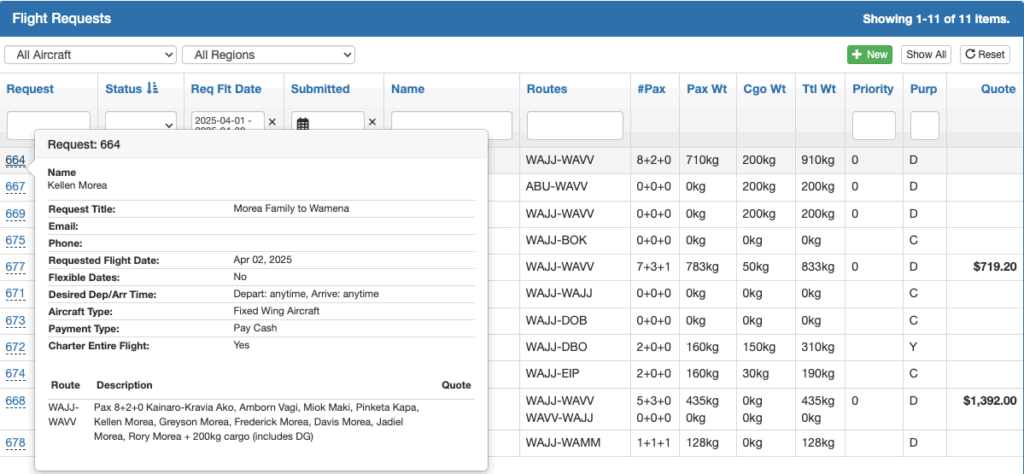
Hover over the blue request number for more information, and click on the number to open the Request Detail.
Click on a green Payment icon to create a Payment from the request; hover over a blue Payment icon to view an existing Payment record number, and click to open the Payment Detail.
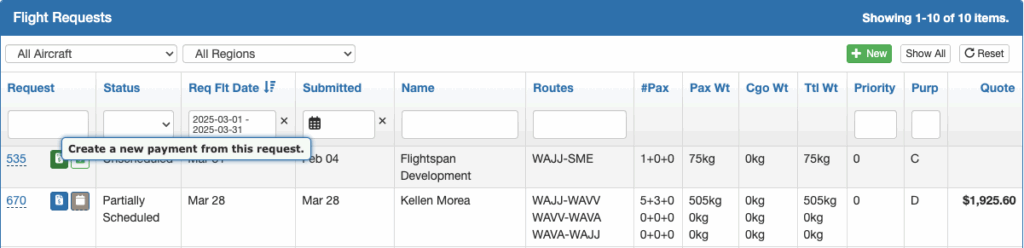
Schedule icons are color coded to indicate the schedule status.
- Green with White Background = Unscheduled
- Gray = Draft
- Light Green = Planned
- Dark Green = Confirmed
- Brown = Cancelled
- Blue = Flown
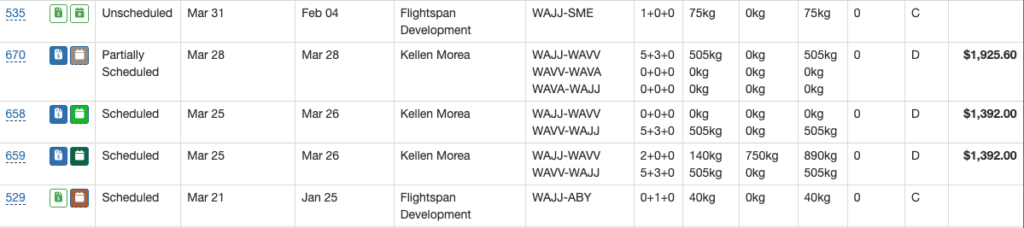
Click on a green with white background Schedule icon to create a scheduled flight from the request; hover over Schedule icons to view existing schedule information, and click on the icon to open the Schedule Detail.
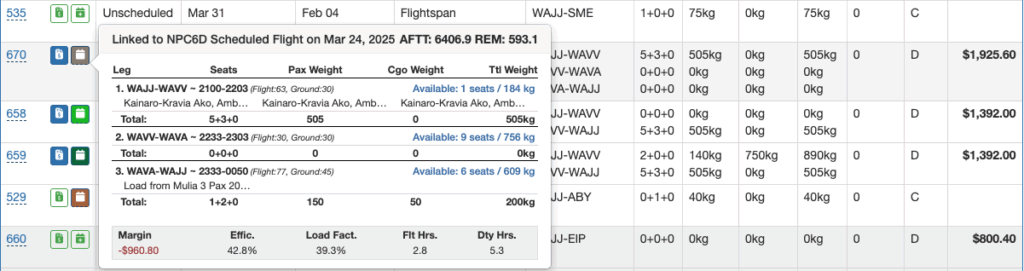
Hover over a small green calendar icon to view flex dates.

And hover over the brown Alert icon to view connecting flight details.

Creating Flight Requests
Flight requests may be created in four different ways. First, customers may submit a flight request through the public portal. Second, requests may be created from a Quote. Third, request packages may be designed and submitted. Creating request packages is covered in the next lesson. And four, the flight coordinator or their designee may create a new request, as follows.
The NEW Request link under the Schedule menu will take you to the New Flight Request page.
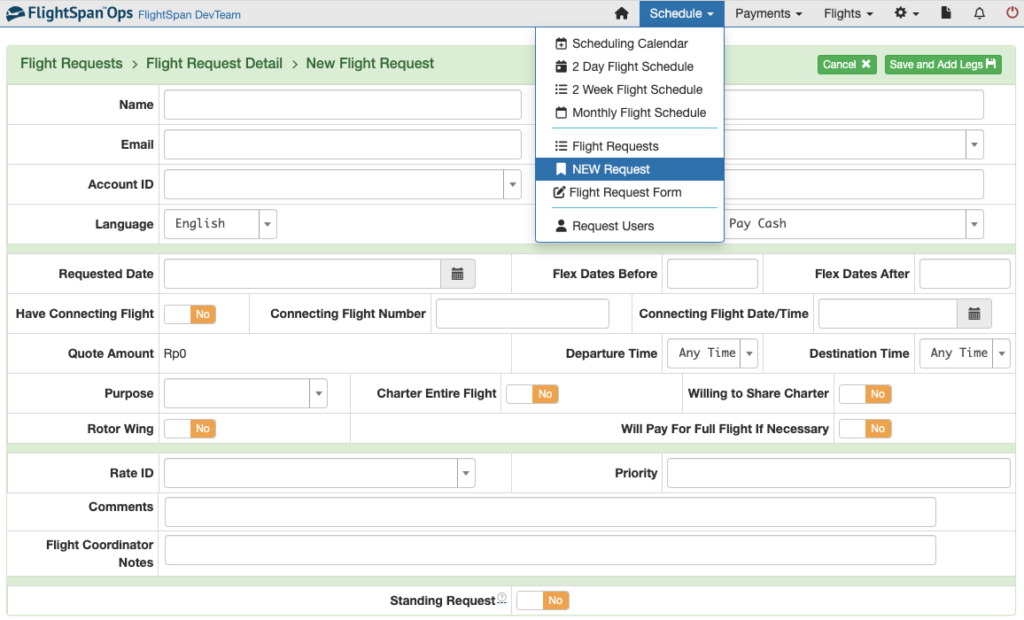
Or from the Flight Requests page, click on the green +New button.

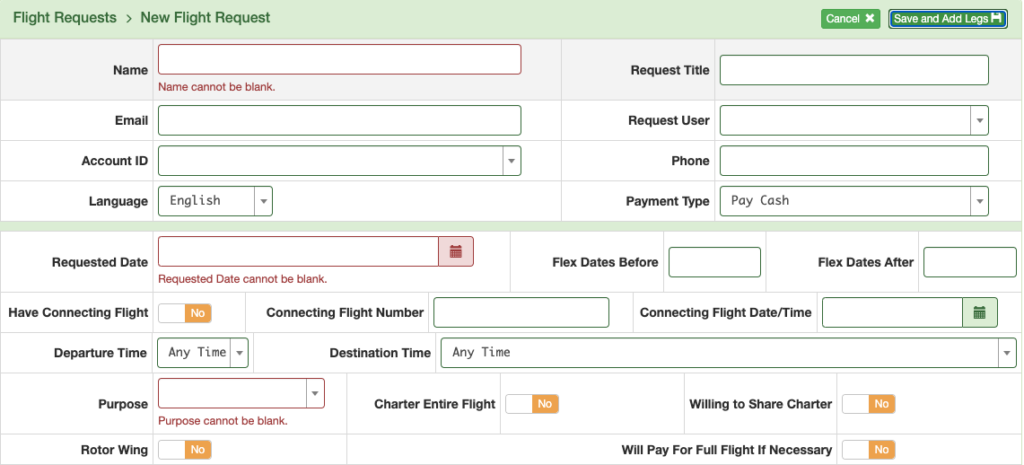
Only certain fields are required, but the more detail that can be added the better, since details the pilot or the flight coordinator needs that aren’t included now will have to be added later by the pilot or by the flight record checker after the flight.
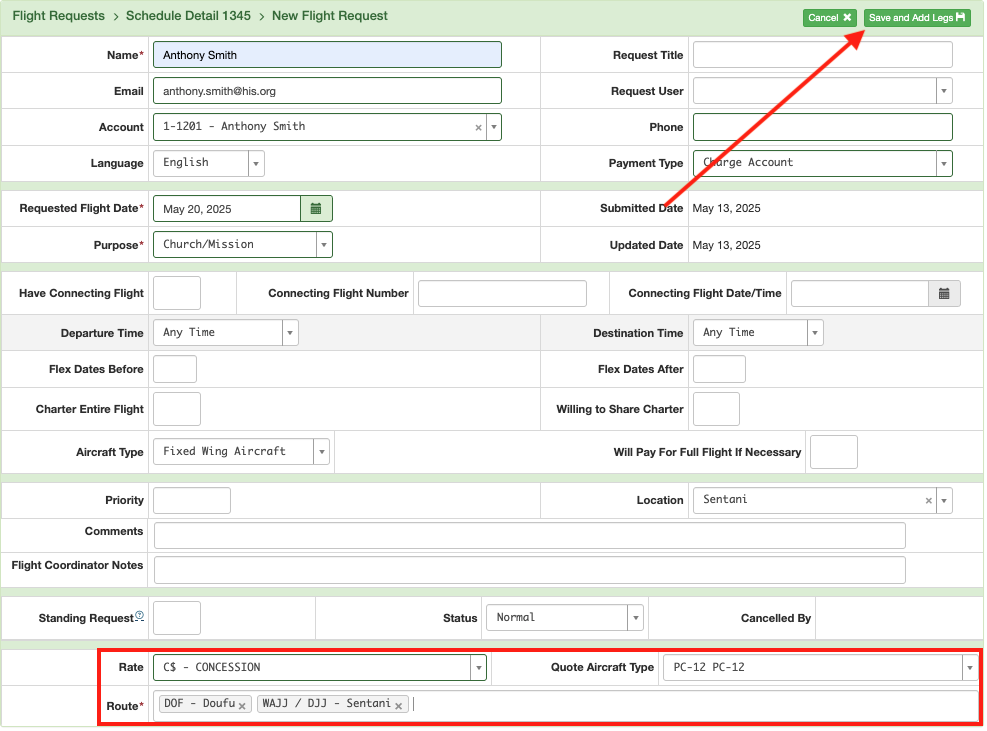
If you want to use the same request repeatedly (for example, a flight to the capital city that is flown regularly) set the Standing Request toggle to Yes, and the request will stay in the Flight Requests section of the main flight scheduling calendar.

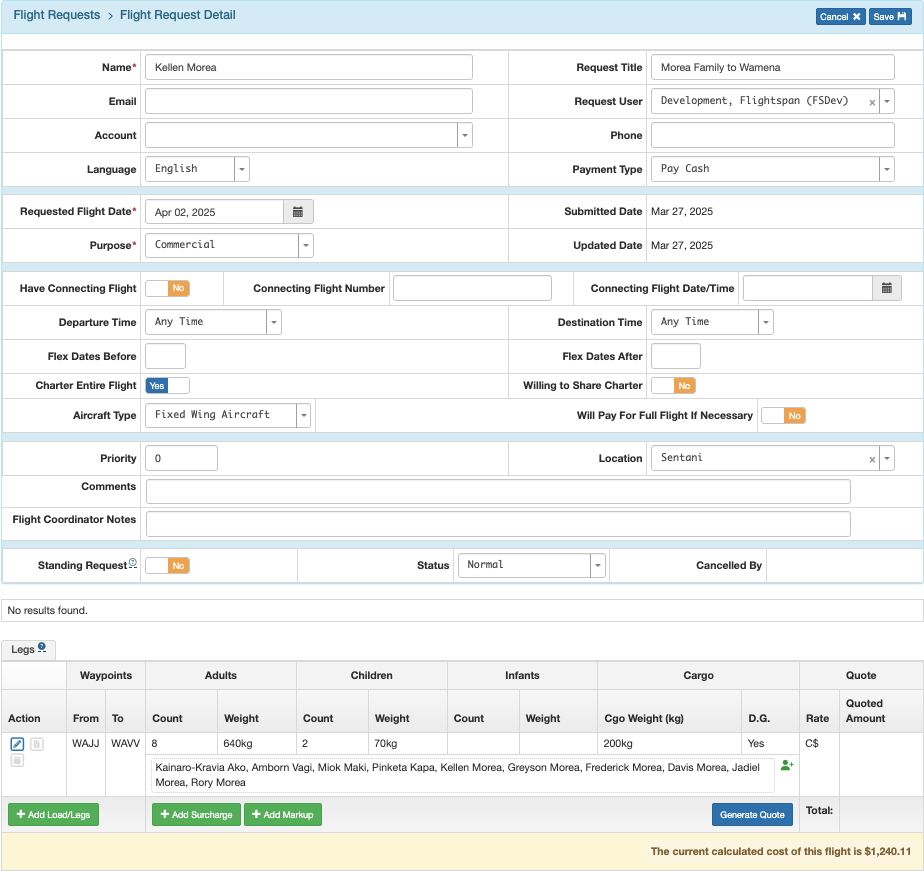
Enter the rate and route on the bottom rows. If an account has an associated rate, the default rate will be automatically selected. If it’s a charter/time based rate, be sure to select the correct aircraft type. Then click Save and Add Legs.
If you will be itemizing passengers, click the green Add Passenger Details button and add passengers as described in the Passenger Information documentation.
Passenger counts and weights will be automatically updated.

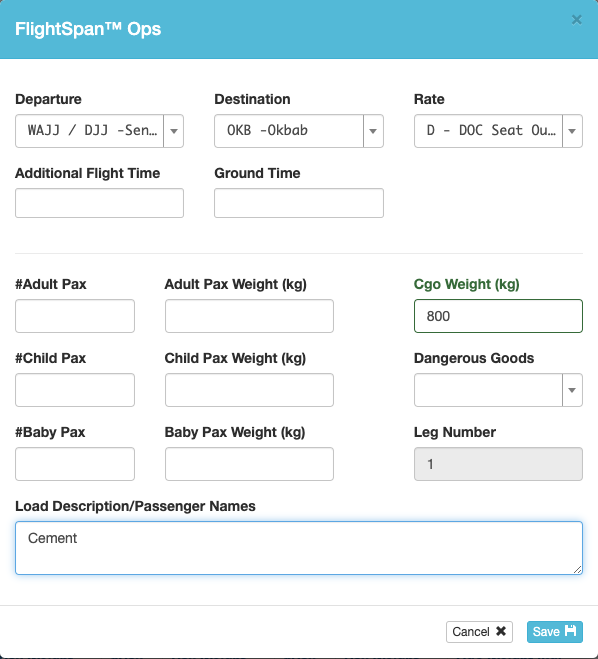
If you will not be itemizing passengers, or if you need to add cargo loading, click the blue pencil icon to edit the leg details.

Enter the load details. If passengers are added, weight and name cannot be left blank.
If you add passengers when editing the leg, then later itemize passengers and there is a passenger count or weight mismatch, there will be a warning flag. Hover over the flag for details.
Correct the mismatch manually by editing the leg or by itemizing passengers. Or the mismatch can be resolved later when a Payment is created.

Use the green buttons to add Load/Legs (additional loading on another leg), Surcharges, and Markups.
If an additional leg is needed on a different day, it must be submitted as a separate flight request.

Once you save the load and leg, the new flight request will be added to the Flight Requests page and the Requests section of the scheduling calendar.

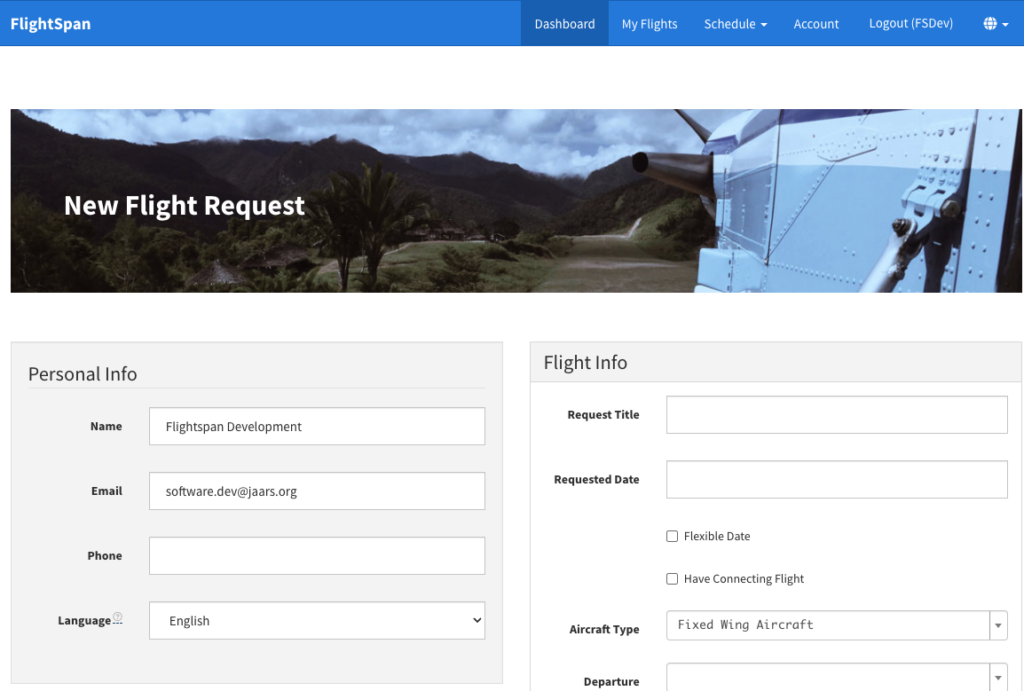
If you prefer, you can use the same flight request form that customers use by clicking the Flight Request Form button.
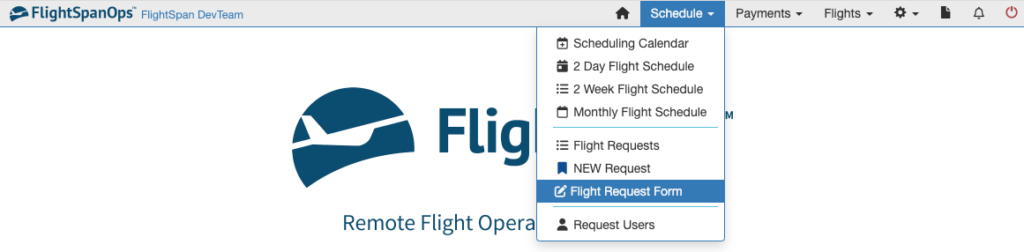
This form requires the same information; it just provides a different user interface that FlightSpan Ops users may find more user friendly than the previous method. Click Dashboard to return to the Home page.
Note: The Duplicate, Split, Add Surcharge, and Add Markup functions are not available.
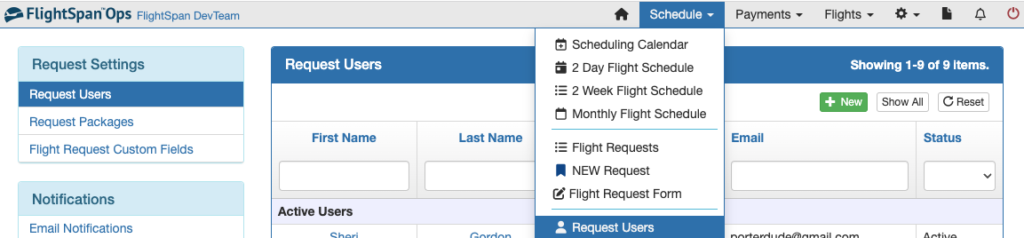
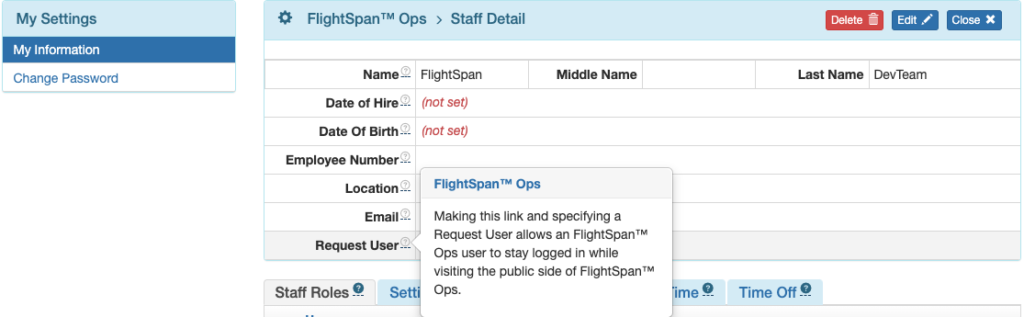
In order to use the customer flight request form, you’ll need to first create a Request User account,
Then link your FlightSpan Ops user account to your flight request user account from My Settings/My Information.

Search for your user name in the Request User field.
Cancel or Delete Flight Request
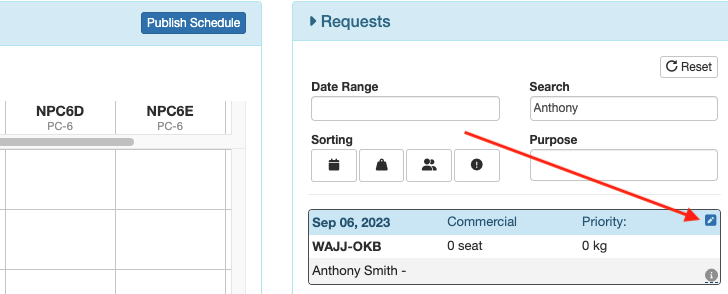
Open the Request Detail from the Flight Requests page or from the Scheduling Calendar by clicking on the small blue pencil icon.
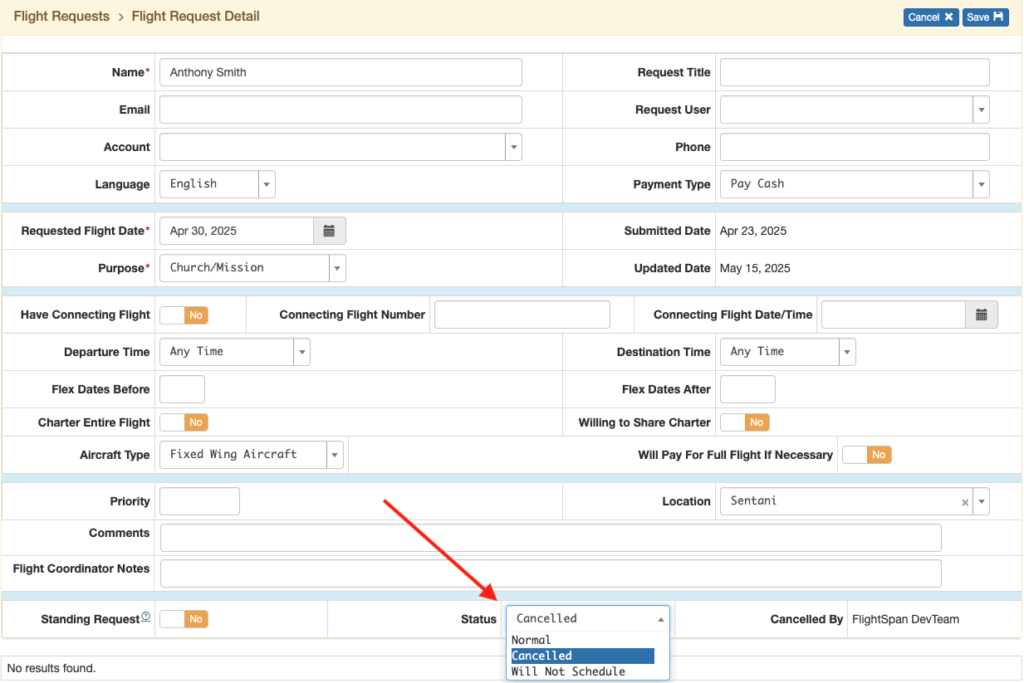
If you click on the yellow Cancel button, the request will be removed from the scheduling calendar, but will remain in the Requests list with a Cancelled status.

The request may be made active again by selecting Edit, then changing the status back to Normal.
If you use the red Delete button, the request will no longer be accessible in FlightSpan Ops.

Duplicate and Split Flight Request
If you click Duplicate, the flight request will be duplicated, and a confirmation message will appear with a link to the new flight request.

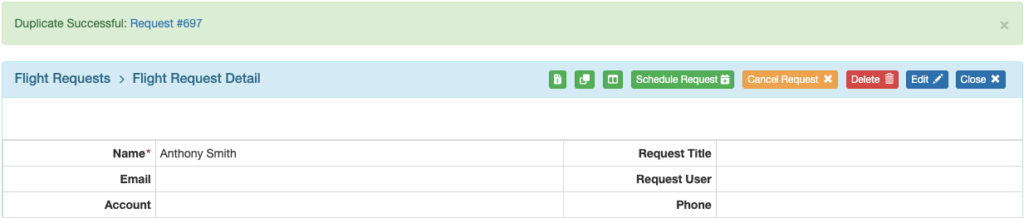
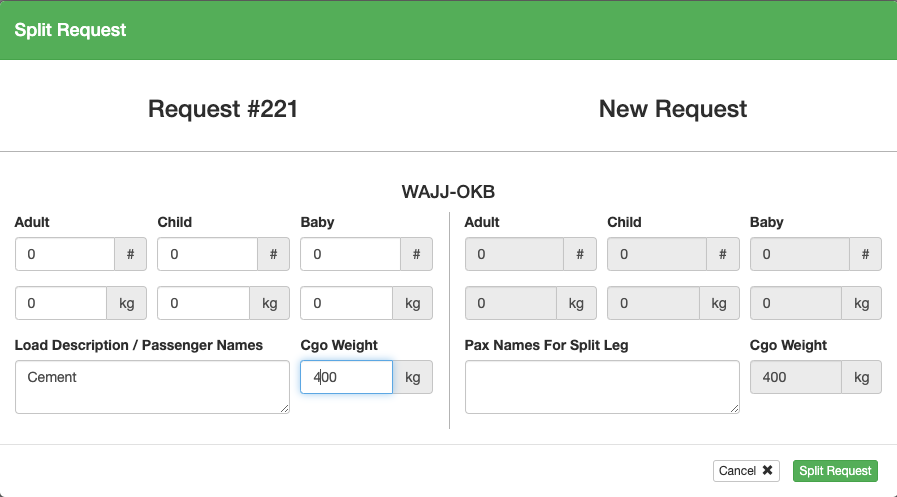
If you use the Split button, set the number of passengers and cargo on the existing request, and the new request will automatically be filled with the remaining load, and a confirmation message will appear with a link to the new flight request.

The Create Payment button will create a Payment using the details of the Flight Request as described in the Creating Payments documentation.

Video Version