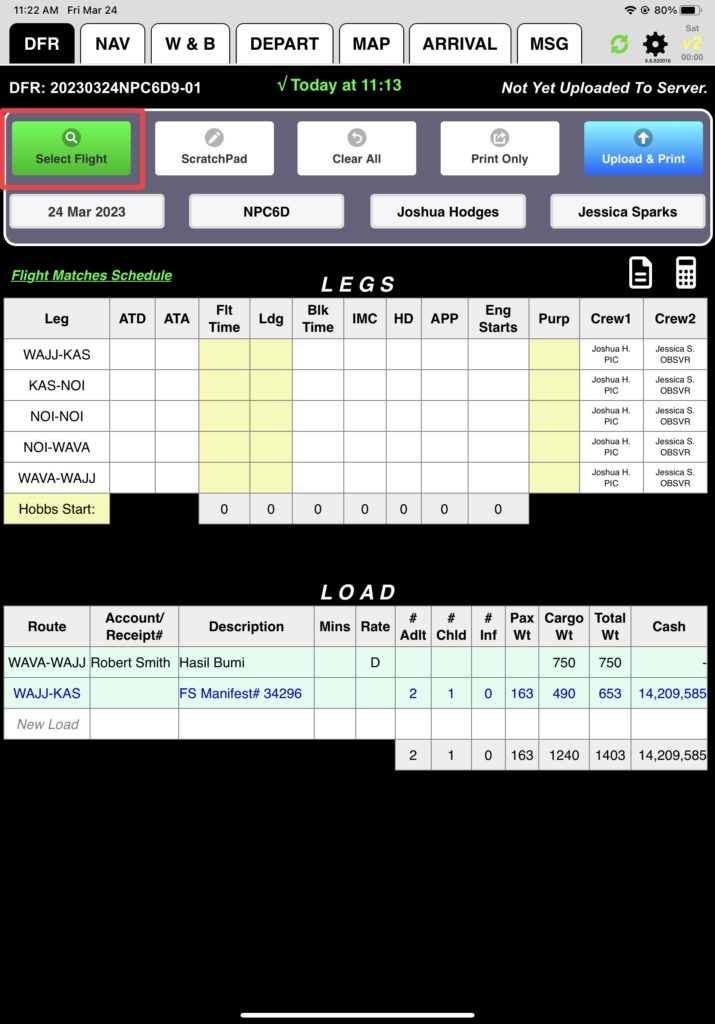
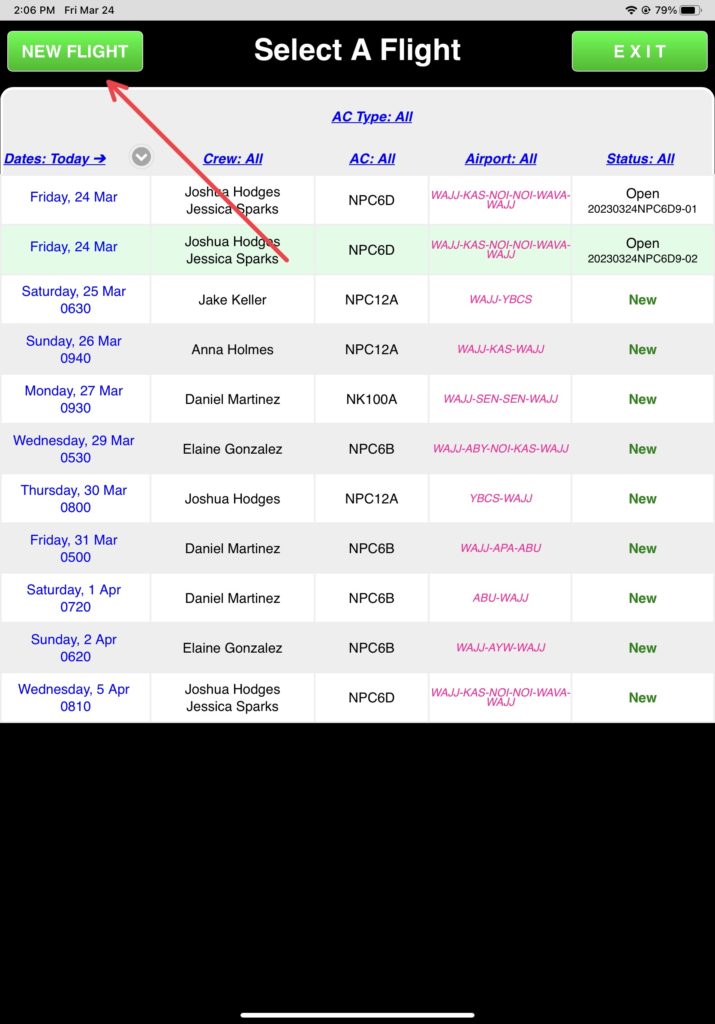
Next create the same flight manually. Tap the Select Flight button, then the New Flight button.
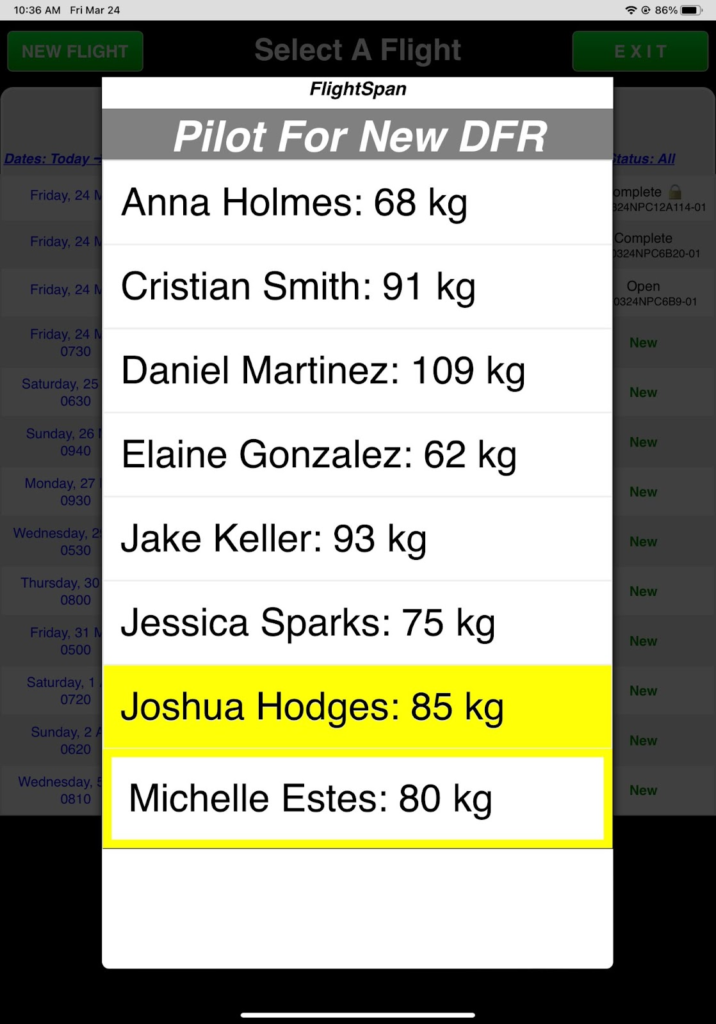
Select Joshua Hodges as the pilot.
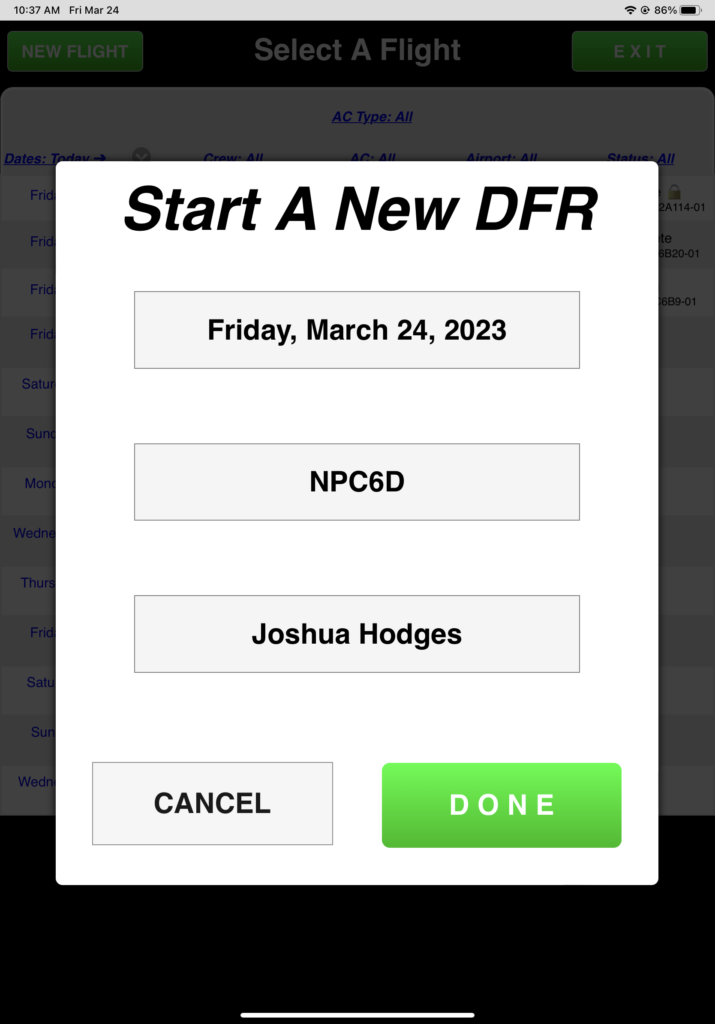
Set the desired date, select NPC6D, and verify the pilot from the Start A New DFR screen. Make any necessary changes and tap Done.
If you change aircraft types, a warning message will appear.

Note: Once you have created a DFR using one aircraft type, you can switch to another aircraft of the same type, but you can’t change to a different aircraft type.
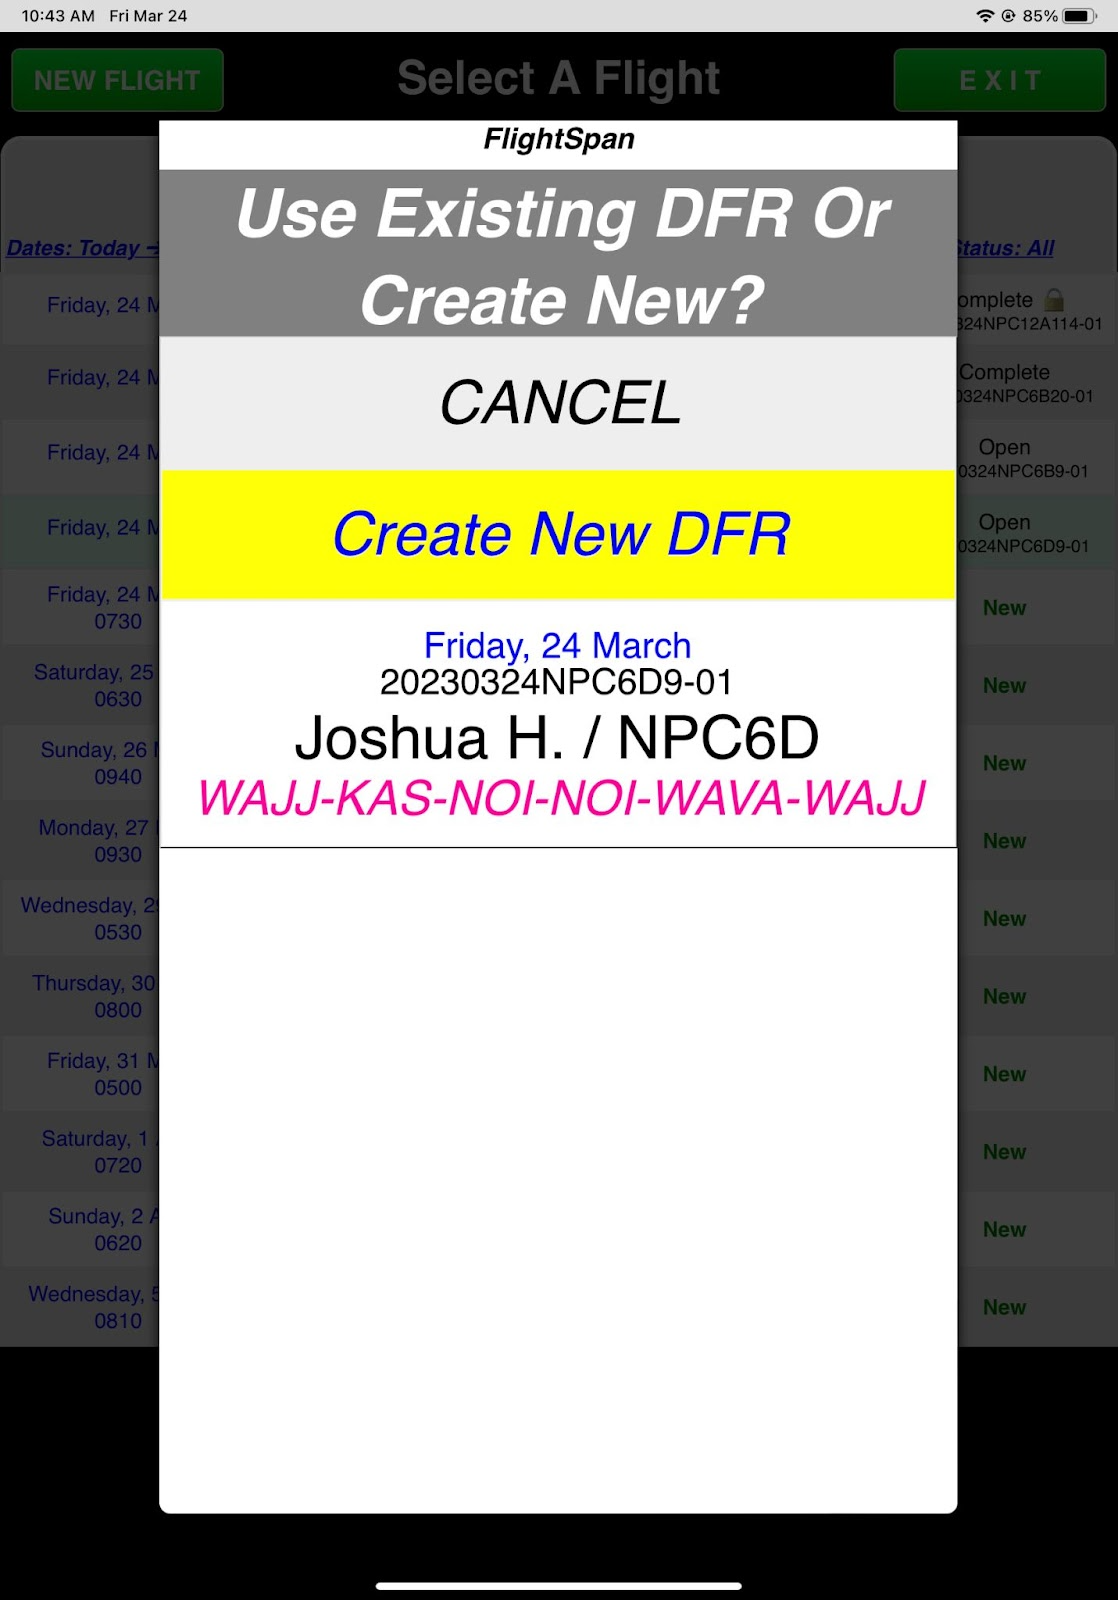
If you selected a pilot for which you already have a DFR on that day, decide whether to modify the existing DFR or create a new one. Select Create New DFR.
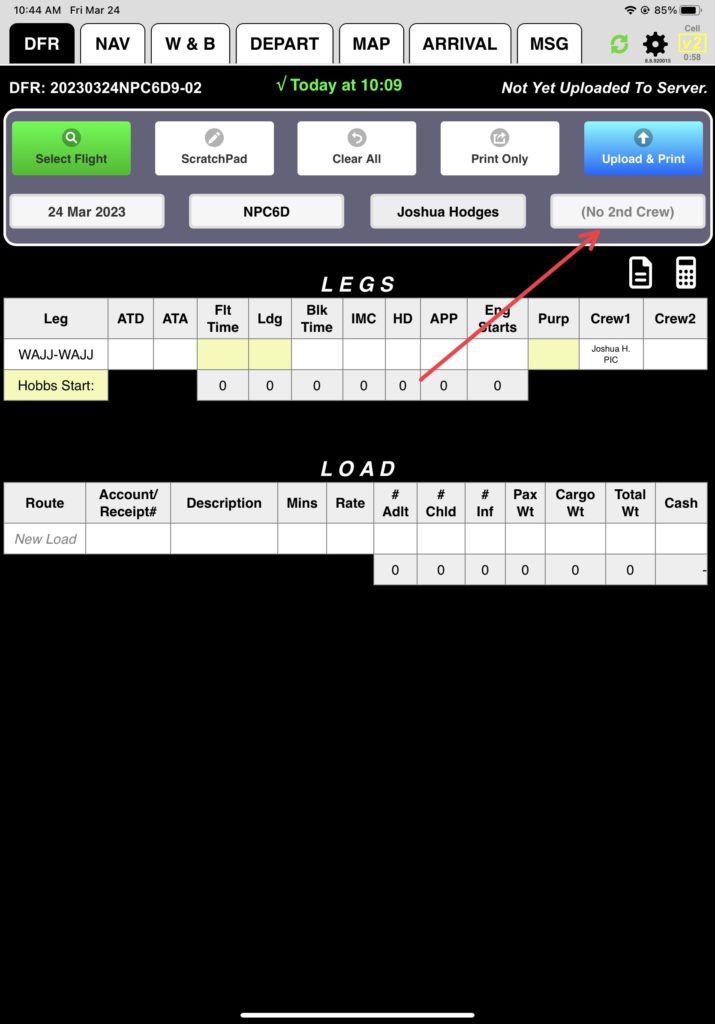
Add Jessica as Crew 2 by tapping the (No 2nd Crew) button,
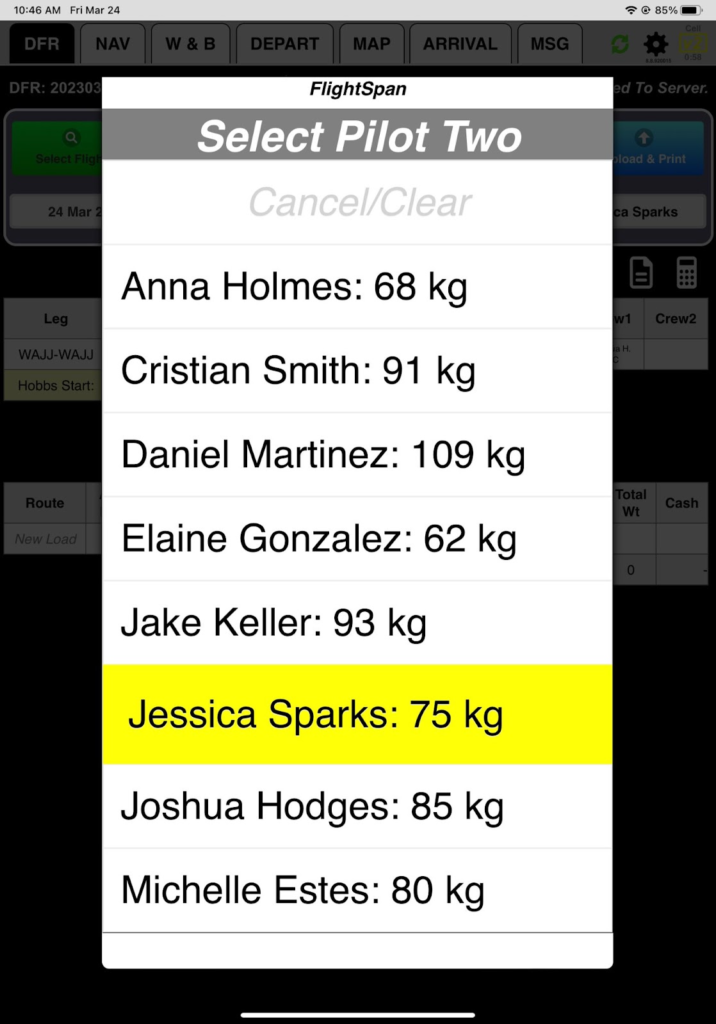
Selecting her name,
Confirming you want her as Crew 2 on all the legs,
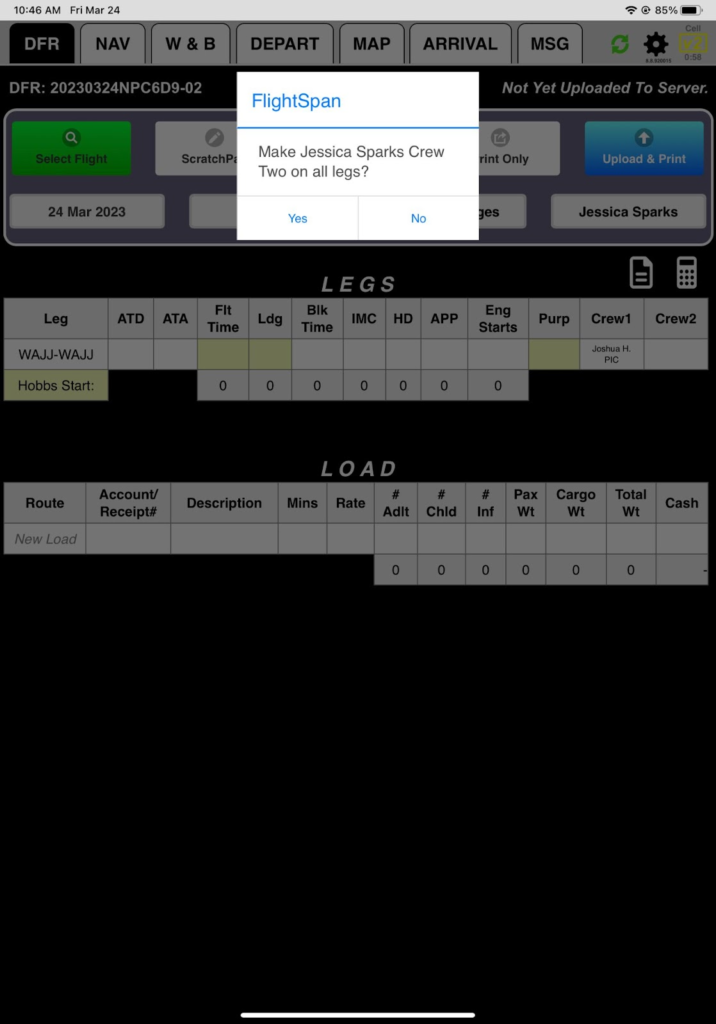
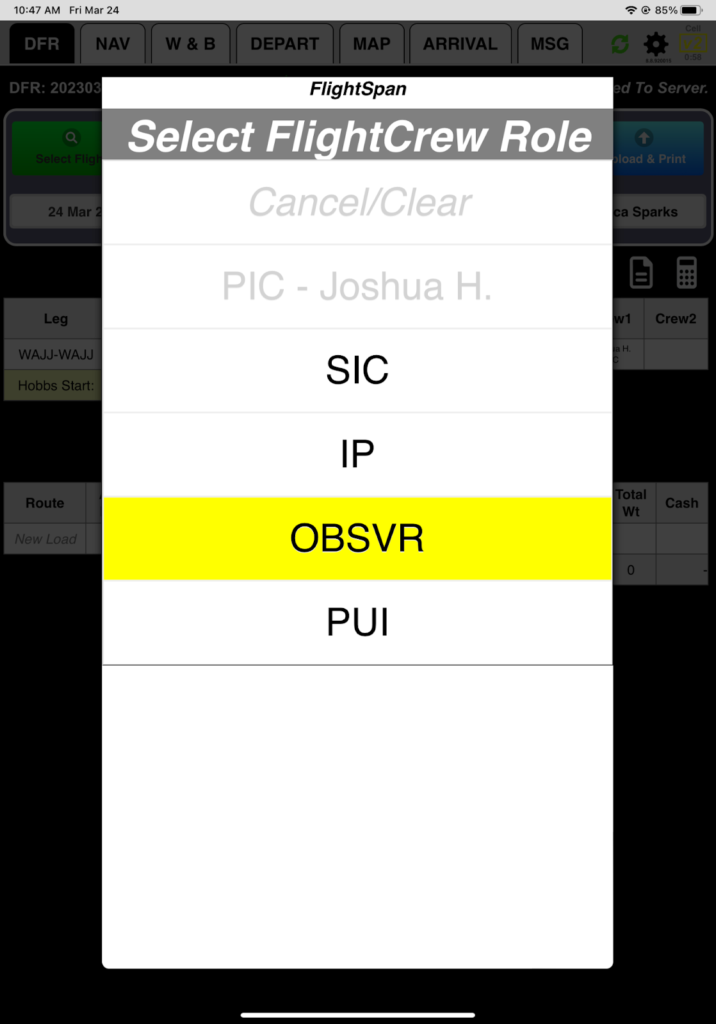
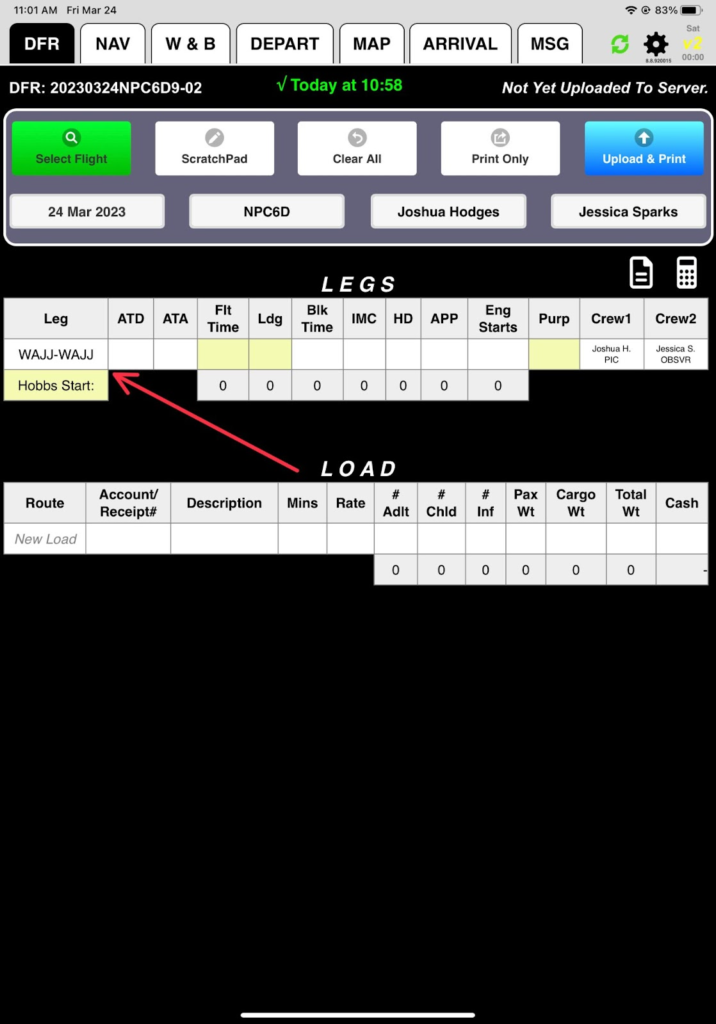
And assigning her the role of Observer. Later we’ll address how to change crew roles during a flight.
Now tap on WAJJ-WAJJ in the Leg column to begin adding destinations.
From the route screen, there are several ways to add the desired waypoint:
First, if your company has this option turned on in FlightSpan™ Ops, you can select your destination from a scrolling list of waypoints. (If your company operations into more than approximately 250 different airports, the length of the scrolling list of airports can become unwieldy.) The list is separated alphabetically by alternating light and dark gray.
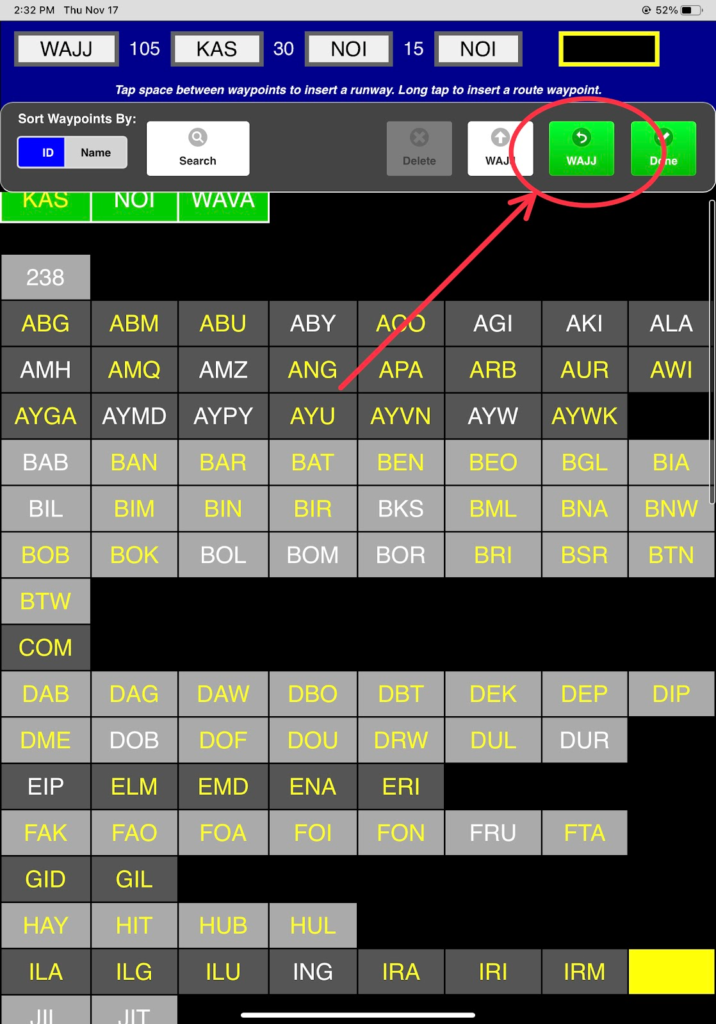
Highlight the second WAJJ at the top
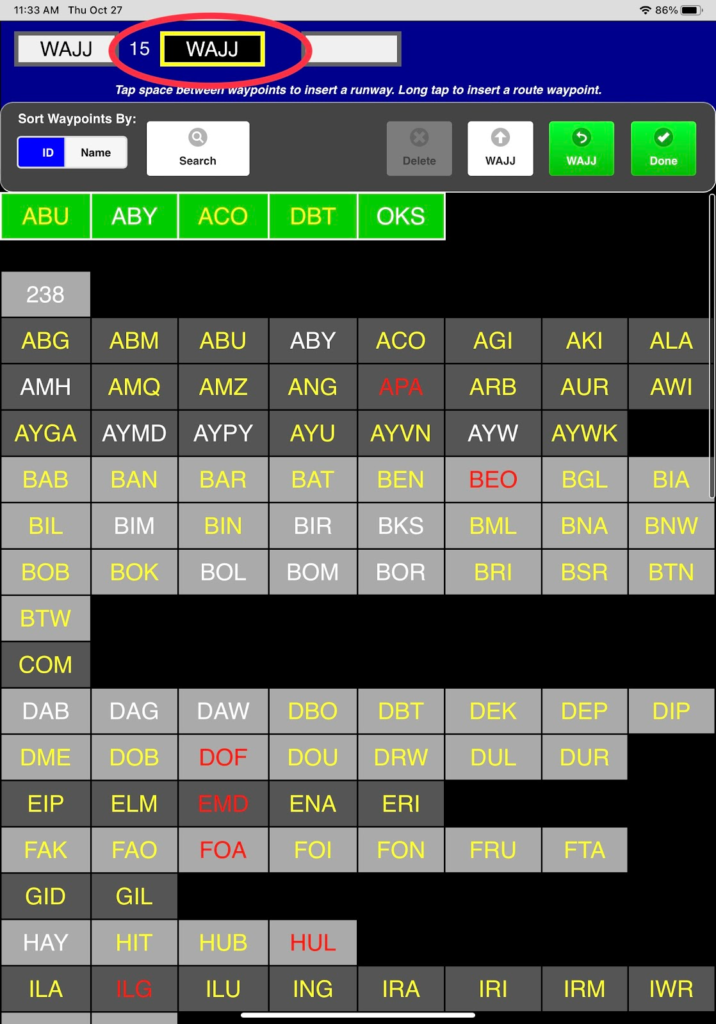
Scroll down until you find KAS. Tap to replace WAJJ with KAS.
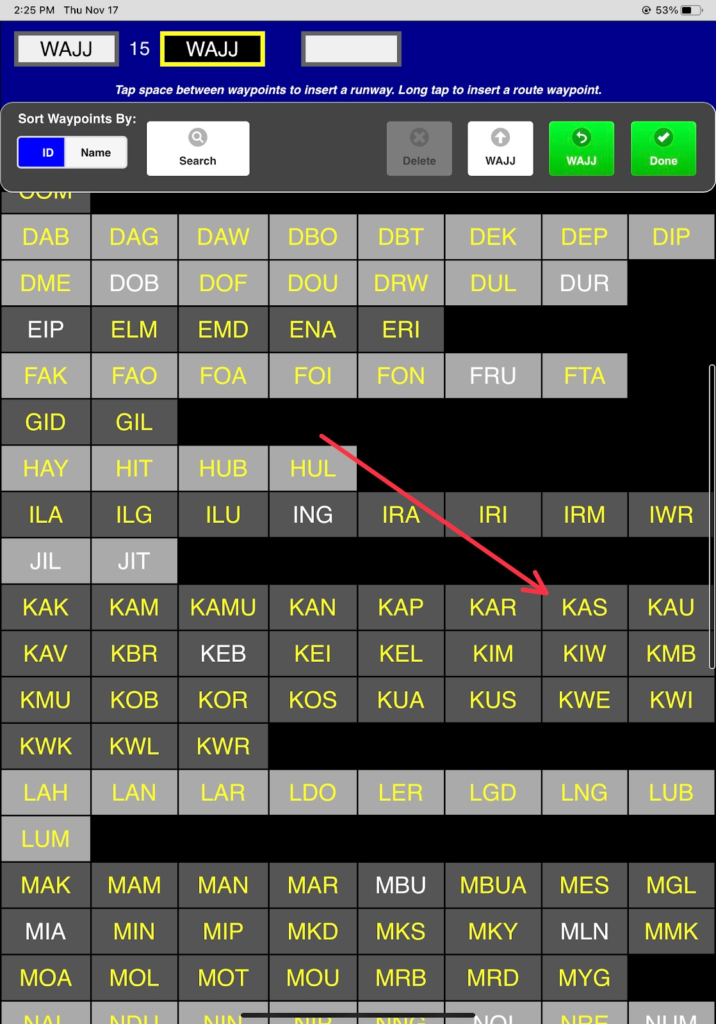
Note: Waypoint color code meanings are
- Red = NOTAM, runway is closed
- Yellow = Runway is open, but there is either a NOTAM, runway inspection is due, or it has been more than 6 months since the last operation at this airport by your company
- White = no NOTAMs
If you prefer, you can sort waypoints by name instead of identifier. Try that to see what it looks like.

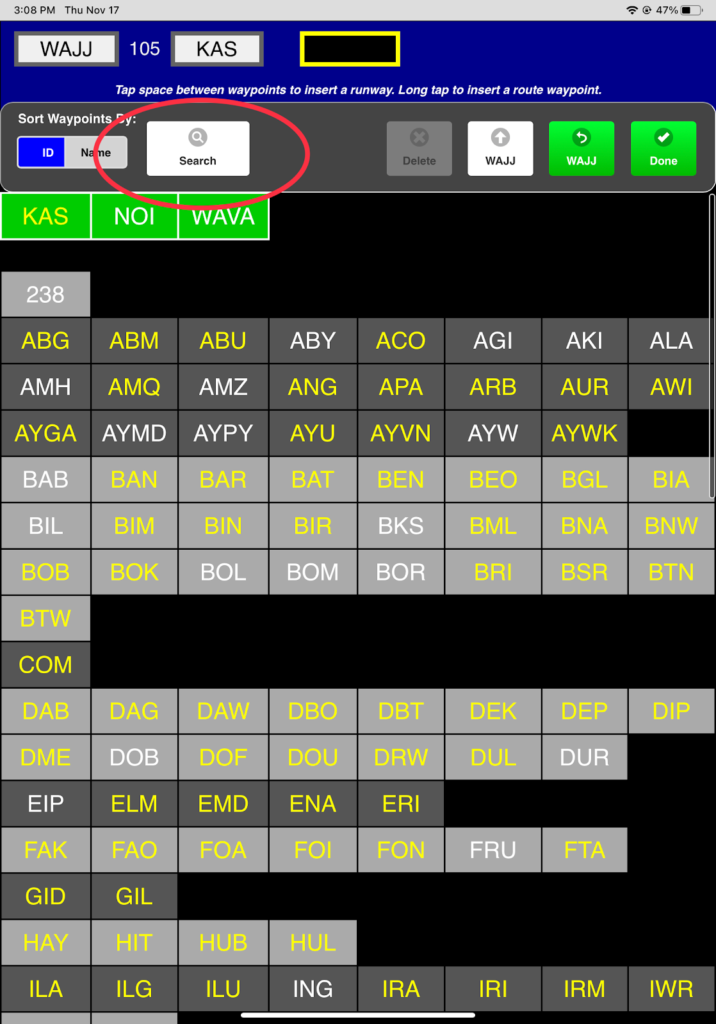
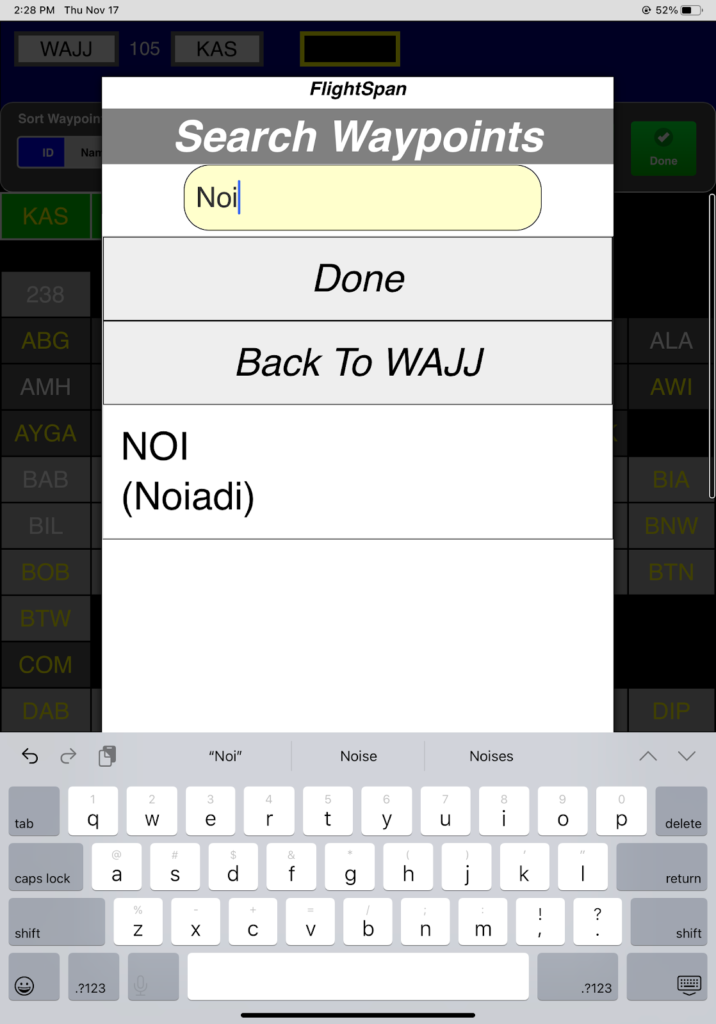
A second way to insert a destination is by tapping the Search button and begin typing the name or identifier.
Begin typing Noiadi (FlightSpan™ will search both the identifier and the airport name). When the desired waypoint appears, tap on it to insert it into your route.
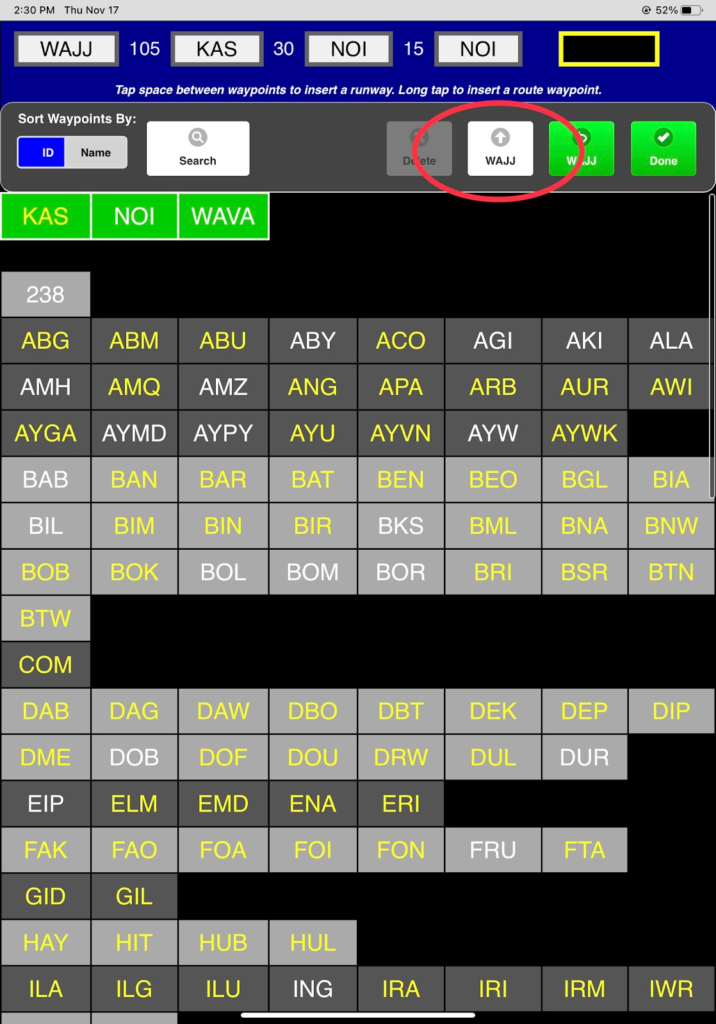
A third way is the commonly used waypoints list at the top. (Favorites can be set in FlightSpan™ Ops.) Add NOI again, this time by scrolling to the top of the list and tapping NOI on the green row of waypoints.

Note: If you can’t find an airport, check to make sure the elevation is set in FlightSpan™ Ops. The EFB will not allow you to plan flights to airports or LZs that don’t have elevation because it needs that information.
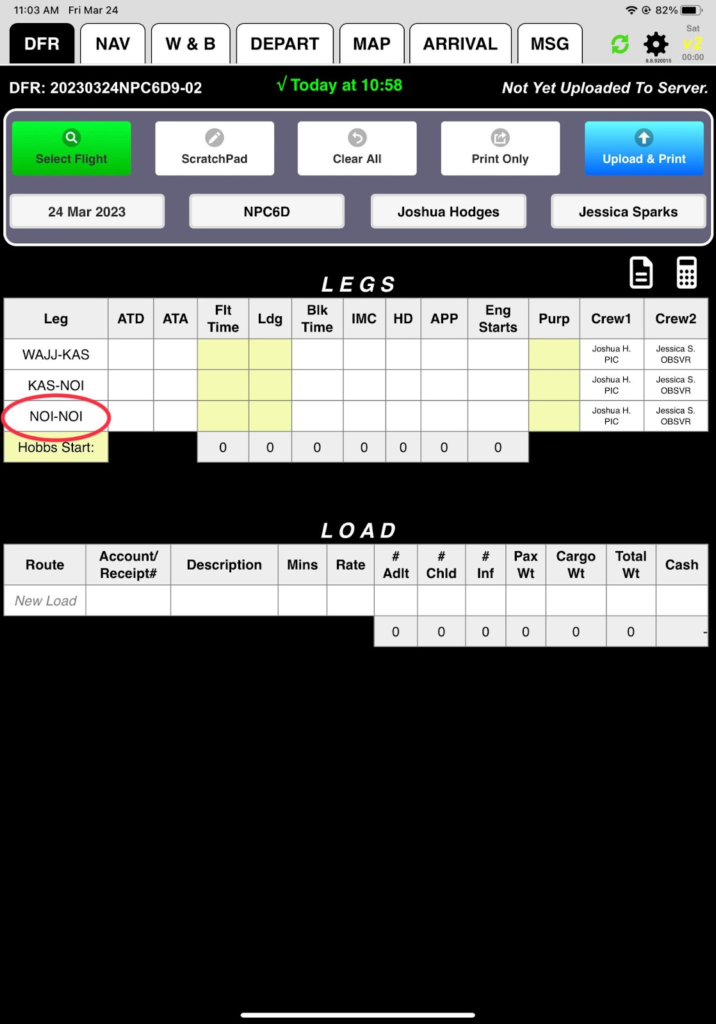
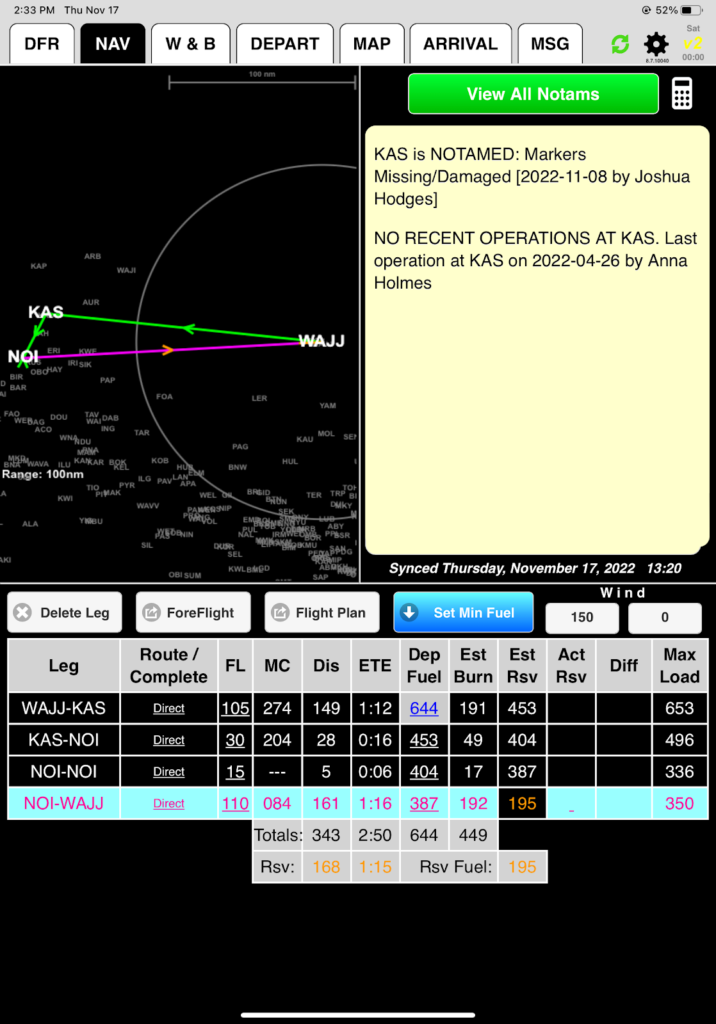
If you wish to terminate the flight at the last destination entered, use the Done key. Try it to see what happens.

FlightSpan™ will automatically cycle to the NAV tab without adding any more waypoints.

From the DFR or NAV tab, tap on the NOI-NOI leg which will again pull up the route planner screen.

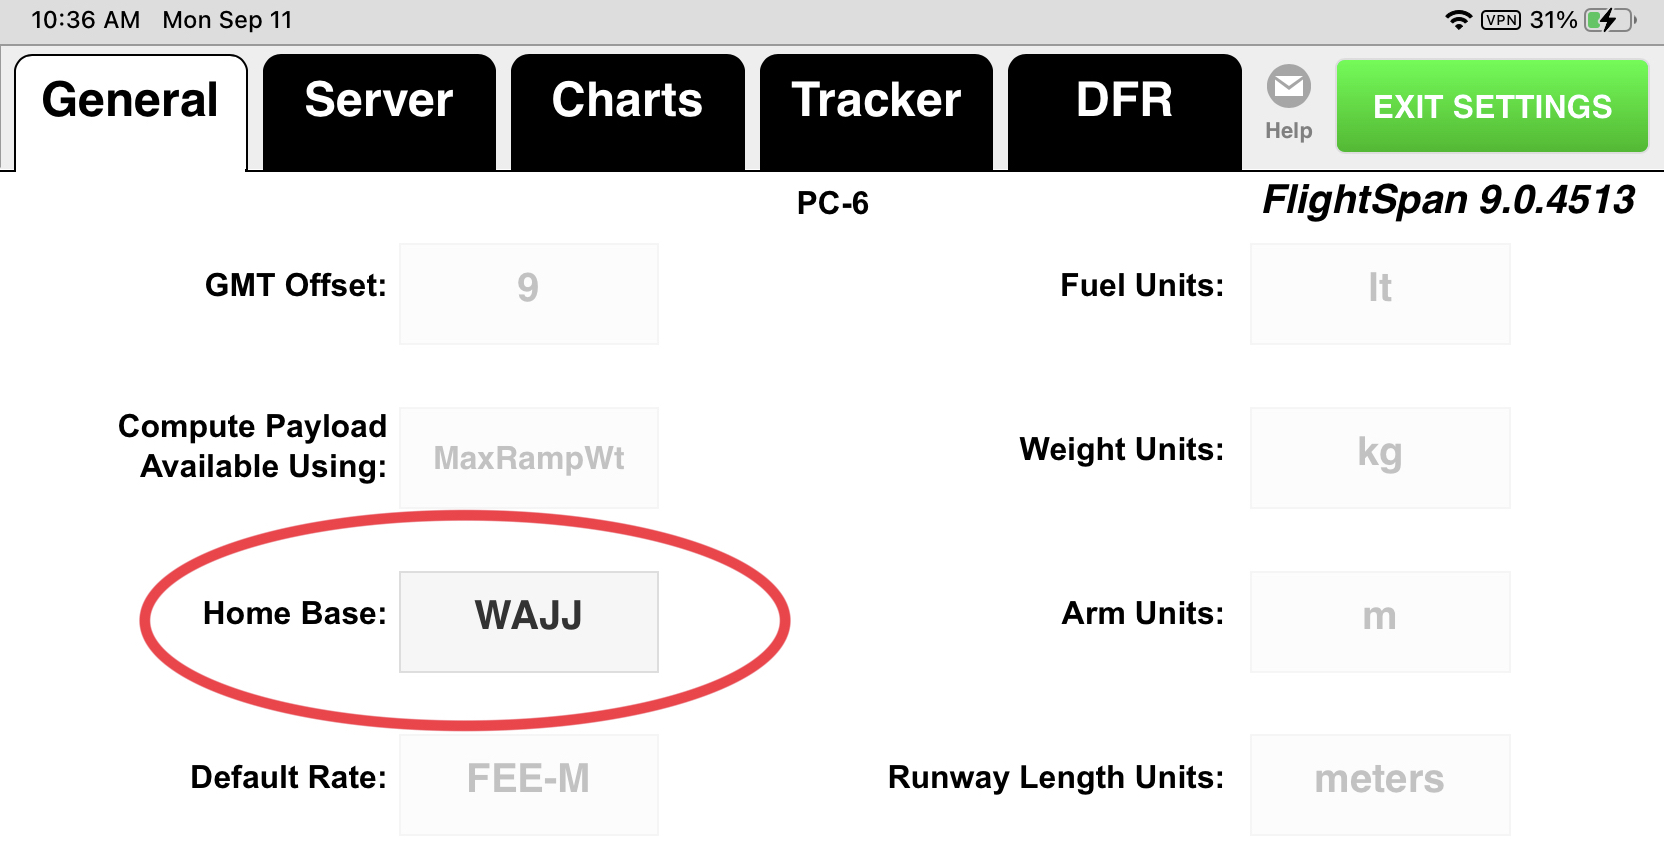
If you wish to return to home base and depart again during the flight day, use the white home base (WAJJ) button and continue adding destinations. Try it out.
Note: Home base can be changed at the individual iPad level from the General tab of the Settings page.
FlightSpan™ adds WAJJ and remains on the route planner screen so you can continue adding destinations.
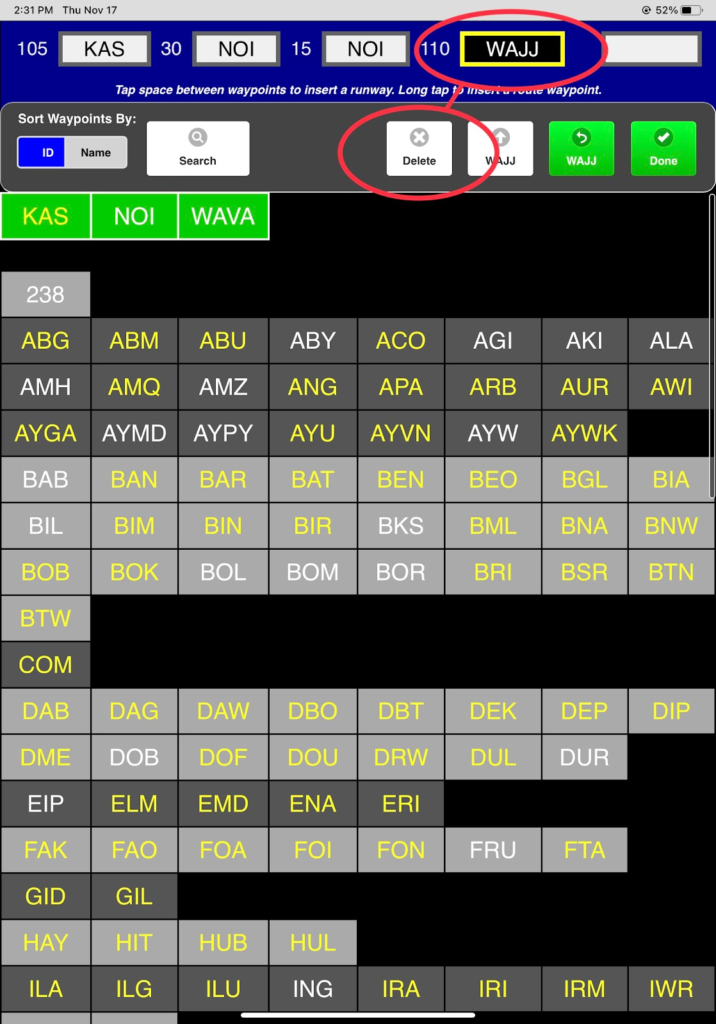
Before trying the next method, delete WAJJ by highlighting it and tapping delete.
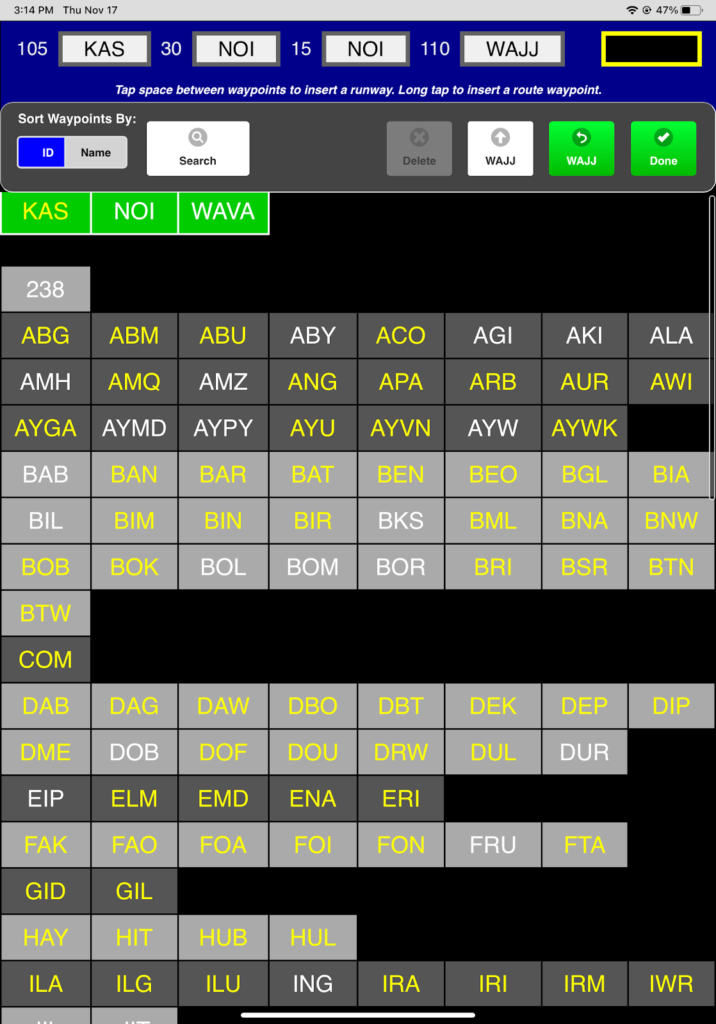
If you wish to return to home base at the end of the flight, use the return to home base button (WAJJ). Try it out.
FlightSpan™ will add home base and automatically cycle to the NAV tab.
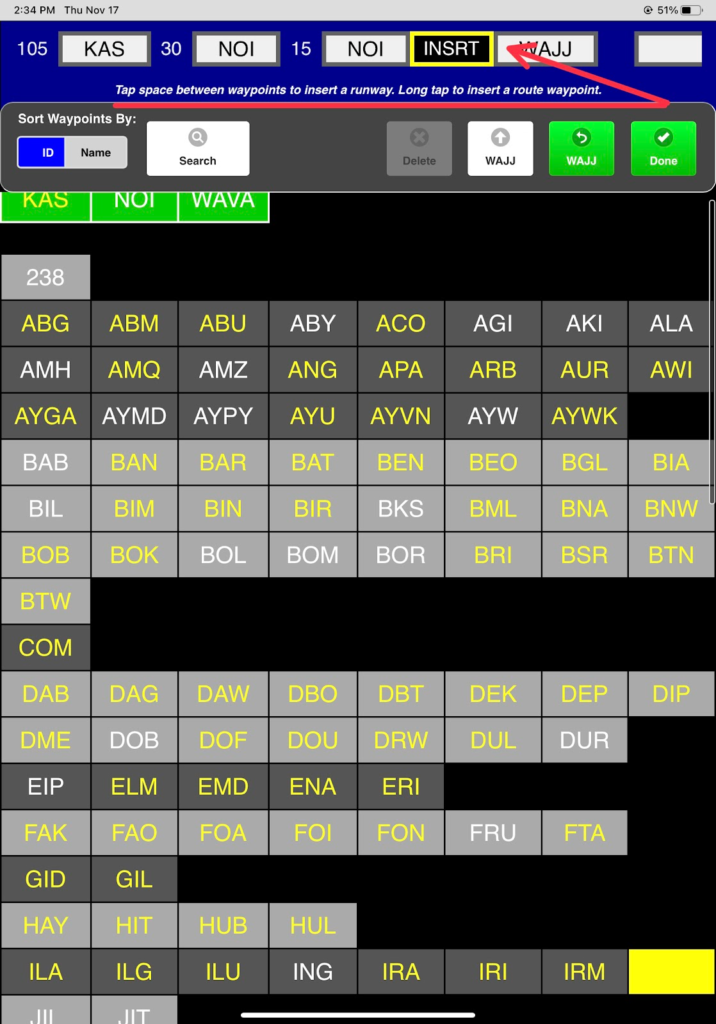
From the DFR or NAV tab, tap on any leg to get back to the route planner screen. If you missed a waypoint, you can insert it by tapping on the altitude FlightSpan™ used for time and fuel calculations, which is displayed between the cells. The altitude will change to an INSRT cell. Tap between NOI and WAJJ and insert WAVA.
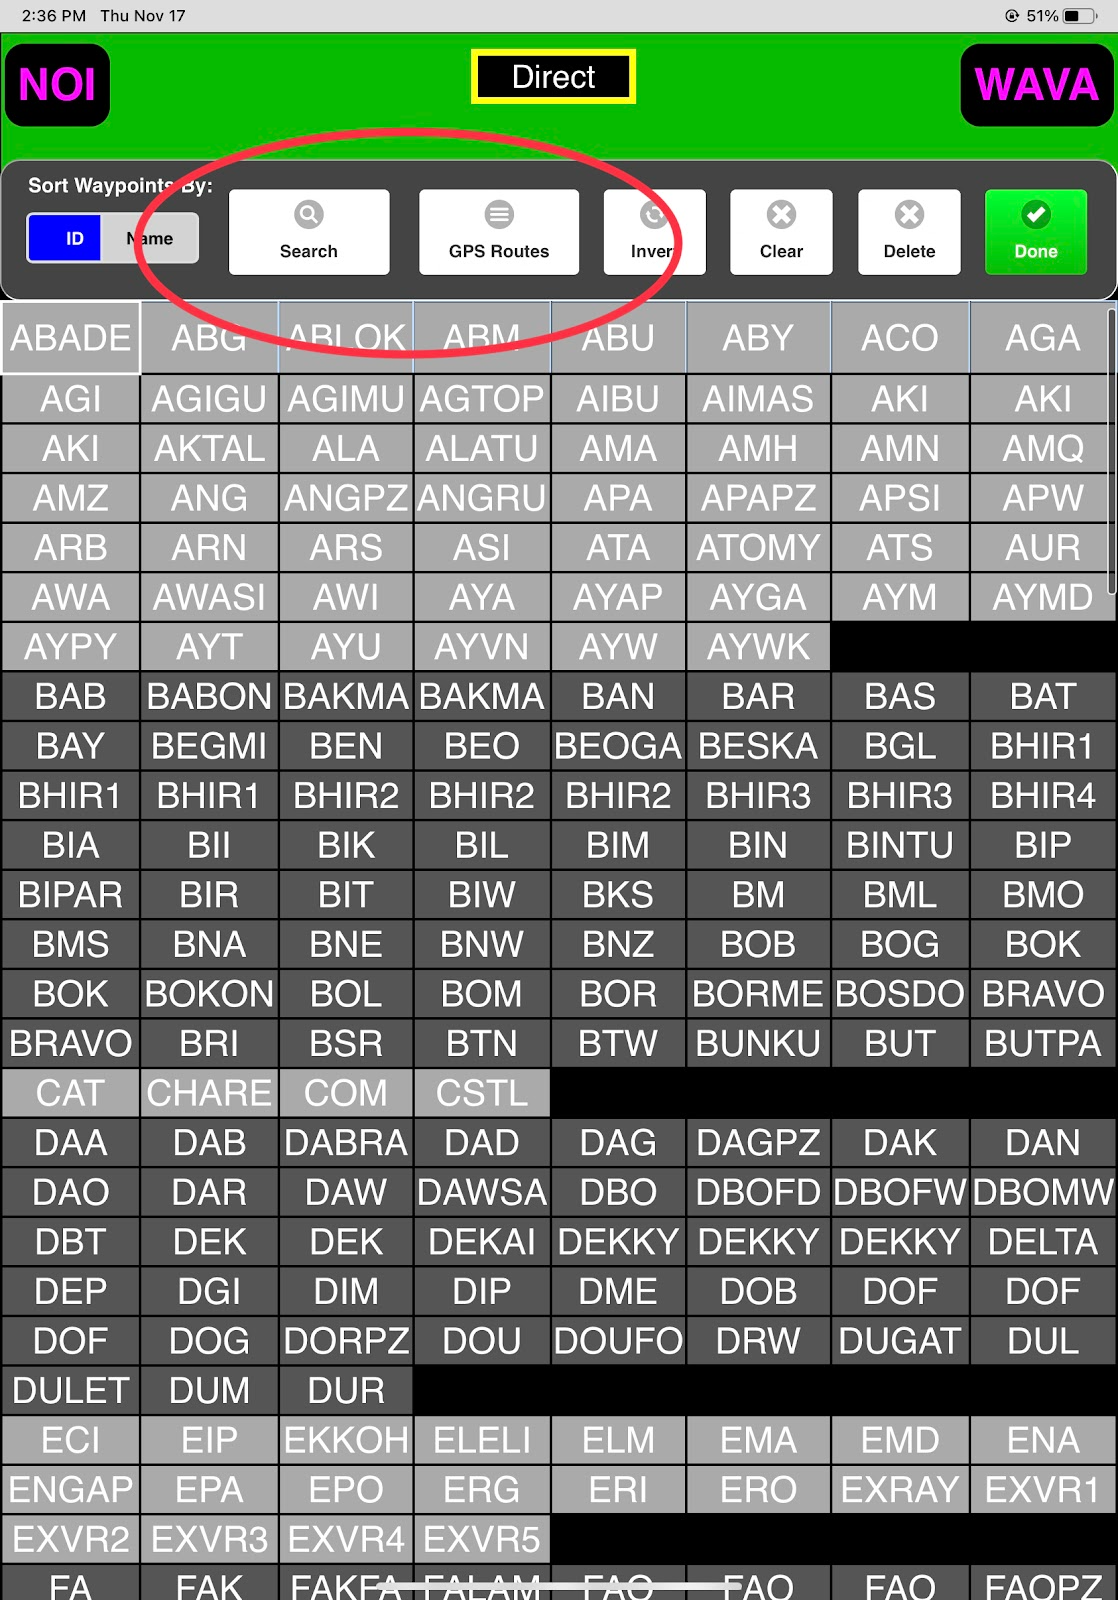
If you long tap on the altitude between the cells, you can add an en route waypoint or a stored GPS route. We’ll cover this in more detail later. Tap Done to exit.
Video Version